Showing posts with label Technique and skills. Show all posts

Saturday, 11 April 2026

More vibe coding - song analysis

I am fascinated by the happenings in the LLM/Chatbot/"AI" landscape. I studied an "AI" unit at Uni more than 30 years ago, we called it "Artificial Neural Networks" in those days, but the underlying premise remains. I'm sure the tech is WAY more complicated than the simple models and training data we used. Heh, for my final year project I wrote a program in C, in DOS, that was running on a "luggable" computer (not quite a laptop, but a computer with battery you could carry around and use), that had a sound interface and a microphone. There was a small database of words, students would walk around with the computer and get volunteers to say the words that appeared on the screen and it would capture the audio - to be used for training data. I managed to put a pretty oscilloscope graphic on the screen as well - to make it fun for the person talking - as they pressed the space bar, said the word, pressed the space bar for the next word. After twenty or so words it would thank them and save all the sound files to folders to be later used as training and test data for speech to text. Very early stuff.

Anyway, it's fun to see it have come so far.

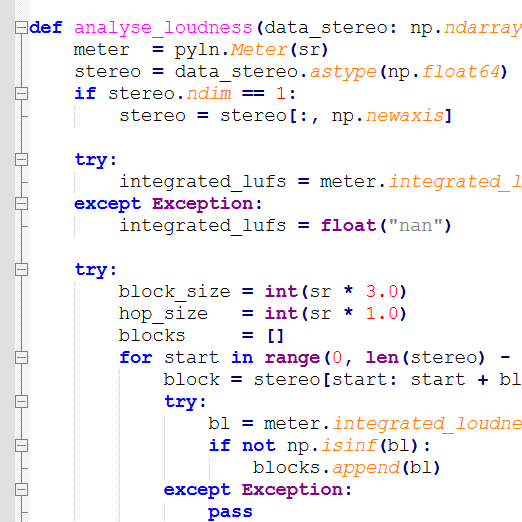
My most recent vibe code, with Claude who is my current favourite vibe coding chatbot, "we" wrote a python script to analyse music. Let me explain.

I have been mixing songs from my local church for a few years now, it's such a great way of practising and improving. Both as a musician and as a mixer/producer of a mixed song. I have mixed more than 60 songs over the last two years and I thought I'd take my favourite 12 from 2025 and make a playlist. But each mix has a different feel, as my ear developed, as my skills developed, so the 12 songs across 2025 have quite a different feel, even though they are all similar in style. Sure, there are differences - we aren't playing the same song over and over! - but I felt that as an "album" of 12 songs there should be a certain level of consistency.

I think you know where this is going

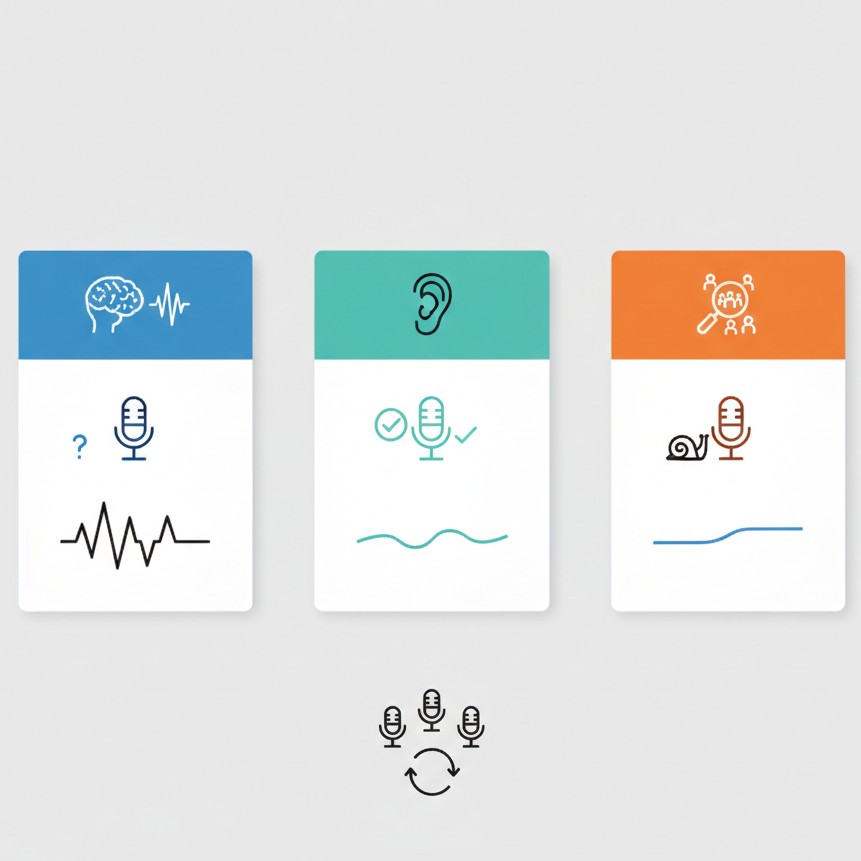
A basic consistency check is your LUFs and LRA. You don't want to be constantly turning the volume knob up and down between songs, or even within songs - so an overall perceived loudness (LUFs) and a measure of how much dynamics there are in a song (LRA) is important both for the listener and for a streaming service. Streaming services will adjust your loudness if you don't hit their metric.

In Reaper DAW I can easily track LUFs and LRA - but I was interested if I could get other sonic characteristics as a metric for comparison in Reaper.

In typical Chatbot style there was lots of talk about integrating various sonic libraries into Reaper (it has great programmability) blah blah, but chatbots just don't think outside the box. When it was talking about calling some python external to Reaper I said - "can we just do all this outside of Reaper?" and the answer was basically "yes that would be easy." Sheesh.

Suffice to say I now have an interesting python script that analyses a group of songs for an interesting range of metrics, looking for outliers and suggesting what needs to be changed and how it can be changed.

So much going on there. First thoughts are "C'mon JAW, are you trying to make all music hit the same bland boring metric?" No. And a little bit yes. Who else here turns down the start of "Time" on Dark Side of the Moon because they don't need to have extremely loud alarm clocks scaring them. I get it, the artistry, the "scare me into action because every year is getting shorter", but I don't need it on the 100th, 1000th listen. Or the first whalesong note in "Echos".

So I'm going to say yes, the LUFs should be close to each other (especially since the streamers will change them if you don't behave yourself) and the dynamics shouldn't be crazy wide. You don't want a listener turning up a song at the start because it is a quiet guitar intro only to turn it down again when the verse kicks in. At the same time you don't want your song to be so compressed that there is no dynamics at all (I was guilty of that on a few).

However for spectral data broken into bands, Sub - Bass - LoMid - Mid - Presence - Air, I do feel like there should be a certain amount of homogeneity across the board and yes, I did tweak some outliers. Frequency rolloff point at 85% is also another interesting metric. I don't want there to be some songs that sound like an AM radio and some that sound like you are standing outside of a rave party. Particularly when the recordings are from the same venue, the same style of music and the same groups of musos appearing in the songs.

From a vibe coding point of view - it s so good to do, fun and super effective and efficient. From an art point of view - I like consistency, I like having my mixes compared with each other to see where I went a bit wild in places. I have templates and recurring processes, but I mix to the song so they are always going to get a different vibe. From an album point of view I think reeling in some of the outliers is a good idea.

If you want to try it out, get it here.

Saturday, 21 February 2026

Crowd vocal isolation Part 1

So speaking of AI I used my current favourite Chatbot (Gemini 3 Flash) to research deeper into vocal isolation models. I had been using Demucs then Demucs FT (Fine Tuned) for a while but seeing as the space is active and busy I was interested to know what else was going on.

Let's back up.

If you are recording a live sound, which I do quite regularly at my local church, then having the sound of all the people singing in your mix is an ABSOLUTE GAMECHANGER. I also used crowd mics for recording my daughter's band concert - basically I will want to use ambience/crowd microphones for anything live. It's how the resulting mix sounds like you are there, part of it, with the crowd, rather than a studio performance.

Here's the problem - the crowd microphones are going to pick up the PA, of course. So step 1 is to use the right microphones and have them in the right place. I was lucky that someone had previously set up a pair of Samson C02 condenser mics at my local church and they kicked my inspiration into overdrive for adding them into a mix. What I found however was they were very low on the stage and pointed forward and would pick up what was in front of them rather than the "wider bigger vibe". We moved them up onto stands which helped a lot - they picked up a wider sound of the people but the PA house sound was still very loud in them. I have since experimented with location and different mics, which is ongoing hence this is Part 1 of an ongoing experiment.

One way of reducing the house PA sound is to use the right sort of mic in the right sort of placement and use EQ/etc to draw out the people's voices...but it's the 2020's and we have software models for everything. The application of music isolation blew my mind when models overtook the algorithmic systems (thanks for your persistence Steinberg, it was a good effort but it was the wrong approach). So if I run an ambience mic through a model to separate just Voices and Not Voices I get this wonderful ambient I can mix back in.

"Remind me why you can't just use the raw audio with some EQ and effects?"

As you turn up the crowd mics, even with a sculptured signal, the drums/bass/instruments in the recording starts to overpower the actual recordings of the drum/bass/instruments. You will start getting that phasey reverby roomy echo which sounds more like mud than like the crowd. A little is okay, too much is meh. So if you really want the people big in the mix, isolate out the instruments.

The Chatbot talked to me about other models to try beyond HTDemucs FT (developed by Meta (Facebook) trained on a massive set of internal data). We have the MelBand Roformer (developed by ByteDance (TikTok) and Kimberley Jensen) and community expansions of it with extra data of messy real world audio.

I discovered that for some of my recordings The MelBand Roformers were a lot better! But it is not a one-size-fits all unfortunately - if you really want to go to town you would run all the models and mix them together.

Okay, let's have a look/listen at an example - here is a recording straight from the crowd mics:

For reference here is what the microphones being held by the vocalists sounds like, mixed:

Notice that there is some instrument present, especially drums. They are dynamic mics and the vocalists are holding them close to their mouths so it's not getting much drums/instruments, but it is there. But also notice they are clear and crisp. That should be the predominant sound in the mix - not the mushy crowd mic version - but we want that underlying crowd sound as well!

I'm not going to mess with EQ and effects for this example - although that would make it a sound better/balanced - for the purpose of this discussion let's just listen to what the isolators do. To initially blow your mind like it did mine, here is just the instruments (for reference this was done with MelBand Roformer InstVox Duality V2 model).

Righto - let's first listen to HTDemucs FT. You can run this yourself - make sure you have python installed and execute:

demucs -n htdemucs_ft "test_raw.wav" --two-stems=vocals

Of course it's not perfect! But wow it is very very clever. The main vocals are lound in there - coming back through the house PA quite strongly - which is to be expected - but the crowd is underneath. Not as much as I want - but save that for Part 2 - different mics and different placement to better pick up the people and not the house PA.

Now for MelBand Roformer Big Beta (community)

audio-separator "test_raw.wav" --model_filename "melband_roformer_big_beta5e.ckpt" --mdxc_segment_size 256 --mdxc_overlap 2 --mdxc_batch_size 1 --use_autocast --output_format=WAV

Code tips: ask your favourite Chatbot. Some of these parameters are tuned for my laptop GPU which is not very powerful.

Notice it dropped off a little towards the end, and it grabbed a bit more bass towards the start - I think that was more the bass guitar then vox. Not bad but I don't think it beat HTDemucs.

MelBand Roformer original Kim version

audio-separator "test_raw.wav" --model_filename "vocals_mel_band_roformer.ckpt" --mdxc_segment_size 256 --mdxc_overlap 2 --use_autocast --output_format=WAV

Similar, handled the end a bit better, it picked up more nuance with the singing, for example the word "Surely" at the start has been captured better in this model than the other two.

MelBand Roformer Duality

audio-separator "test_raw.wav" --model_filename "melband_roformer_instvox_duality_v2.ckpt" --mdxc_segment_size 256 --mdxc_overlap 4 --use_autocast --output_format=WAV
Similar again, seemed to be slightly more gatey - decided the gap between phrases was silence, which is technically correct. Didn't grab quite as much bass as the other two.

Look I could go with any of them, in this test snippet I reckon the winner is HTDemucs FT or MBR Duality.

As a final closeout, this is what a people-less mix sounds like:

Notice there was an electric guitar being played, but the house had it down so low it was barely present in the crowd mics! But because I had all the channels recorded, I turned him up, because it sounded so good. So finally, with people mixed in, the point of all of this:

It brings out the "liveness" of the room. Because there was still a lot of main vocalists in the mix they come through a bit echo-ey, but the fact the people are singing underneath really turns the mix around.

There you have it! Using the power of AI to isolate vocals - but it's only as good as the original mic signals and I have room to make them better. Watch this space!

Sunday, 19 October 2025

Restoration: Cassette

A mate of mine pulled out an old cassette of a recording from the late 70's that he played on, and ripped it to digital, handed it to me and said "if you feel like a challenge, see if you can clean this up." I do like a challenge.

The songs were really well done - great old Gospel hymns sung by a talented dude, backed with piano/guitar/bass/drums and a Gospel choir - I could hear through the bad quality that they were pros. But yikes, how do you recover that? Armed with my ability to use an AI model to do isolation, I set about trying to separate the instruments and vocals. Clearly the model was not made for such recordings, it couldn't separate out vocals/bass/drums/other, but it did a pretty reasonable job of separating vocals and other. I then had a chat to the Chatbots about what is going on a learnt a few new things.

My main issues were the usual hiss, boxiness and lack of sparkle, but the two other things that bothered me was the recording drifting from left pan to right pan, and the times the recording seemed to be out of tune. Some other minor things like vocals too loud at times and the drums were so mashed into the mix they were barely discernible.

So far, I have used the following approach and the initial results are quite satisfying:

  • Separate vocals from everything else. The lead vocalist, not a problem, but the choir sometimes appeared in the lead vocals and sometimes in the other. Kinda makes sense, it was a dense choir, it wasn't too bad I found I could volume envelope my way around most of it.
  • Collapse both tracks to mono, then re-expand them with:
    • a hard left/right two tap delay which gives a mud-free perceived stereo effect. Depending on the difference in delays you can tweak how much expansion you want. My ears can detect even a 1ms left - 2ms right difference, it's subtle but it is there. At 5ms - 10ms it is quite clear. >50ms is starting to sound cavernous.
    • Magic 7 is my favourite reverb at the moment which adds spatiality, but also adds muddiness for me, so I dial in a room sound and then adjust the wetness.
  • EQ - lows and mids: I found the bass was booming annoyingly and the low mids were too prominent. I used a normal EQ to get this more like what I wanted to hear. I wanted to do a multiband EQ compressor but I find them hard to use - I need to practise more - so where there were sudden thumps I used a volume envelope to contain them. It's brutal, but if you don't push it too hard I don't hear it "everything suddenly ducked". Hmm, I really do need to practice using EQ compression.
  • EQ - highs: Cassette seems to rob us of sparkle. When I tried to push it back in I was just increasing the hiss. So I used a little bit of EQ in the areas that didn't sound like his, and a saturator to create more high frequency overtones to "artificially" add more sparkle back. This seemed to work okay - what else can you do?
  • Compression and limiting to help smooth out the dropouts and dips. And this might just be me, but I like smoothness and consistency in what I listen to. I like swells but I don't like to be jarred. Dynamics in music is great, maybe my ears are already too shot, but I like only subtle dynamics, I prefer a consistent balance. I don't want everything to be the same perceived loudness the entire time...well, maybe I do a little :-)

I noticed while trying to sweep the EQ listening for what annoyed me that "it seems to ring everywhere!" When I chatted to the bots about it, it's all artifacts from tape. Head misalignment, tape speed inaccuracies and just the nature of tape as a data storage medium. I found a compromise...these recordings are never going to sound crystal like they were recorded with modern gear, my main aim was to remove the panning warble, to balance the EQ, some re-producing/mixing to smooth out the dynamics, and I had to accept pitch drifts and out-of-tune sounds.

"Old school analogue vibe."

Monday, 29 September 2025

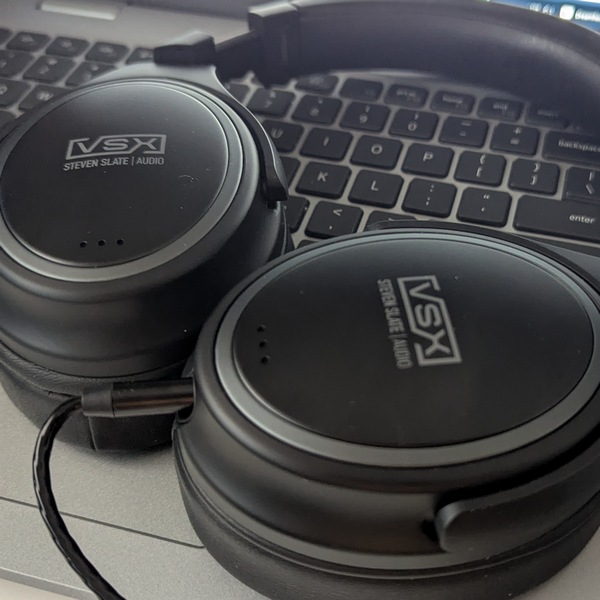
Steve Slate VSX Listening Routine

What to Listen For, What to Check, How Do You Use These Things Anyway?

This is a reminder to myself about how to do a mix translation test using VSX headphones through the VST plugin, after doing the bulk of mixing in Linear Mode.

* * *

1. Linear (Flat / Microscope View)

Play 20–30 sec mid-strength section

  • Check local loudness relative to snare/kick.
  • EQ balance has no harsh spikes, not dull anywhere.
  • Bass and kick drum has nice separation.
  • Listen for sibilance, cymbal/hi-hat/high end harshness
  • Mono check (quick flip: does vocal stay centred? Does low end collapse?).

2. Mix Room – Nearfield (Producer’s Laptop Monitors)

Play the same section.

  • Vocal placement sits in the mix, not on top or buried.
  • Snare/guitar/keys clarity in the mids.
  • Kick vs bass relationship in low end okay?
  • Does reverb delay stick out?
  • Small level tweaks (1-2 dB) often shine here.

3. Mix Room – Midfield (Full Mix Perspective)

Play peak song section.

  • In low end does kick + bass still feel solid.
  • Panning/reverb/stereo balance feels okay, no phaseyness.
  • Automations and arrangement flow - do transitions lift the energy?
  • Overall size - not too thin, not boxy.

4. SUV (Car Test)

Play full chorus/bridge at a higher volume.

  • Vocals still audible? (cars bury them if too low).
  • Kick + bass groove not too boomy?
  • Sub-bass control - does anything rattle or overwhelm?
  • Harshness at loud playback - does the mix stay smooth?
  • Does the song feel exciting/hyped?

5. SA-Pods (Earbud Reality Check)

Play chorus at low–moderate volume.

  • Vocals cut clearly (lyrics understandable).
  • Snare/guitar mids provide drive even if bass vanishes.
  • Quiet-volume test - does the mix still feel compelling?
  • If it works here, it works anywhere.

Saturday, 16 August 2025

Vibin' Reaper with The 'Bots

I still mix multi track recordings from my local church, I find it relaxing and therapeutic. The more I do it, the more I appreciate everything that is going on - music production, sound engineering, what to play, what not to play.

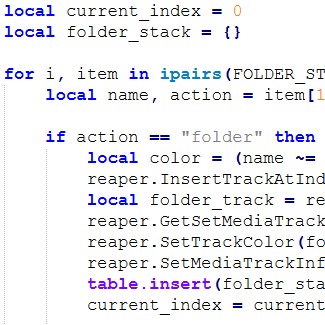
Early on, when I'd just started having a crack at Reaper DAW, waaay back in late '23, I realised that there are a number of processes that I was doing every single mix, so I created some scripting to get them done quickly. It served me well for nearly two years, but I still found myself doing other same things every mix, and while I put together some additional scripts, I still wanted to improve my workflow - the mixes I want to process are stacking up on my disk waiting for me. I want to spend more time on the creative process rather than the mechanical grind.

These days we have the LLMs - the ChatBots - and they code like absolute guru maniacs, I use them at work. When I started coding was a ChatBot wasn't a thing. Now it is.

So the first script I wanted created was the ability to look at a mix I had coming in, all the people involved, and apply my usual effects to each. In Reaper you can save an fx chain and then load it back up again on a different track. Pretty standard fare. Since there are around 20 people in the music team, each recording was a combination of fx...and I wasn't leveraging hard enough. I could come up with a baseline fx for each vocalist, guitarist, pianist, automatically load them, and tweak them from there rater than from scratch or manually copied from a previous mix. Especially the drumkit! Yikes, so many mics (never enough mics!)

I fired up ChatGPT5, and we got somewhere fast. It's one of those things, it has scraped enough of Stack Exchange and reddit to know about Reaper, and it understands Lua, the scripting language, so it has a good crack. But it's not instant. Oh no no no, you have to iterate and iterate and iterate some more. You get 80% of the work done in 20% of the time. A pretty standard rule in engineering I have found.

I ran out of Chatbot freebies, and firstly because I was being cheap, but secondly because I wanted to try other LLMs - I switched to Grok 4. Which Chatbot would do better?

I sent the code so far to Grok, and it changed some stuff, and improved it a bit more. Unfortunately, there was a lack of understanding by me, ChatGPT, and Grok, about a certain bit of functionality. None of us could fix it. Humans are still better than Chatbots - I can vouch. I forced it to rethink an approach to a section of functionality that no matter how many times it tried to fix it, just didn't work. I remembered having a similar issue when it was just me by myself. With Grok's help, we sorted it out. And then Grok ran out of freebies.

Again, being cheap but also wanting to see how the other side lives, I switched to Gemini 2.5 Flash. Not as good, but I didn't need much more, I was basically done. What I got it to do was remove fluff and tidy up the code, which it did admirably. "Clean up this code, simplify it, and I will test it and make sure it still works." "Okay, good one, still works, now simplify it even more, don't be afraid, we'll keep testing it." I was actually surprised how small the resulting code became.

I then passed it my old made-by-human script; I wanted a few enhancements. I gave me a "Very cute, nice try, I can see it works but it is full of bugs and poor coding techniques." Sure, it said it a bit nicer than that, kinda "good effort! here's a gold star!" and then ripped it to pieces.

But Humans for the win again! Even though it added in my enhancements and the code looked far nicer, it introduced an error, another "This Reaper API call is supposed to work like this, it doesn't, maybe this time. Maybe this time. Maybe this time." And I ran out of credits.

So, I gave Claude Sonnet 4 a crack. Quite different to the others, well, still a Chatbot, but it had a less-chatty more-codey style of operation. It wasn't fooled by the Reaper API - I did help it "Really, you need to think differently about this call, I'm pretty sure it's not going to work like you think, let's do some test scripts to understand the core functionality together AND THEN we'll put it into the main product". Claude surprised me, it felt like a coding buddy, and we came up with a great final solution. And when I said "TIGHTEN IT UP MORE!" it said:

  Looking at the cleaned-up code, there are a few potential improvements
  I could suggest, but I'd want to be careful not to over-engineer it since it's 
  working well now. But honestly, the code is in a really good state now. It's 
  clean, functional, and does exactly what you need. The improvements 
  [I suggested] would add complexity without much practical benefit. My 
  philosophy is: if it's working reliably and you're not planning major 
  changes, leave it alone! Sometimes the best improvement is knowing when to 
  stop improving.

That was good advice. I stopped, and my vibe coding for the day was done, and it will save me 10-15 minutes every mix.

Saturday, 26 July 2025

Capo o'clock

I recently had a discussion with one of my local church band leaders who loves a capo. I've never really bothered with capos, I know where all the chords are in an open position and I can pick the root 6 and root 5 barre chords up the neck for variance. I've never felt that I need to go for a capo unless the song is in Bb or Eb - I don't like hanging onto those chords for a whole song!

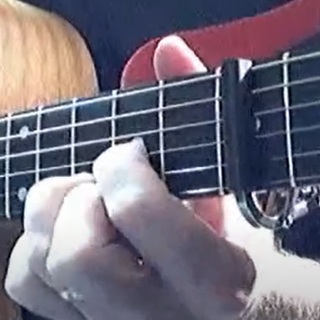
The song in question was in A, but he really wanted me to play it in G with a capo at 2. The main chords used in the song were G, Csus2, Dsus4, Em7. If you can picture this in your head, basically you are holding you pinky/ring finger on the top 2 strings third fret (which is 5th fret from an absolute point of view) the entire time. That would be what the song writer would have been thinking - obviously a guitarist - so without the capo it would lose that droney feel on the top.

This made me think that I should be more considerate about using a capo. And certainly in a band situation - if the keys are sitting there around middle C and I am strumming around middle C, were are competing for the same space and washing each other out. I think that sometimes that's fine, because the tone of the guitar is quite different to the tone of the keys, and I do like a low E to be available... But I can see when capo'ing up the neck you can create voicings that will be far more complimentary to the song.

He came up with a chart, kind of a suggested capo location for the various keys. I've thought about it further and come up with the following, using the shapes you get primarily from G, C and E, with some A and D in case you are looking for a different sound.

Key Option 1 Option 2
Capo Key Notes Capo Key Notes
C 0 C Classic, rich, easy 5 G Bright, airy, sparkle
C# 1 C Easy^ 6 G Avoid unless layering sparkle
D 2 C Prettier voicings 0 D Classic sounds*
Eb 3 C Sweet voicings^ 1 D Warm, easy^
E 0 E Full, punchy 2 D Sweeter sounds
F 1 E Easy+ 3 D Sweeter sounds**
F# 2 E Easy+ 4 D High texture, chimey
G 0 G Classic, expressive 5 D Avoid unless layering sparkle
G# 1 G Easy 6 D Avoid unless layering sparkle
A 2 G Jangly sounds 0 A Easy
Bb 3 G Jangly sounds^ 1 A Easy^
B 4 G Bright, clear, spacious 2 A Easy, full sound

^ Do this as a minimum - don't attempt no capo for this key
* Fret F# with your thumb on the low E for D chord or Drop D tuning can add depth.
+ I'm okay playing these in the open position, depends on the song.
** To really add clarity and sparkle, a third option would be capo 5 in C.

Sunday, 25 August 2024

My Reaper Mixing Notes

This article is a work in progress and will be constantly updated, for me, as I learn new skills!

I use the Digital Audio Workstation (DAW) called "Reaper" for mixing and I quite often get a multi-track recording from a Behringer X32/Midas M32 deck (they are virtually the same thing). This post is a dumping ground for all the things I have learnt from the process so that I have a coherent centralised place to keep them for me - and maybe they will also be useful to you.

Remember some golden rules: use your ears, not your eyes; keep it simple; mix in context not in solo.

Important things to do to Reaper before you start:

  • Download and install SWS Extensions, it's, umm, to enable you to, ahh... just do it. sws-extension.org
  • Download and install ReaPack, for managing scripts. Reapack.com
  • Options->Preferences->Project Backups and tick the top level Auto-save. To prevent heartache later on when you forgot to press save when you should have, or presses save when you shouldn't have.
  • File->Project Settings:
    • Set you desired sample rate - 48kHz for an X32/M32 deck
    • If you are working to a click track, set the BPM here.
    • If you are not working to a click track, set "Timebase for items/envelopes/markers" to "Time" (won't automatically stretch items pasted from a different timebase)
  • In Reaper use the WASAPI driver instead of Windows direct sound, it is better. Options->Preferences->Device and select WASAPI. Go for Shared Mode so that other apps can use sound. Set the sample and bit rate to say 48kHz 24 bit. In Windows sound settings make sure you input and output devices the same setting. If you get the error "WASAPI shared mode device error: input device sample rate does not match output device samplerate!" then hard select the Input device and Output device to match your windows devices, you shouldn't need to fall back to exclusive mode.
  • You can save fx chains and reuse them, very handy.  They MUST be in the Reaper FXChains directory so be seen in the fx dialog, so any that you have (or save) will be (Windows) in C:\Users\<you>\AppData\Roaming\REAPER\FXChains
  • Windows users: In System->Sound your device->Properties MAKE SURE AUDIO ENHANCEMENTS ARE OFF! And Spatial sound. And anything that Windows uses to mess with the signal.

Raw files

Acquiring from X32/M32

While the X32/M32 has a USB port on the front it will only record a deck-mixed stereo signal. However if you have the SD card module added, you can record all 32 channels pre-mixer. Format any SD card to FAT32 and pop it in. While the manual talks about 32GB as the limit, I have been using 128GB cards no problem which can record a 5 hour session. Class 4 SD cards are fine for bandwidth.

It records everything into a WAV file, split into 4GB chunks, not useful yet. Here is my process:

  1. They are hexadecimally named which doesn't sort well, so I made this little script to rename them:Rename x32 hex to dec.cmd.
  2. Drag all these files directly into a Reaper track, "sequential time positions on a single track". You will now have a single track containing multiple items (the wav chunks), each containing the 32 channels.
  3. In Reaper, Extensions (previously installed from ReaPack) browse and install the package "Explode multichannel items to mono items in new tracks (without render)" by Rodilab. Run the script as an action. It will explode the WAV into separate tracks.
  4. In Reaper run my "prep" script which will get rid of the unused tracks, add colour, group, pan, based on rules. Download this script and edit it according to the rules you need. This will require some experimenting on your behalf! JAW X32 Track Rules Parser.lua

Consolidating

Now that you have multiple mono tracks with multiple items, all referencing rather large WAV files, it's a good time to consolodate into smaller MP3 files and throw away the unused tracks and quiet sections.

  1. Delete any tracks that weren't active, eg, there was no electric guitar playing that day, only 3 vocalists, etc)
  2. Set Reaper into "Ripple Editing All Tracks" - there is a button on the toolbar. Click to show a cursor, ctrl-A to select all tracks, S to split. Then use right mouse to drag click select, press delete and sections of the tracks will be removed. Turn off Ripple Editing
  3. File->Consolidate/Export Tracks, create a new directory, give it a name, set the resample mode to the highest quality MP3 or FLAC if disk space is not an issue, entire project all tracks, and tick all the boxes to update project with consolidated files and saving as a new project. This will create a much smaller set of files but still high quality files, with only one item per track. Much easier to deal with. Will take quite a while, all tracks will be rendered.
  4. Ctrl-A, Right click on any item, Item Processing, Normalise items. Normalise to Peak, "Normalise each item Separately". Depending on what the gains were like, this will get all tracks to the highest amplitude without any distortion. Again, to make it easier to deal with.
    NOTE: for dual mono channels that represent a stereo signal, do these "Normalise to loudest item" to ensure that they remain "paired" as part of the normalisation process. Otherwise you risk making one channel louder than the other.

Rough Mix

Faders(volume)

Set all faders to an appropriate level before applying any effects to get a rough mix. GIVE YOURSELF SOME HEADROOM! Don't try to max out the gain at this stage, leave yourself some room in the master track, don't worry, you can make it loud later.

You should only add effects to fix problems. With that said, if you already know a heap of problems that happen every time, and you have already solved them before, then add those effects in.

Pan

Not really an effect as such but definitely think about where you want each track to be situated from left to right. It's a good idea to get tracks off centre, even just by 10%, to create 3D space, unless you specifically want your track to be straight down the middle. With that said, to really create width pan tracks 100% left or right. Particularly good for multiple vocalists or a solo instrument that you can to hear "over there". Don't be frightened about going to extremes.

Phase

Maybe some of your mics have a different latency, and maybe the latency will cause phase cancellation or distortion. but if you want the tightest of the tight, then zoom right in on your master track and see how all the tracks are overlapping, specifically on punchy transients. Particularly useful on the drums, if you notice some tracks are offset to each other, you can move tracks in time slightly to line up the signals.

In Reaper 7.40 there is now an action to auto-align phase. Run the action "Item edit: Phase alignment" and let it do the work for you! Tip: For really long items, select a small section, tick "Use time selection" and the calculations will be much quicker. Always let it invert phase - it knows best. Cut a bit off the front of the tracks to allow the system to move tracks left, and hit apply.

Double Tracking

If you have recorded more than one track of the same song, to a click track, then add in a new track, synchronise them, hard pan one track left and one track right. This is fantastic for acoustic guitars. You might need to go through and re-align any errors that stand out - but use your ears, not your eyes. Perfectionism is a killer.

Routing Tips

When you create folders, containing children tracks, THE CHILDREN ALWAYS ROUTE TO THE PARENT. So if you wanted to route from one track to another, they can't be related. So for example say you had a complicated chopped up vocal track and you wanted a clean version with several vocal effects, but then another grungey version with abunch of unrelated effects, you would have three tracks all at the same level, you would then drag the routing icon from the first chopped up track to the clean track, then again to the grunge track. Then you can add you effects to those other two tracks.

Make sure you click on the routing for the sending track and untick Parent Send channels so that track isn't going to the master. Note that that track will act like a parent folder - if you solo it you will here all the tracks it is sending to coming back through it.

Vocal Isolation

Meta (Facebook) have been working on AI in the music scene for a while now, and to show how good they are they release their models for free! If you have a crowd mic and you want to incorporate it (it really adds ambience to a mix!) but it is full of reflections of the PA you can get quite an impressive vocal isolation, albeit not perfect. It will have artifacts which if glued nicely at a reasonable level in the mix won't be noticed. You can do this locally on your own PC, don't waste time with online isolators:

Initial Setup:

  • install python, make sure it is in your environment path. If you don't know how to do this, chat to the LLMs.
  • download the program "ffmpeg", unzip into a directory, add ffmeg/bin to environment path. If this doesn't make sense, chat to the LLMs.
  • in a command box execute:
    • pip install demucs
    • pip install soundfile
  • Do some research with your favourite Chatbot about GPUs.  Install the latest driver, look up how to use Torch with your GPU to really speed the process up.  Something like:
    • pip install torch torchvision torchaudio --index-url https://download.pytorch.org/whl/cu124

Ongoing Use:

  • turn your crowd mic into an mp3 - if you have a stage left and stage right then hard pan them and save as a stereo mp3.
  • in a command box run: demucs -n htdemucs_ft "your audio file.mp3" --two-stems=vocals --device=cuda
    Note: htdemucs_ft is slower but better.  For faster response just use hrdemucs
    Note: drop the --device=cuda if you don't have a GPU set up
    Note: you might need to set the GPU if you have more than one:
       python: device = torch.device("cuda:0" if torch.cuda.is_available() else "cpu")
       bash: set CUDA_VISIBLE_DEVICES=0

Effects

Delay

My favourite use of delay is a stereo delay - having different times in the left/right channels. This can make a mono signal sound like a wide stereo signal and is great to re-situate a track into a different 3D space to the rest of the tracks. Use "ReaDelay", set length to say time=80ms (musical=0), pan full left, then add a new tap, set to time=120ms pan full right. Adjust the wet for a good feel. Adjust the times to get the spacing you like the sound of.

Compression

Tame a signal where the dynamics are bigger than you want them to be, squeezes the levels together. Use on almost anything. Set the ratio higher to have less effect, but 4:1 is a good starting point. Move the threshold up - if you aren't exceeding the threshold anywhere, you aren't going into compression, there is no point having it. Set the attack fast if you need to the compressor to respond quickly, set the release slow if you want the compressor to not come off so quickly, sounds more natural. ReaComp is a good go to, don't forget to tick "Auto make-up" to keep the volume consistent. Choosing one of the stock presets for your application is a great starting point.

The JS 1175 is an emulated Urei 1176 fast compressor worth looking at, ReaXComp get even more fancy by having multiple frequency bands of compression.

Limiter

When compression isn't enough...use a limiter to prevent clipping on aggressive transients while bringing up all the subtleties underneath. Great on drums and in mastering to Make It Loud.

Set attack and release times so it doesn't sound unnatural.

For a The Ultimate Limiter use "Event Horizon Limiter/Clipper" which has zero delay response, this will clean up anything that escapes out of the normal limiter.

EQ

Boost and reduce frequency ranges, surely everyone knows what EQ does. A good way to work out what frequencies you want more or less of is to make a fairly narrow band boost, drag it extremely high, then sweep across the frequency ranges listening for what you like and don't like, and set it accordingly. Some good rules of thumb:

  • 20-70 : Rumble/Subbass : for dums and bass need this.
  • 70-300 : Boomy/Warmth/Muddiness/Fullness : Sometimes there are resonances here, notch them out.
  • 300-1.2k : Boxy/Nasal : often worth reducing on some tracks to create space for other tracks.
  • 1.2k-5k : Honky/Harsh : can add clarity. Look to remove vocal esses (sibilance) in here.
  • 5k-11k : Sparkle/Presence
  • 11k+ : Air

Use ReaEQ for creating normal boost/cut EQ. Use ReaFIR set to Dynamic EQ mode which can be great to tame harshness in vocals or solo instruments: Set mode to Compressor, set the Compression Ratio fairly low, say 1.5:1 and then set up a band profile where the compressor is starting to do stuff on the peaks across the frequency spectrum. This will smooth out peaks in frequencies depending on how hard you set the compression ratio.

Reverberation

Ubiquitous and overused but quite essential. Because we aren't always recording in a warm room or a cathedral, but those sounds are nice, so apply artificial versions of them. Don't overdo it! Argh! Reverb does not make up for a bad recording! A little bit of reverb underneath a vocal or a solo instrument can be quite nice, a good one as recommended by Kenny Gioia is ReaVerb: set to file, use the "Fat Plate" impulse file from the Lexicon 480L last seen at http://www.housecallfm.com/download.php?f=BGLex480.zip somewhere around -30dB.

Another great free reverb is Magic7.

A simpler Reaper built in reverb that can be quite effective is ReaVerbate: set the room size to massive - even say 95, and use very sparingly to make a vocal ring. Use side chained or automate the wet mix or manually add it in a separate track.

Gate

If something sits on background noise most of the time and then bursts into life, then gate it - ie, it will be silent unless the gate is exceeded. It will sound unnatural solo'd, but in a mix it will be fine. Drums are good to gate, sometimes even the vocals. Use ReaGate and set the attack/hold/release to something that suites your track, and most importantly set the threshold.

Tuning

It's okay to tune up a few vocals here or there, especially when there are multiple singers doing harmonies, but you can't fix a bad recording. Add in ReaTune in Auto mode, if you choose the key for the song it will make sure no notes leave the key - or just set it for chromatic so any normal note is allowed - so any off notes will snap to the closest note. 

If you need to fix just a few bad vocal notes is to do it manually: on the Correction tab change the attack time to around 100ms, then on the Manual Correction tab tick "Manual Correction" and then draw blue lines to fix missed pitches. Put your blue line slightly after the point at which the pitch is hit, to make it sound smoother, and finish the line a bit early. Put ReaTune first in your effects chains. Note - if you have to manually tune notes, it's probably already a lost cause...

Sometimes when there is sibilance ('S'es/etc) the tuner will go warbly and yuck, you will notice it. A straightforward way to deal with it is to simply turn off the tuner during those sections. Go to ReaTune, click Param and select "Show Track Envelope" (use "Wet").  Now you have an envelope under the track, simply block out the sections where you are hearing tuning nonsense. Using "Wet" to turn it off is a better idea than "Bypass" as you can often get pops and clicks and the VST energises - when you are using wet it continues to run in the background, you just don't use it for a bit.

Saturation

This is a quirky little effect, basically distorts the signal based on the way old analogue equipment like tape machines or tube amplifiers would distort when driven hard. Adds harmonics which are "richer, warmer" ie pleasing. I found the free plugin "GSat+" does a good job, load it up and at the top menu press the right arrow to say "Medium" or "Warm", wind the input up until it is going onto saturation for at least part of the range.

Another good saturator is Korneff "Chocolate Milk" which is a tape based saturator rather than the GSatplus tube based saturator. Because saturators are simulations of the real word effect of overdriving analogue signals through something like a vacuum tube or magnetic tape.

Quantisation

With your drum MIDI that you have captured and had played to a click track, and you want to fix up mis-timed hits, first start with quantisation:

  • Double click your MIDI to get the MIDI editor window
  • In the bottom left, first choose your grid - if the fastest notes you played for example were 1/16 then set it to that. Change to straight/swing, or triplets if you were playing them.
  • Press Q to bring up the quantise window.
  • A simple quantise would be: Use Grid, Uncheck Bypass, All notes, Position, Strength around 80% so it still sounds like a human played it and Fix overlaps, Hit commit and OK.
  • You might like to get your snare snappy and accurate - select all the snare notes and hit quantize again, set them to 100%
  • Now listen, and anything that was too out of time will be pretty obvious, click and drag into the right position.

Tip: when playing with midi, make a text file where each line is <midi note> <description> and import in with File - Note/CC names - Load note from file. Set the view to be note names rather than piano.

Dealing with Takes

If you are layering/overdubbing, Reaper will automatically make takes into a second lane in that track. You can be a total pro about it and comp it and finalise a take, or you can explode it into individual tracks and do it olde school. This is probably essential if you "accidentally" recorded more than just one thing into a single track. Right mouse drag to select all items in track, right click on one of them, Take - Explode all takes into tracks. For bonus points you can re-select all split items and right click - Heal items in split, as doing takes will naturally split at the point your take started and ended.

Instruments

Drums

The setup I spend a lot of time with has 7 mics. I will always make a track that is a folder (bus) for all the drum tracks and I add a limiter to that to "clean up" those times when the drummer has hit 3 drums full tilt at the same time.

  • Gate all drums except the overheads. Set the gate so that only the "fundamental" drum sound comes through, so usually the fastest attack possible and only a hold/release for as long as required, hopefully not before the next hit.
  • Put on a limiter rather than a compressor. Drums have a massive impulse on the initial hit which doesn't suit any compressor I've played with. Whereas the limiter, with a brickwall ceiling, can bring up the tail without losing too much initial impulse. Push the threshold until the limiter is only just coming in.
  • Add some saturation where you need a drum to really punch
  • EQ to the drum in question. Use an online cheatsheet. Note that the full mix will contain everything - let the overheads glue it together. Set each individual mic have an EQ that captures the essence of that drum:
    • Kick drum - low frequencies important here, but some highs to get drum character.
    • Tom drum2 - keep low frequencies and some mid.
    • Snare drum - keep mid frequencies and some highs.
    • Overheads - remove the low frequencies and most of the mids, keep only highs. The overhead mics glue the drum kit together through the middle - the low end is dealt with in their own tracks.
  • On the snare drum add the free VST "snare buzz". It is fantastic to bring out that snare sound.

Electric Piano

Since it is electric it's already perfect, leave it alone. The only thing you might want to do is compress it if you want to squish the dynamics, or adjust the EQ to create some space for another instrument.

Acoustic Guitar

Generally this is already coming in from a pedal, so like the piano you might not need to touch it. However I rarely find an acoustic guitar that has a frequency response I like, so I usually add EQ to remove boominess and boxiness. It's also a good idea to remove everything from around 80Hz and below, acoustic guitars can't hit those frequencies.

Vocals

Ah, the most challenging instrument of all. Compress - if there are really peaky parts, use two compressors, one to scrub the peaks, the other to smooth it out without crushing it.

I love a saturator on a vocal. Korneff Chocolate Milk (tape saturator) is great, GSatPlus (tube saturator) is free and also quite good.

Add in a further compressor to do sibilance de-essing. In ReaComp, in the detector, adjust the Lowpass and and Highpass so the detector is only working on a frequency range where the esses are, say around 7k-11k for a female. The attack should be fast and the release fast-ish, say 1ms and 30ms.

EQ - varies from person to person, but 120Hz for fullness, 240 for boxiness, 5k for presence, 8k for sibilance, 10k for air. Sweep the mid to find frequencies you like/dislike

Sax

I found that the sax is dynamically unbalanced even between notes. I compress it a lot. Either go for a little bit of reverb, or add some back slap delay if you don't want to muddy it with reverb. EQ this for sure.

Fine tuning and Mastering

Envelopes

Right click on a track header, click Envelopes and then choose say Volume or Pan. Now you can drag the fader/pan around as the song progresses. I normally do the 4 click trapezoid to bring a section up or down. You are almost re-producing the song with this - you can say drop a solo instrument right down so it isn't competing with the vocals, and then crank it up during insturmental sections.

Edit

Don't be afraid to split tracks up! You can realign missed tempo notes, or copy sections from another take or verse to punch out bad sections. Overlap all cuts so they seamlessly transition. Normally you can drag around the cross-fades, but if the fade isn't showing, right click the track, select Item Properties, and then type in new values for the fade in and fade out.

Mastering

The JS 1175 Compressor is nice to glue it all together if it feels a bit unstuck. Use the ReaXcomp multiband compressor to make it pop. Some very minor EQ to tweak up anything that presents itself in the final mix (because you were too keen EQ'ing individual insturment). Top it all off with the JS Event Horizon Limiter/Clipper, set the ceiling to 0, and wind down the threshold a little bit to make it louder but don't go too far or it will start to distort.

Handy Functionality

SWS/S&M

Action - SWS/S&M Copy FX chain from selected track (bind to key I)
Action - SWS/S&M Paste FX chain to selected tracks (bind to key O)

MIDI double hits

I found my older cheaper Yamaha DTXplorer was giving double/triple hits, probably picking up hit bouncing (they are pretty firm rubber pads) but I probably have the sensitivity and threshold too low in the drum head unit.

But all is not lost! I created a script that will remove hits that are clearly too short. The rule is if it finds a hit that happens too quickly after the same note hit then it removes it and stretches the first hit to be the same length as the two hits together.

In the MIDI editor, select all the notes. Under Actions, change the section to Main, and run a lua script. point it to my script and run it. Yah!

Channels

Generally, each track will only have 2 channels shown in the mixer. Even for mono, because FX will often create stereo. If however you have ended up with say 32 (and the track is really wide) you can fix it by clicking on the Route icon, set channels 2.

Timeline

If you want to make an arbitrary point your new zero, right click on the ruler -> change start time/measure - > Set to zero. You can later undo this with a Reset Project Start Time.

VST Drums

Steven Slate VST drums (SSDSampler5) is popular and a great solution if you don't have access to a real drum kit. If you don't have a midi input and just want to draw on the grid:

  • Add a track and add the fx SSDSampler5
  • In Create double click on a kit to select it
  • Click somewhere in the track Insert->New Midi item
  • Double click on the midi item to bring up the MIDI editor
  • Set the toolbar to note names
  • File->Note names->load note names and point to an SSD drums note name file

If you do have a drum kit and use midi triggering through an interface, don't forget to set Reaper enabled on MIDI inputs.

Sound Interface

If you are using an interface to record directly into Reaper, and you want to be listening as you go, then minimum latency is critical. I can hear a latency of 10ms and it is too distracting - you can't pluck guitar strings and have more than 10ms delay and remain sane and calm. You have two choices - have a setup with low latency, or don't listen to the signal, just record.

To get low latency (I'm in Microsoft Windows land) you can try using WASAPI, you might be fine, it's pretty good. You will need to tweak with buffers (keep them small, ie using less time, but requires a faster computer). What you really need is equipment that supports ASIO. Note that ASIO4all is not actually ASIO, it is a fudge, like WASAPI it might be okay. You need to specifically buy equipment with its own ASIO driver, such as the stuff from Focusrite, Presonus, various Behringer gear. Unfortunately at the moment it is not cheap.

Note: if you experience noise while connecting your laptop to your interface over USB, you might have a ground loop issue. If you unplug your charger and the noise goes away, then definitely a ground loop issue. Try a different charger, run on battery only, or put a galvanic isolator on your USB between your laptop and your interface to eliminate the gound loop.

JAW's Quick Notes To Himself for M32 mixes

  • Copy WAV to local drive, name the folder yyyymmdd <leader> - song 1 - song 2 - song 3 - song 4
  • Run ..\Rename x32 hex to dec.cmd
  • Drag WAV to new Reaper session, sequence time positions on a single track
  • Run JAW's Explode & Track Rules Parse.lua
  • Delete inactive tracks and rename tracks according to the prep standard
  • Using Ripple Edit mode, cut out bits not required
  • Save as yyyymmdd-1.rpp
  • Consolidate tracks into FLAC: Set output directory correctly, project name as yyyymmdd-2, set consolidated filename as $project-$track
  • Isolate vocals: after doing the consolidate there will be 4 flac tracks for the congregation in the root directory.  To pack and isolate them run
    ..\ProcessCongregationIsolation.cmd
  • Run JAW's Pre Mix Prep.lua
  • Optional: Phase alignment on drums (pull all tracks right a tad to allow space). Use a short section that features plenty of snare (bleeds into other mics), MAKE SURE it is "Adjust each item separately" and Adjust "Position". Use snare as the master.
  • Drag isolated vocals in and add the fx chain.
  • Double track acoustic guitar/etc if required.
  • Rough fader re-adjustment: GIVE YOURSELF HEADROOM!
  • Solo and tweak individual drums if necessary - levels, amount of gating, limits.
  • Going forward - don't be afraid to split tracks and do coarse volume adjustments on those (pre-fx) items.
  • Add in Bass and tweak.
  • Add in Piano, Guitar and any solo instruments and tweak.
  • Solo the vocalists, add in fx if not already there and tweak.
  • Make the START of the song really hit.
  • Run through the VSX checks.

  • Note: these are some of the decent isolators:
    Demucs:
    demucs -n htdemucs_ft "cong.wav" --two-stems=vocals

    Melband Roformer is possibly slightly better but takes ages:
    audio-separator "cong.wav" --model_filename "melband_roformer_instvox_duality_v2.ckpt" --mdxc_segment_size 256 --mdxc_overlap 4 --use_autocast --output_format=WAV
Friday, 19 April 2024

What's happening April 2024

A while ago I decided I needed an electric guitar. I bought an interesting one that had a UST pickup in it. I remembered pretty quickly afterplaying it for a while that electric guitar necks are too narrow - generally a nut width of about 43mm. I next had a company in China build me a custom neck - 48mm wide - but I accidentally specified Stat style heel rather than the Tele style heel that guitar actually needed so it wouldn't fit on the guitar. Not dismayed, I picked up a cheap Stat copy from my local pawn shop and fitted the neck. It was okay, but I hadn't made a good nut for it, so the intonation was bad.

Nonetheless I started using it as my practice/arrangement guitar, mostly because it is quiet and yet the neck feels like a classical neck, and the string tension is not that far off a nylon string. I've been playing it more than my actual classical... a lot more.

I thought to myself "why don't I fix up the nut so it intonates better, and do some of my normal recordings with it?" Because to set up a recording with microphones with the classical requires a bit of effort and the house to be quiet. My house is rarely quiet.

Getting the nut better is becoming an easier process for me, I have made a few saddles and nuts now. I have a feel for what you need to do, and am getting a bit quicker at it. This one was easy, the strings all just needed to be closer to the fretboard.

I remembered why I stopped adjusting it last time - you have to be able to file a very narrow groove - the width of a string - into bone. I had tried the welder nozzle cleaner files and they are okay, but not with the really fine files, it's not really possible.

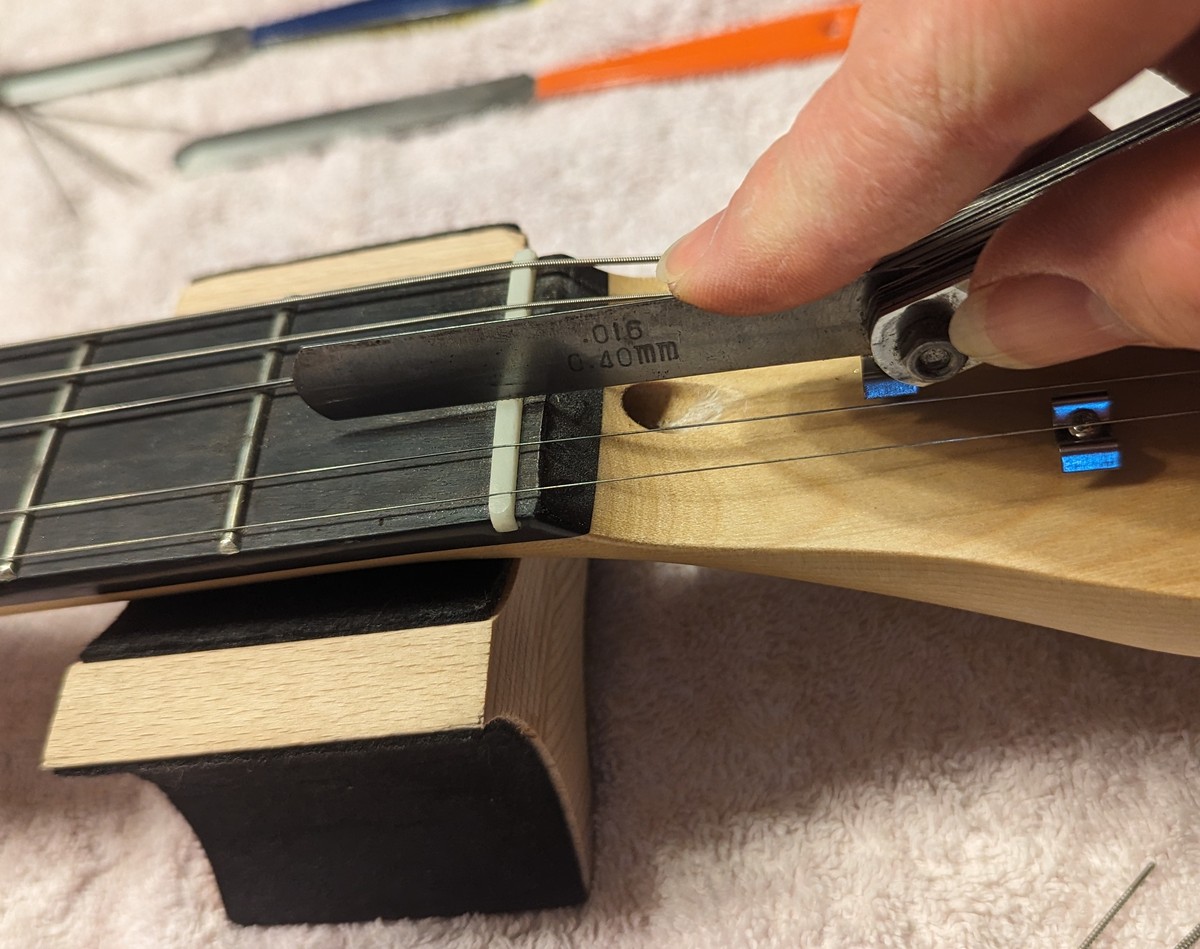
I remembered a trick I had seen on the internet - modify a set of feeler gauges. The idea being that feeler gauges come in all the exact widths you'd need, and they are kinda tall so they don't flop around like a 0.4mm round file. So I grabbed my feeler gauge, measured up each string with a caliper, got the corresponding feeler gauge out, and roughed up a section with a heavy duty file. I didn't need to make it super rough, or even a very long section. I did clean up the burs on the sides by running the edges flat over some sandpaper, and rounded it ever so slightly so it wouldn't cut a completely square slot.

The end result is great. You don't need to file much, it is only slightly abrasive which is fine for a thin bone slot and you aren't going deep anyway.

I quickly had the nut slots the perfect width per string deep enough that you only had to press the string down a tiny bit before it was touching the fret. How far? Well, I figure if you fret at the first fret, and then look at how close the string is to the second fret, you want about that same distance. Leave a bit extra - nuts wear down during tuning, so have a bit of meat there so it lasts longer than the first string change.

Once I re-tuned and then fretted at the first fret the intonation was not perfect but a lot better. I still fret like an acoustic player - mashing those strings down so of course I am going to go a bit sharp anyhow - I need to develop a lighter touch for electric guitars. But I was happy enough.

The next stumbling block recording on an electric, is how to play with headphones on through whatever effects pedal you want to hear, possibly listening to a click at the same time, all while recording just the guitar.

This should not be a stumbling block of course, people have been recording through interfaces for years. I had bought a nice little Behringer mixing desk with USB output for a cheaper price than an interface, and that has come in super handy as both a mixer and for recording. Because whatever you mix can be sent straight to a computer as a 44.1kHz 16 bit USB stereo signal.

The problem now is latency. If you are sending your mix to a giant amp that you are listening to, and recording in the background, then latency is not a problem, it can be seconds, who cares! But if you pluck a string and are listening in headphones from the computer then there should be no delay (no latency). I reckon I can hear latency starting at around 10-15ms.

Out of the box the average computer hardware running Microsoft Windows will not achieve 10-15ms. The standard Microsoft audio driver is "DirectSound", and it is not made for real-time audio. You will be quite sad if you try to use it for real-time audio.

However if you switch to ASIO as your audio driver, you should be able to get your 10-15ms. Unless you have a specific ASIO driver for your USB interface, download and install "ASIO4ALL". From Reaper/Audacity/etc go to your audio setup, choose ASIO, and click on the ASIO Configuration. Things to try: test out Hardware Buffer, I found setting this with anything around 12ms-20ms worked great. Try setting the block size to 64. Keep the sample frequency at 44.1kHz/16 bit.

If you hear latency, then decrease the values. If you hear noise - like the occasional pop and click, then increase the values. I was able to find a noise free setting that had a latency that I could tolerate.

With that all done, I found with ASIO I couldn't play a click track or anything else at the same time! That is because ASIO will only run exclusively, it won't share with other audio. I found if I went back to DirectSound and recorded a click track, and then back into ASIO mode I could play the click track and overdub, so it's okay.

Otherwise, try out WASAPI. This is the Microsoft equivalent to ASIO. It's pretty good, it will run in shared mode so it is almost the same as using the default DirectSound in that respect. It has similar settings to ASIO, play around with the buffer size, and set the thread priority to Time Critical.

I found I couldn't quite get as good latency out of WASAPI as I could from ASIO. This is all on an 8 year old Dell laptop running Windows 10, so hopefully you have more joy!

So once I was ready with a guitar that would play in tune, with a recorder that could record noise and delay free while I was listening, I hit the next road block.

Well, two road blocks.

I couldn't get the tone I wanted, and my fingerpicking doesn't translate well to coil pickups. Huh?

Tone - I am using my Zoom G Four multi-effects pedal, so I can dial in any patches I want. I found an acoustic simulator with a tiny bit of reverb, running through the neck pickup only at about 50% tone was barely okay - I could live with that - but it just isn't the sound of a classical guitar.

Fingerpicking with a consistent dynamic and tone is hard on electric! I only had to pick ever so slightly different between notes, almost imperceivable, and that different dynamic leaps out. Only have to flick the strings percussively a tiny bit different to the previous and it is the difference between a kick drum and a closed high hat!

I dialed in some compression and this squeezed those inconsistent dynamics together and made them less obvious... but you know what? It squeezed the dynamics together! I _want_ the actual dynamics that I want when I'm playing!

So my years of nylon string has meant I don't have the ultra-fine control of my dynamics I need for an electric guitar.

I haven't given up, but for now, I think I will stick to practice on the electric but recording on the nylon. (Oh, and all this practice on the electric is making me rusty on nylon...)

Wednesday, 19 April 2023

Tempo

A couple of weeks back someone on YouTube mentioned that I was a great guitarist and made really good arrangements, but my tempo is a serious weakness. He was very kind and apologetic about it - but I was grateful because it is true and I should do something about it.

This is where I insert my standard joke "I would use a metronome but I haven't found one yet that works properly."

Background: yes I had some group lessons when I was in primary school, but by the time I was around 11 I'd stopped having all lessons and I haven't had one since. When you teach yourself, you only concentrate on what interests you and you end up with big holes in your musicianship. One of my biggest shortcomings was that playing by myself I never bothered to develop an internal clock. If I had have played with others, or against a backing track or even metronome, I could have fixed this a long time ago.

Fast forward, I now play pretty regularly at my local church, and I tell you, it was SO HARD to begin with, I couldn't track a beat whatsoever! Even now, a few years on, if I start a song solo I am sweating bullets trying to hold a steady tempo. Once the drummer kicks in I'm not too bad at following these days.

All three of my kids play instruments, and I made sure they all played in ensembles, and they continued to for years. Their tempos are all thusly impeccable.

So after the friendly YouTube commenter nudge, I pulled out my phone and browsed up a metronome, and I played several songs... on beat! An actual metronome that works! To be fair, every now and then the metronome was slowing down, so I would also slow down to let it catch up, but really, it wasn't awful. A lot better than the maximum 30 seconds I've ever put up with a metronome before.

Moreso, I have been playing at a fixed tempo slower than how I would normally play, which is hard indeed! And I have played with that metronome at least 4 times over the past two weeks!

So to my fellow DIY musos out there - if you aren't going to play with a band, at least force yourself to play with a metronome or backing track. Easy to say, hard to do, but it is worth it 👍

Friday, 23 September 2022

Musescore Swings!

"If you gotta ask, you'll never know" - an old response to "What is swing?"

My hands found swing a long time ago - my brain had no idea what they were doing, but it sure felt groovy.

So when I started tackling arrangements with swing, I just couldn't get down what I was playing. I generally left the swing out with an instruction "just listen and play it like that". Occasionally the swing was so prominent and important I had to put it in the sheet. For example in 2019 I attempted to write out "Gold" by John Stewart as swung and got this:

Which I quickly abandoned because "something just isn't right, and wow, that's hard to type in."

But it's actually a good insight into how swing is notated - that above is text book "shuffle" - so I discovered. Secret let out - swing is delayed offbeats. Forcing the notation into triplets like I did above is a hard shuffle where the normal offbeat (the "and" note between main beats) is pushed out from 1/2 of the way to 2/3 of the way to the next note.

So when I recently took on "Horse With No Name" I once again came up against how to get that swing feel into Musescore. Because when I played the song I realised that my hands were playing swing. (How do they do that? How do they know when something swings, and when something doesn't? See opening sentence.)

So in my frustration I googled "Musescore swing". And what do you know, it's been there all this time! Musescore for the win!

In Musescore version 3, you actually just add text to a note, and that brings up a properties option, and in this case you can set the swing options. In version 4 it's right there in Format->Style->Score. And the people who write the Musescore software are clearly music geniuses - there is a percentage setting for the swing delay, so 50% means the offbeat note is "where it should be" out to 100% meaning the offbeat note is actually on the next beat (ha ha - let's call that "ultimate swing").

But let's not just talk about it, let's see it in action! Here are the first 4 bars "straight" to begin with and then "swing" at 60%, which feels about right.

Look, this is big improvement, but it is a strict rigid swing. I can hear that my hands actually vary the swing per offbeat as they go - for instance, "the" in "all the life" doesn't quite sound right in the above. I experimented with the swing setting after I did this, and discovered my hands actually swing "the" around 65% rather than 60%.

At least half of my arrangements need swing turned on I reckon - the text "Swing" at the top, and then when it plays back you hear the delayed offbeats.

"If you gotta ask, you'll never know" - but now we know, and luckily you never asked 🙂

JAW

Tuesday, 21 December 2021

Asymmetric Right Thumbnail Shape


"Heeeyyy" in my best Fonzie...hmm...
that's showing my age.

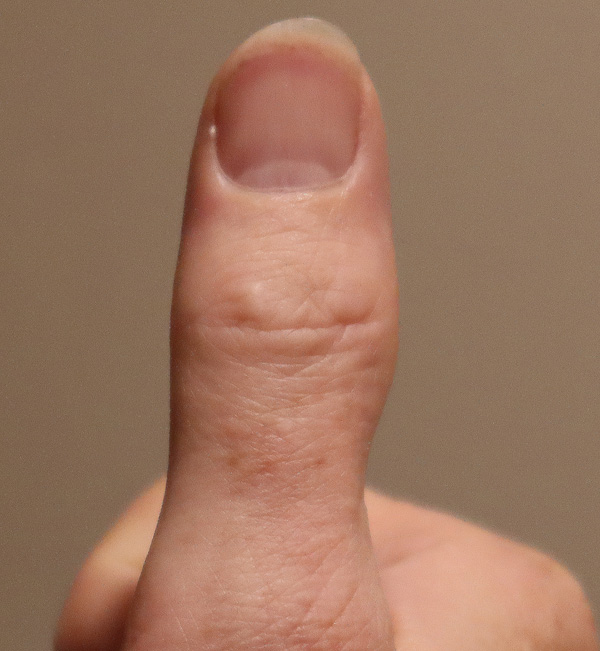
"Thumbs up for Christmas!" Well in fact this is more about how I've been shaping my right thumbnail for a while. I've spoken about nails before but this is a new trick that is working well for me.

A problem I had was my right thumbnail being so long that when I bring my hand down real low to the fretboard and I really dig in, my nail will catch hold of the string, pulling it up and for a loud awful slap bass sound, it's not good.

I want some thumbnail length for the tone I like, so I had to have this perfect thumbnail length balance between long enough for tone and short enough that it doesn't catch.

So I put two and two together - have the left side of my thumbnail short so it doesn't catch, leading up to some length on the right side for the tone I am after! It took me a while to get over having a non-symmetrical shaped thumbnail (okay, I'm still getting over it) but not only did it cure the thumbnail catch problem, but I think it has improved playability and tone at the same time! It's only a minor difference but you end up with the correct attack angle for all positions - when I'm low down palm muting the strings, or when I'm high up classically picking.

I recommend giving this a try, I'm giving it a thumbs up <groan, thanks dad...>

Wednesday, 21 September 2016

What's happening September 2016

I am still playing from time to time at Deli Chicchi on a Sunday afternoon/evening. The owner Glenn believes in live music and good on him. Sure you can have your home theatre big screen blasting out a blu ray recording of The Eagles live, and you will get a great experience, but you weren't there "in the moment" and even though live music at a pub/cafe won't be quite the same grand experience, you will get "in the moment". Both experiences are great but here in my small city of Perth, people, as a generalisation, haven't (re-)discovered the joys of live music. So get out there!

I haven't recorded anything lately even though my computer game tune arrangement is ready to go and I have already played it several times in public. So nothing to report on that front.

A few times over the past few years I have spoken about finger pain, last year; in 2011, all the way back to 2010. The sad conclusion I've had to draw is that yes, if I go to hard on my left hand doing awkward fretting I am going to cause myself pain. Is it arthritis setting in? I don't think so. Am I managing the pain? Yes; just. It's a sad thing when you know you are capable of doing something but you shouldn't do it. So pulling back is a hard thing to do.

Stretching fingers/wrists and hands helps but it isn't a cure-all. I have some regular stretches I do while I'm at work and they increase how far I can do without busting into pain-and-damage land. Stretching during a long playing session, especially simply pulling your hands back at the wrist is a good idea. I have also been taking turmeric pretty much every day for more than a year now. Yes, the yellow spice; it is a natural and cheap anti-inflammatory. Mix a quarter of a teaspoon with water and down it, once a day in the morning. I've become accustomed to the taste, it grows on you. When I have forgotten to take it for more than a week I notice that I get into pain-and-damage land much sooner. So I'm giving it a tick and sticking to it.

I am going to catch up with a year 11 student at my kid's school sometime soon. I saw him once at a music show belting out some pretty good fingersyle; he has skills. I thought "I could show him some stuff, and save him from having to learn the hard way the past few decades what I have learnt." So I spoke to the music teacher and he introduced me. He seems keen, I will find out what his goals are and see if I can help him get there. It would be nice to be a "guitar mentor", I feel like I've got stuff to give. Life is big, and wide, and varied, and everything isn't about guitar. But at least the parts that are about guitar can be as worthwhile and fruitful as possible :-)

JAW

Sunday, 10 January 2016

What's happening January 2016

Warm wishes for 2016, and warm it certainly is, summer is sure heating up Western Australia.  This year is my 10th year anniversary of being on Youtube, how times flies. Youtube had been around for around for about a year when I created my account in May 2006, so I felt like a late comer, but it seems now like I'm an early adopter.

Meanwhile, whilst practising one of my latest songs I injured my hand again. Argh. Same as last time, left pinky. It's some sort of strain, only hurts when I use it...I've mentioned before that when you are practising it's not a good idea to do the same movements over and over again.  I should listen to my own advice.

I stopped playing for a week or two which coincided with Chrismas so it was not too bad, but I was very disappointed with my boo boo.  I started doing some research into what it is, and what I can do about it. It seems that it is an over-use injury, somewhere between tendonitis and carpal tunnel but not arthritis...nothing Dr Google could fully diagnose.  I did however come across much interesting and useful stuff.

Did you know your ulnar nerve is the "largest unprotected nerve in the human body (meaning unprotected by muscle or bone), so injury is common" (Wikipedia).  The reason I mention this is because it is connected primarily to your pinky, via your elbow.  It is your "funny bone" - when you whack your funny bone it is your ulnar nerve you are whacking. Since both my pinkies suffer from the same problem I'm pretty sure my left hand pinky is only aggravating an existing issue at my elbow.  Cubital tunnel syndrome is similar to carpal tunnel syndrome except rather at the wrist it is at the elbow, entrapment of the ulnar nerve.  I don't think that is what it is, except it made me realise I've had elbow issues for years.

Anyway, what was the most enlightening was what to do about all these finger, wrist and arm issues - stretching!  After watching a few Youtube videos, I couldn't believe how flexible some people's hands are - and how stiff I am.  In fact, I sat down with my wife and we did a ten minute video doing a bunch of different hand stretches, and my wife's hands are far more flexible than mine!

So I've been doing a bunch of stretches daily, or more, things like bending my hands back and forward, stretching fingers apart, pushing thumb against the wrist and backwards. Very quickly I noticed my hand flexibility improved. It didn't make my problem go away, but it's early days, I'll report back with findings.

JAW

Thursday, 3 October 2013

Hey man, tune your guitar!

I get that every couple of months.  Someone on my youtube channel will tell me my guitar is out of tune.  I listen back, umm, yeah, maybe?  Ever so slightly?  One or two of my videos are indeed slightly out of tune, but the recent ones are not.

Here's my thoughts on the matter.

Some people have an _amazing_ ear for pitch.  A _really amazing_ ear.  My ear is pretty bad so I tune using a pretty accurate digital tuner, and always tune in very carefully before recording.  However, the intonation on the guitar is only so good.  In fact when I was hunting for my Esteve, that was high on my list of what I was looking for in a guitar - good intonation.  I used my tuner to check the intonation on many guitars, and the Esteve is pretty good.  But generally, if you are playing up the fretboard, she's gonna be a bit out of intonation (tune).

Furthermore, when I fret a chord, I'm usually bending the strings out of "the correct place" a small amount.  On unusual shaped stretchy chords I'm bending the strings quite a lot out of the place where they should be to sound in tune.  Even the simple act of fretting distorts the intonation slightly (but guitars do compensate for an amount of fretting intonation).  Not that you or I could hear fretting intonation distortion, but some people can.  It's especially noticeable on nylon because they have lower tension strings.

Even the guitar heating up slightly after me playing it will put it out of tune - you should be constantly adjusting your tuning while playing.  But since I don't have an amazing ear, by the time I notice, my pitch perfect mates were already wincing in pain five minutes ago.

I have developed a very healthy respect for fretless stringed instrument players.  They have to hear the intonation and play to it.  They train their ear.  Us guitarist, well, duh, we ain't so bright, see, we don't need to hear intonation, duh, the frets dun do that for us.  Okay, I'm being a bit harsh there, slide guitarists, even pulling bends, you need to have an ear for pitch, but I think you get what I mean.

The bottom line - no matter how hard I try to have good tuning, there will be a percentage of the population who will cry out at my "terrible tuning".  And they are right.  Luckily, the other percentage of the population and I won't hear it.

(It's all relative though, I have been known in the past to very politely and with great tact mention to players on youtube that perhaps their guitar was a bit out of tune.  For me to notice - that's got to be a long way out of tune.  With that said, my ear for pitch is now a lot better than it used to be.)

JAW

Sunday, 2 December 2012

Back to Gigging and Youtube Channel Question Response


I'm back gigging at BBar Cafe close to where I live in Gwelup.  Last Thursday was my first night back and uncharacteristically for this time of year there was a storm howling through, so I played inside.  I had played inside once before...let's just say I prefer to play outside in the alfresco.  The problem with inside is it's an all concrete area so getting the sound right is difficult.  And what tends to happen is people who are having a conversation over their meal need to talk over me...so I end up feeling more annoying than enjoyable.  I've experienced this myself many times - been at a venue where I just want to sit back and chat, but instead I almost can't hear the person next to me, shouting to get over top of the music playing.

But I was actually playing quite well, it felt good, it is great to be back.  I'm looking forward to the warm nights out in the alfresco where the acoustics are great, and people can choose to listen or chat, where I'm not competing with conversation.


In other news, I recently exchanged some messages online with a professional guitarist who is at the starting point of establishing his youtube channel.  I had a look at some of his work, it's good stuff, I could get a lot of guitar playing tips from him!  He wanted to know how I got my youtube channel to where it is now.  I was in a very chatty mood at the time so I thought it was worth posting here  My apologies, it's rambly, I could surmise it a few brief paragraphs, but then it wouldn't sound like me!  Here is the slightly edited response:

---
Mark, you don't need advice from me, I need advice from you! :) You've got the skills no doubt, you are playing with feeling, looks like you have the repertoire too - I mean you play guitar for a living! Although I wish I could pour time into guitar, it's just a hobby for me, the family and the day job mean I only get 5 hours a week if I'm lucky to play and arrange. It's not enough to take the guitar anywhere special, but for this stage in my life it will have to do.

The problem with your youtube channel is exposure. I got lucky. I started a long time ago, in 2006 youtube wasn't even a year old. I posted a (dreadful) cover of Canon in D, a song everybody loves, which became popular and created enough "interest" that at my peak I was getting around 7,000 views per day. That's gone down to about 2,500 now; there are sooo many great guitarists out there I'm competing with now it is to be expected.

There ain't much you can do in a hurry. Post videos of songs you know people like. Watch other people play, and comment on their stuff and press "like" a lot. Don't hassle people to come look at your stuff, just comment on their stuff.  They will come and look at your stuff if they want to. I believe you will get more people coming and looking from a good comment than a trawling comment.  It's all just an investment in time and being active. I didn't realise what I was creating during the time I was very active on youtube, in hindsight it is quite obvious what happened.  Firstly I was increasing my youtube search ranking, but more importantly I was creating connections with an audience who would hang around.

Keep your video and audio quality high. If you can post a video once per week, do it. Don't post a whole bunch in a batch, spread them out over a couple of days at least, so people can keep up. Videos don't need to be "super professional", as in filmed in a studio environment. The audio and video still needs to be high quality, but a few mistakes in playing a song makes it more real, more human. That surprised me at first, but that is what I have discovered my audience appreciates (my youtube audience consists mostly of non-guitarist casual listeners but also some guitar playing listeners.)  I think you connect better, in the youtube environment, if you are "real" - not some ultra professional presenter, but rather you are giving a comfortable experience as a fellow human with faults.  On some level I suspect a listener is thinking "this guy is great, but he isn't perfect, I could do what he does if I tried hard.  That makes me feel good.  What I'm listening to isn't unattainable."

Comment back on interesting comments from viewers. Not every comment, for example "You are great!" doesn't need a response, just smile, nod appreciatively, and move on. Just be active on youtube. You've got the chops, you're a better player than me, it's just an investment in time now, building connections with people (which in turn creates more connections) and away you go. Be active on your blog too, keep it useful. Talk about how you create, the little things that people like to hear they don't hear anywhere else. That you would have liked to have heard when you were starting out.  Pick your audience. Talk about your gigs from a technical point of view and you will attract an audience of hobbyist guitarists that want to be playing and gigging like you. Talk about the beauty of the songs you are arranging and you'll get an audience of music lovers. It's all pretty obvious, I doubt I'm telling you anything you don't already know...

Add value to your videos - post tabs if you can, people *love* tabs. But that only increases your popularity in the guitarist scene.  They don't represent the majority of my listeners, but for me they are _my connections_.  They are the people I invest my energy into, they are the ones I chat with, and exchange ideas, and critique each others work.  They are the reason I'm here at all.  It's interesting; I love playing live to an audience who appreciates the same music as I do, who "gets" what I'm playing.  But online, you don't get that real-time connection with people.  Online I love the conversations I have with fellow guitarists. I don't feel as connected with the online listeners.  I'm not sure how to approach that disconnection...maybe you can take that to a new level.  I think I'm more of a teacher than an outright performer, which "limits my potential audience"...perhaps you should take my learnings and modify them to reach a different audience?

I lost all my early momentum on youtube because I can't update often enough. But there is a baseline momentum that stays alive that keeps me ticking along. Throwing a handful of songs out per year keeps me in the game.  Keep up your momentum.  It means you have to be passionate about what you are doing, and be true to what you are doing.

What are you after? Hooking up more gigs? Want to share/teach? Make money online? There isn't much money to be made in just online videos and blogs. Even with 2,500 views per day I make slightly less than $100AUD(2012) per month. If I licensed and sold tabs, or instructional DVDs, that could make more money. But that is difficult to do legally and would take me a lot of time. I estimate if I recorded a CD I could sell about 3 per day, priced at say $12ea I could probably make $20/day in sales. But that requires time to make a _great_ CD (I would want it to be great) and managing the sales myself. I could make it work, because I have a constant flow of visitors. If you don't have a constant flow of visitors, you won't sell stuff.

Spend time. Create connections with audience. But most importantly what are you after - your answer will tell you what to do.

Oh and be careful; posting covers is a tiny bit illegal. I've had one video claimed (the copyright owner makes money from it, quite sensible, they could have had a take down notice on me but chose instead to cash in) and one video taken down. Three take downs and your account is suspended. I can't give you any advice on who will give you takedowns - maybe surf the net for it, I've only had one in six years so it isn't a problem, but perhaps it might be in the future. Avoid Supertramp covers is all I can tell you so far.

Good luck and good skill!

JAW

Friday, 7 October 2011

There is no end...


What I find time and time again is regardless of the direction you go playing the guitar, there is no end.  You can take it as far as you like, there will always be something more.  You'd think after 30+ years I would have exhausted _something_, but no, it's no the case.  And once you have the guitar in your blood, it's there for life.  You might be in a 10 year hiatus, but the guitar will entice you back sometime.

I was on holidays with the family for the whole of last week and I didn't play any guitar.  When I came back, that evening I picked her up and played her, and she has the sweetest sound, so rich and warm, and my fingers just knew what to do and it felt and sounded like the best guitar playing I've ever done.  Just one week away.  You can never reach the end of realising how beautiful the guitar can sound.

This week I was mixing up the melody in my latest song, for a bit of interest.  You don't want to play the verse exactly the same every time, especially when it is sung different in verses, and I found an 1/8th note lag in verse 2 forced my brain to have to completely re-evaluate what was going on.  I could "feel" I needed to program a quite different process in my brain to be able to slip that one note back.  Here is the two almost identical melodies, there is one G missing on beat 2& (which actually provides a mental cue) but it is the Bb set back from beat 3 to beat 3& that makes the difference:

|---------------|------------| |----------------|------------|
|---------------|------------| |----------------|------------|
|----0-0-2-3--2-|------------| |----0---2---3-2-|------------|
|--------3-0----|------------| |--------3-0-----|------------|
|-------------1h|==3---3--1-3| |--------------1h|==3---3--1-3|
|-3--3----------|------------| |-3--3-----------|------------|

You can never reach the end of finding stuff that is challenging to push into your brain.

The last two nights I've had an opportunity to play the guitar a bit, and both nights I've run through Dark Side of the Moon.  You'll be pleased to know Ryan and Marc :)  Since it is a good twenty minutes of continuous playing, you're probably not surprised to hear that I experiment all over the place with subtle differences in melody, techniques and sound.  You'd think that the longer I'd played a piece the more consistent it would get.  I think that is true initially, but once you are playing a piece in autopilot that is when you can start introducing differences.  Naudo is a classic example, I've seen different recordings of something like "Losing my Religion" and "Another Brick in the Wall" and each one is quite different - maybe in another key!  You can never "finish" a song.

The list of never ending goes on - perhaps it is because our approach changes over time; if we were to do only one thing perhaps we would reach the ultimate end.  But I doubt it :)

Saturday, 20 August 2011

Video blog: More Stupid Girl

I kept going on Garbages "Stupid Girl", I more or less have it complete. Made a lessony type video for my mates, I'm still enjoying the song a lot. Sorry that the tab doesn't exactly seem to line up with what I'm playing in places, but I think you'll get the drift. Sorry to Nil - too much talking in this one. Melvin however, you are in luck!

If you don't know Garbage "Stupid Girl" you can watch it here: http://www.youtube.com/watch?v=1HBxUWSxcq8

Friday, 22 July 2011

Video blog: Body Tapping

For some reason I felt like talking about body tapping, and I used "Time" and "Come Together" as examples of how I use the percussive technique.  Disclaimers - I caught a cold from the kids which I hadn't got over so I sound more nasally than normal - and I'm not much of a drummer, especially when I've got the drum kit set up for my 4 year old son! :)

JAW