Showing posts with label Making Buying and Fixing Stuff. Show all posts

Monday, 3 August 2026

Custom Bass

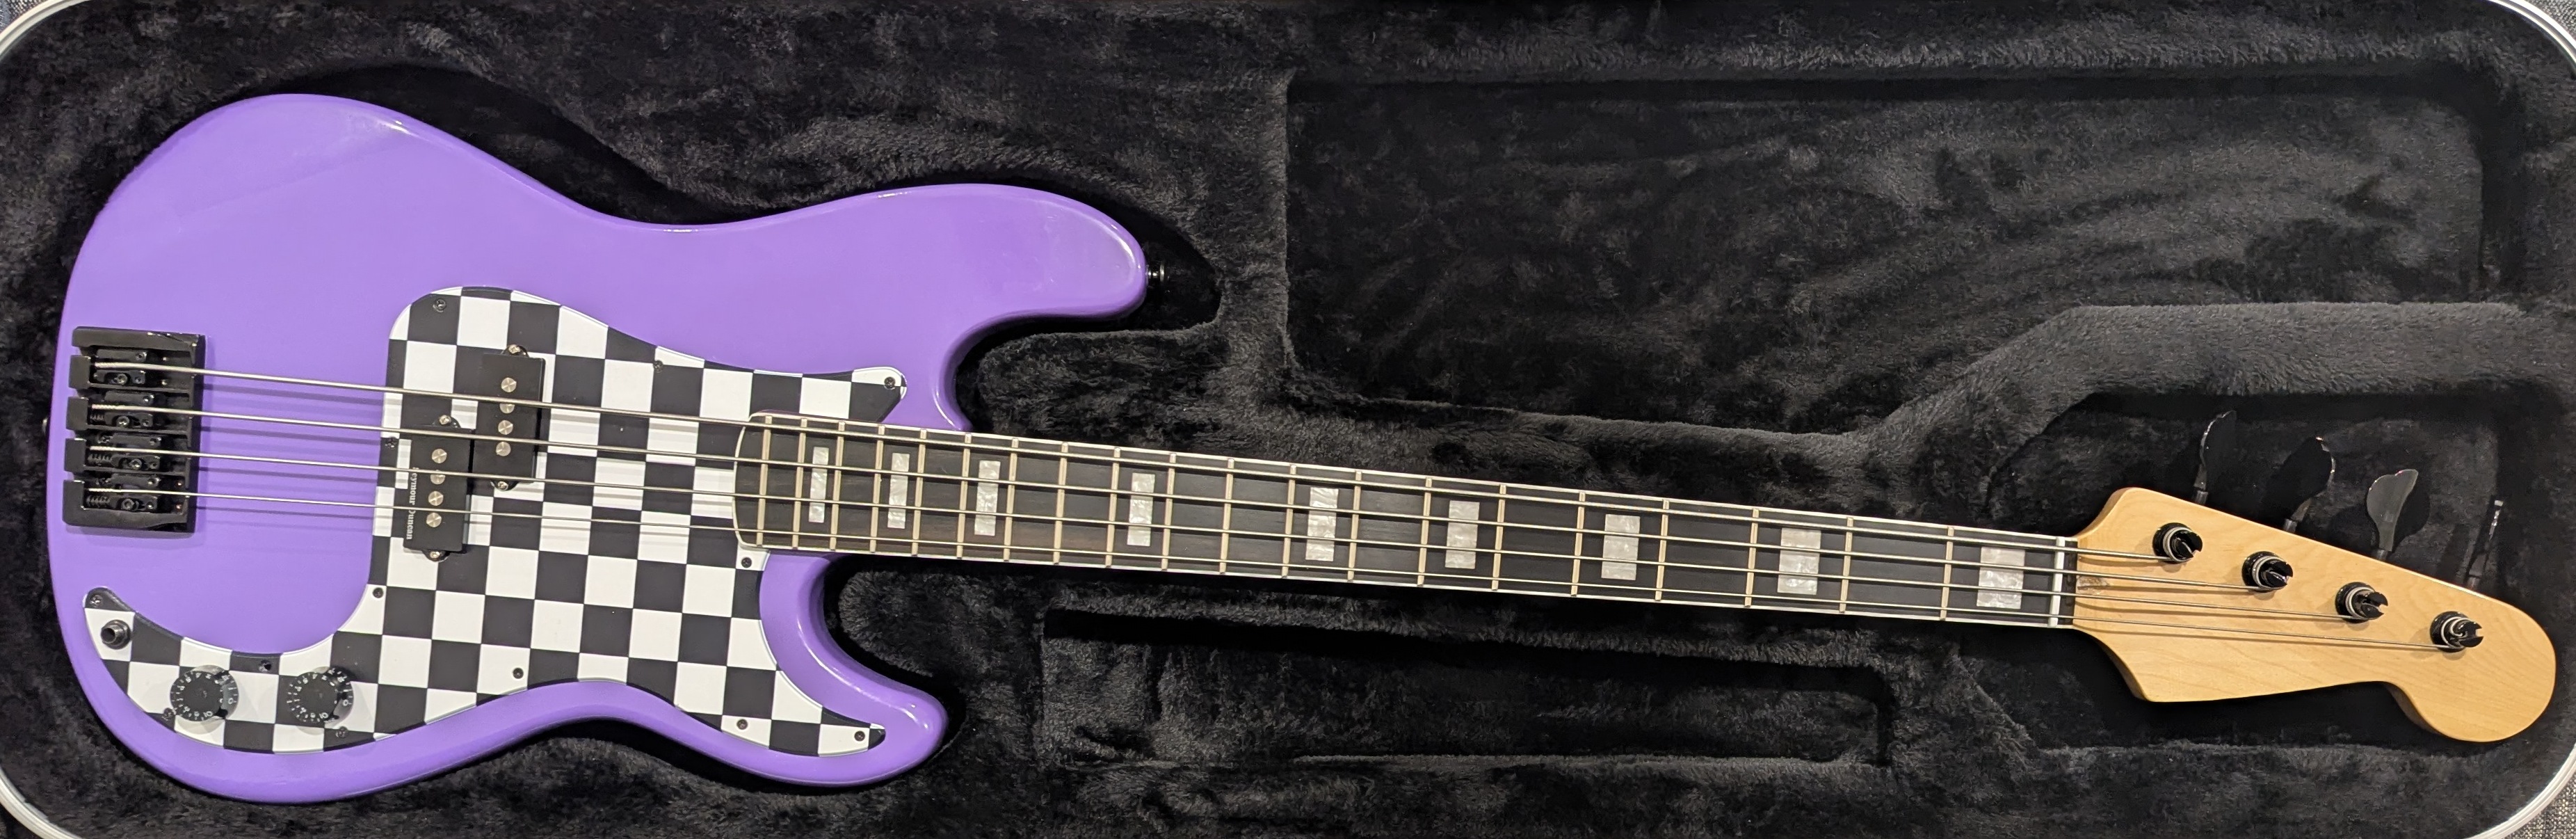
I built a custom bass for my youngest daughter for Christmas in 2024, the delivery was actually not until 2025...it took longer than I thought! It worked out great though, it has a bright punchy tone. It is her regular bass that she does all her performances and recording with. This was my thoughts when getting parts:

  • 4 string Precision Bass (P-Bass) style - ie old school Fender with the single split pickup
  • I was really happy with the Custom Neck I had made in China so I got onto them to make the neck
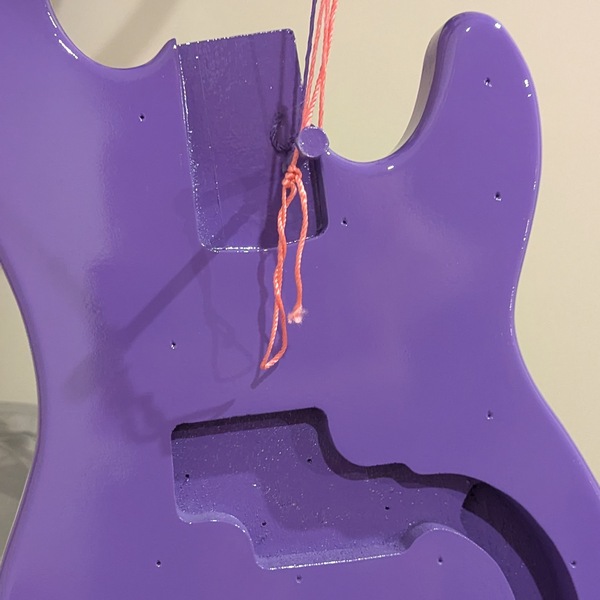
  • I just wanted a bare body that I would paint myself. Note: Don't ever get a bare body. Get them to at least primer it if not paint it, you can lightly sand it and repaint it later. It is more effort to prepare bare wood for painting than it is worth.
  • The best possible pickup that money can buy. This ended up being a SD SPB-3.
  • The best possible high mass bridge, tuners and various hardware that you can get on Aliexpress.
  • Custom paint and pickguard to my daughters specification. Purple and black/white checkerplate.

I recorded a video of lots and lots of the construction. I have yet to assemble it into a coherent video. I will do one day. But that day is not today and I've had this post sitting here in draft for more than a year, I want to post it! Most importantly, for the records, here is the parts list with the supplier and cost in $AUD2024:

ItemStoreCost
Bass Guitar
P-bass maple neck/ebony fretboard/pearl inlaysQing Ping Aliexpress$243.23
Mahogany P-bass body no paintQing Ping Aliexpress$225.16
Seymour Duncan SPB-3 1/4 Pound P-Bass 4-StringMannys$199.00
Guyker TunersAliExpress$49.28
BB404 Bass BridgeAliExpress$38.05
Checkerboard pick guardDopro Aliexpress$22.77
Primer PaintBunnings$11.95
Purple PaintBunnings$11.95
Clear PaintBunnings$11.95
Guyker Strap ButtonsAliExpress$5.62
Neck Joiner PlateAliExpress$5.25
PotentiometersAliExpress$3.98
0.047uF CapacitorAliExpress$2.90
Input JackAliExpress$1.70
Sub Total$832.79
Accessories
SKB HardcaseMega Music$189.00
Zoom B1 Four Bass Multi Effects PedalMannys$179.00
Guitar StrapAliexpress$6.85
Sub Total$374.85
Grand Total$1,207.64

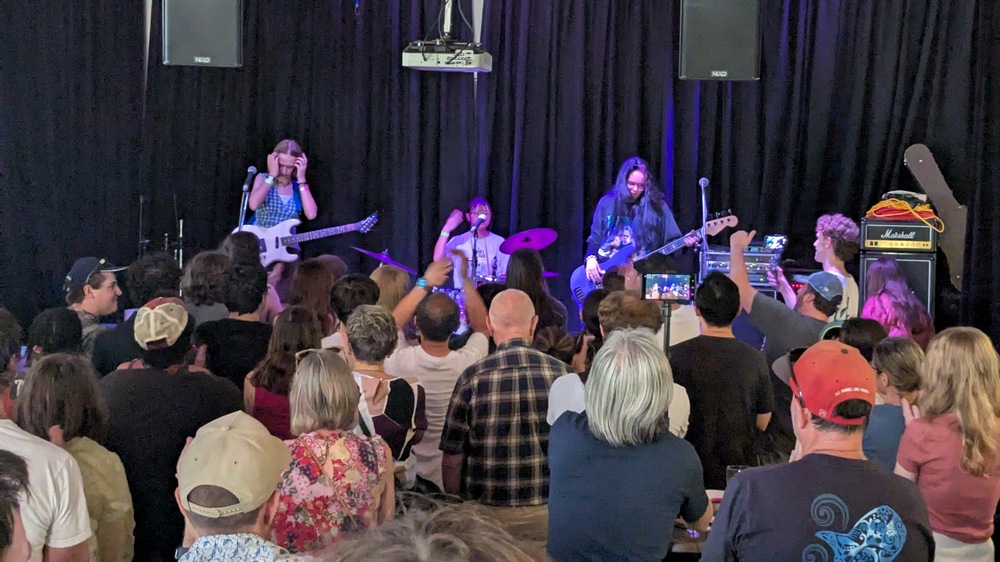
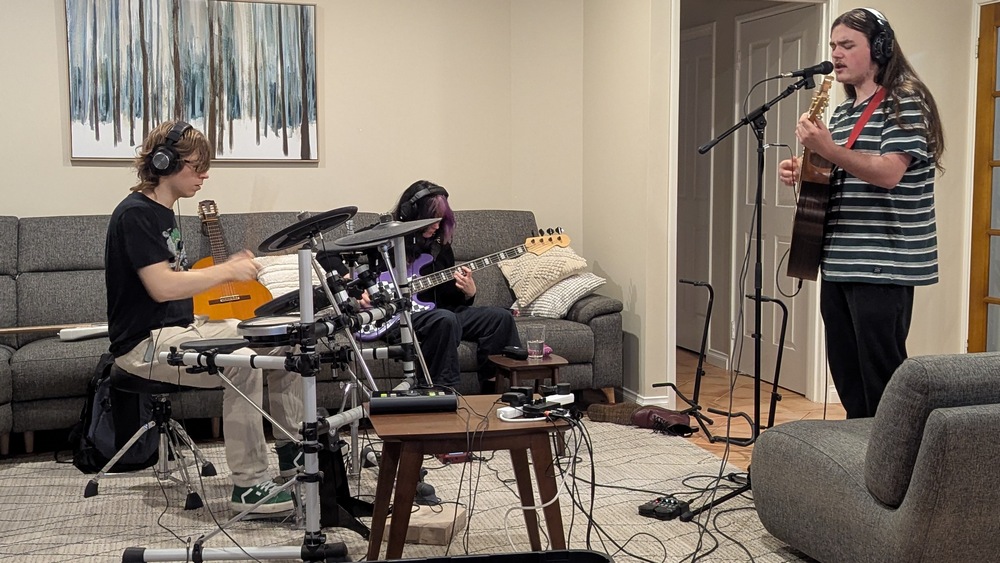
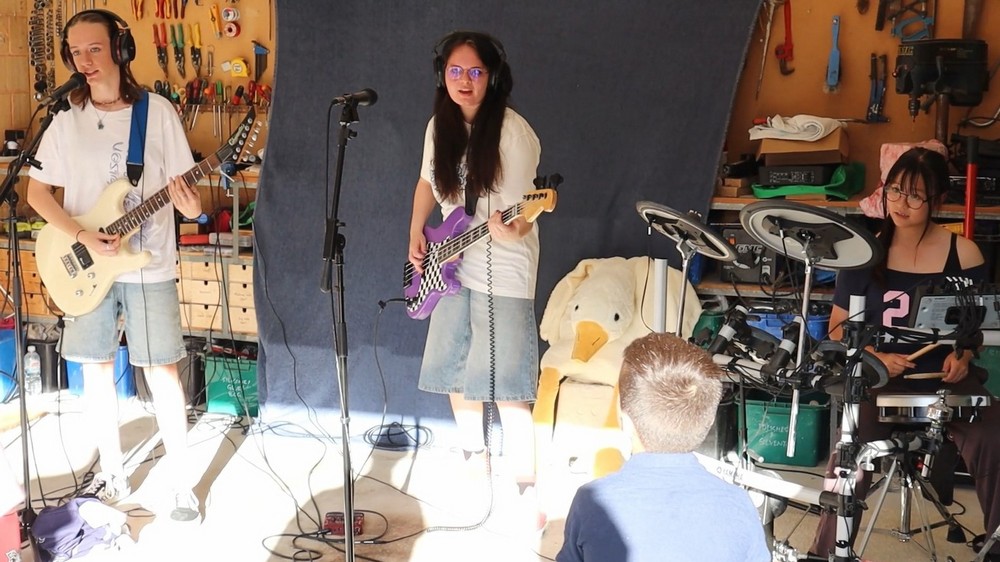
Finished enough! Paint is not great up close but looks fine from a distance! Here it is out and about!

Saturday, 27 June 2026

More earbuds

When I'm mixing I use my Steven Slate VSX headphones which are kinda expensive and sound good, they can also emulate other headphone sounds which is great. I reckon you want to mix so that the song sounds good on any system - which is a compromise - but I have been surprised how little of a compromise it really is. As in, you can have a mix which sounds great on great headphones but sounds bad in a car, or with phone speakers...but with a bit of tweaking it still sounds great on great headphones but now sounds good in a car and on phone speakers as well.

Part of this is experimenting with cheap and budget headphones. Always wired, usually earbuds, and I avoid ones with built in microphones. As in, I buy them to test mixes to see what that style of headphone will actually reproduce. I reckon a lot of people are going to listen to a mix with built in phone speakers and it's never going to sound great on them. You aren't going to hear any of the textures or subtleties so the best you can kinda get is keeping the mix clear enough to understand the vocals and feel a beat. But I'm suspecting that many people will be using a budget set of earbud headphones, possibly some that came with their phone (is that still a thing?) so having a mix sound good on that is pretty important.

In my testing of budget headphones I have discovered a few things. Firstly, that there are good budget headphones. If for you headphones are a bit of a consumable, like they are for me - as in, you will get five years tops out of them before you have broken them somehow - then budget headphones can be a wise choice for casual listening. You can also have a few sets scattered around your house for quick and easy listening. My recent purchase exposed something to me that I guess I had always known but really stood out this time.

The real low end cheap headphones will reproduce sound but they aren't worth the money, even small amounts of money. They will do some electrical or mechanical trickery so that the bass sounds big (annoying - what are we, all gamers wanting to hear big explosions?), they will cut out the low mid muddiness but push the upper mid range so that guitars and vocals sounds crisp and clear. They aren't fooling anyone.

So the mid tier budget headphones will have a more natural flatter EQ, they don't need trickery because the drivers are better. I think back to the Sennheiser MX500 earbuds - the fit, the sound - it's earbuds so the sound is not going to be perfect, but they kinda got it right. The Apple ipod style were also okay but I was never into the Apple scene.

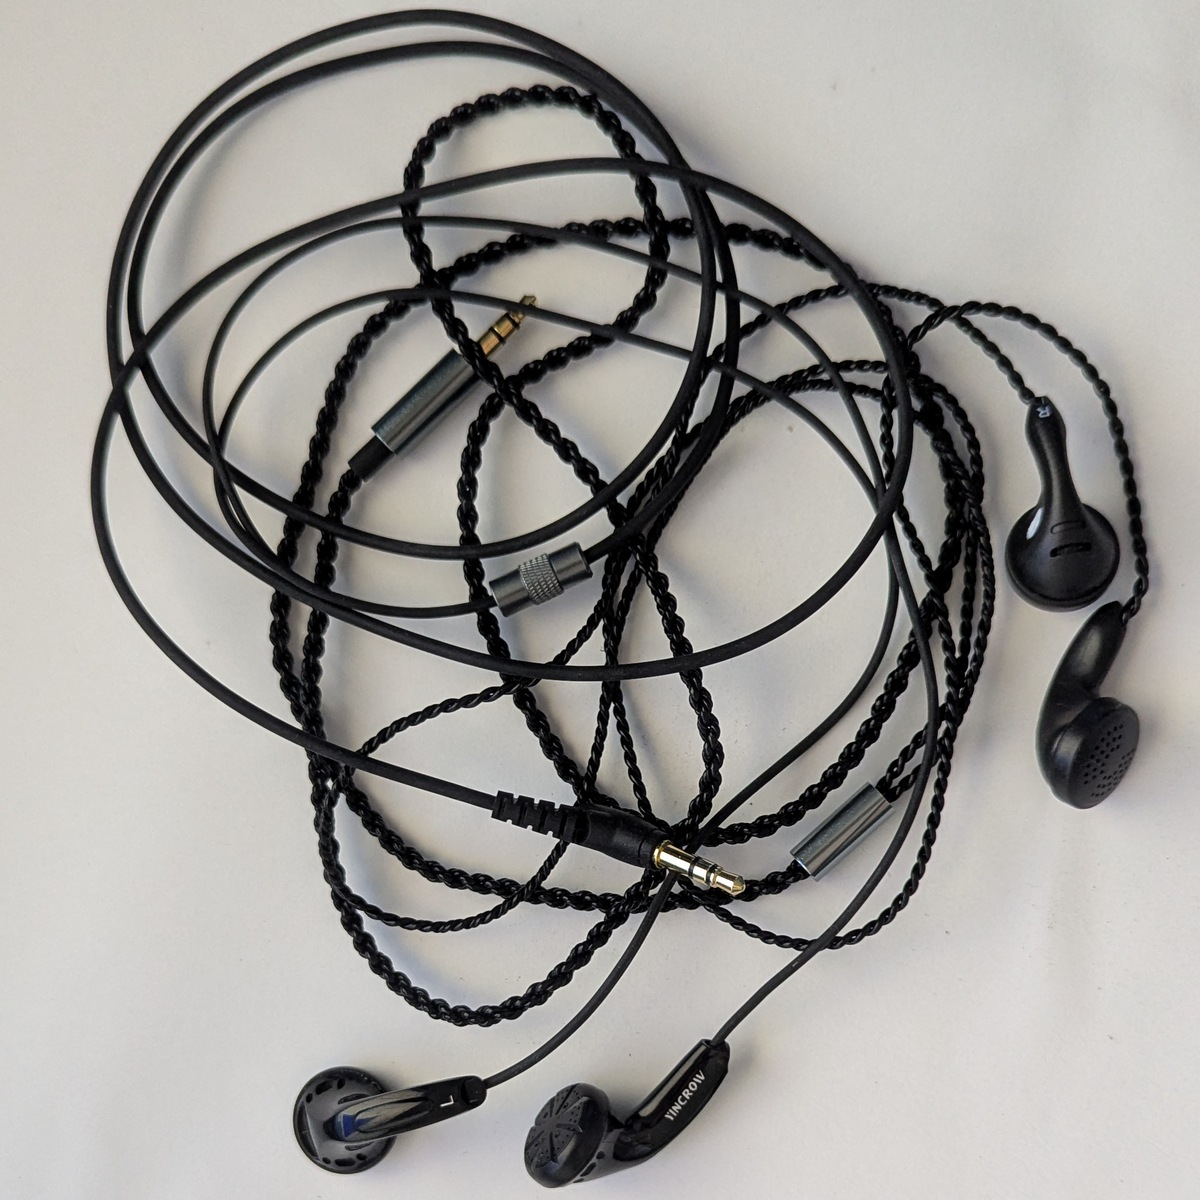
Which brings me to my point - the most recent budget headphones I have been using, when I'm walking around the house listening to mixes - kinda impressed me. Yincrow $AUD20(2025) earbuds, quite acceptable. I was testing $AUD30(2026) NiceHCK B40s. Both had a nice natural sounding EQ, there did not seem to be any trickery involved trying to disguise badness. In my A/B testing, the NiceHCKs had some edge over the Yincrows that I couldn't put my finger on. Sure, the NiceHCK has a slightly boomier bass and a slightly elevated high mid, but neither sounded "forced". The NiceHCK also had a slightly higher volume, I noticed the driver was slightly bigger so maybe it was pushing more air? Or just more efficient? I was nudging the phone volume up/down two clicks during the A/B test so to identify tone differences not volume differences.

I did some research (okay...lazy AI research...I didn't read and think through every subreddit post about headphones...) I realised what I was hearing was the minute transient response difference between the drivers. The NiceHCK must be able to respond a tiny bit faster and better articulate those tiny tiny harmonics and overtones present in the recording. So while they both had a similar frequency response there was some sort of time domain frequency smearing more apparent in the Yincrows. Quite the epiphany. Sound is complex, headphones are a compromise in reproducing it. Manufacturers are doing well with mid-tier budget headphones. Both these headphones are acceptable but the NiceHCK ones have an edge over the slightly older Yincrow, there is a lot going on in those tiny little speaker drivers!

Saturday, 2 May 2026

Jack's Utopish social media and recording a Quip

Gotta love what Jack Conte tries to do. All the creatives out there, feeding the social media beast which has turned into a piece of crap algorithm driven attention seeking advertisement focus killing machine so billionaires can make more billions...creatives don't stand a chance of being truly creative if they need to feed that machine or are creative as a hobby with the day job pays the bills. I like my day job, but I also love creativity and I have been dabbling in sharing my creativeness with the world via the internet for more than two decades now. When Jack started up Patreon several years ago I jumped onboard - it's a way for fans to support artists.

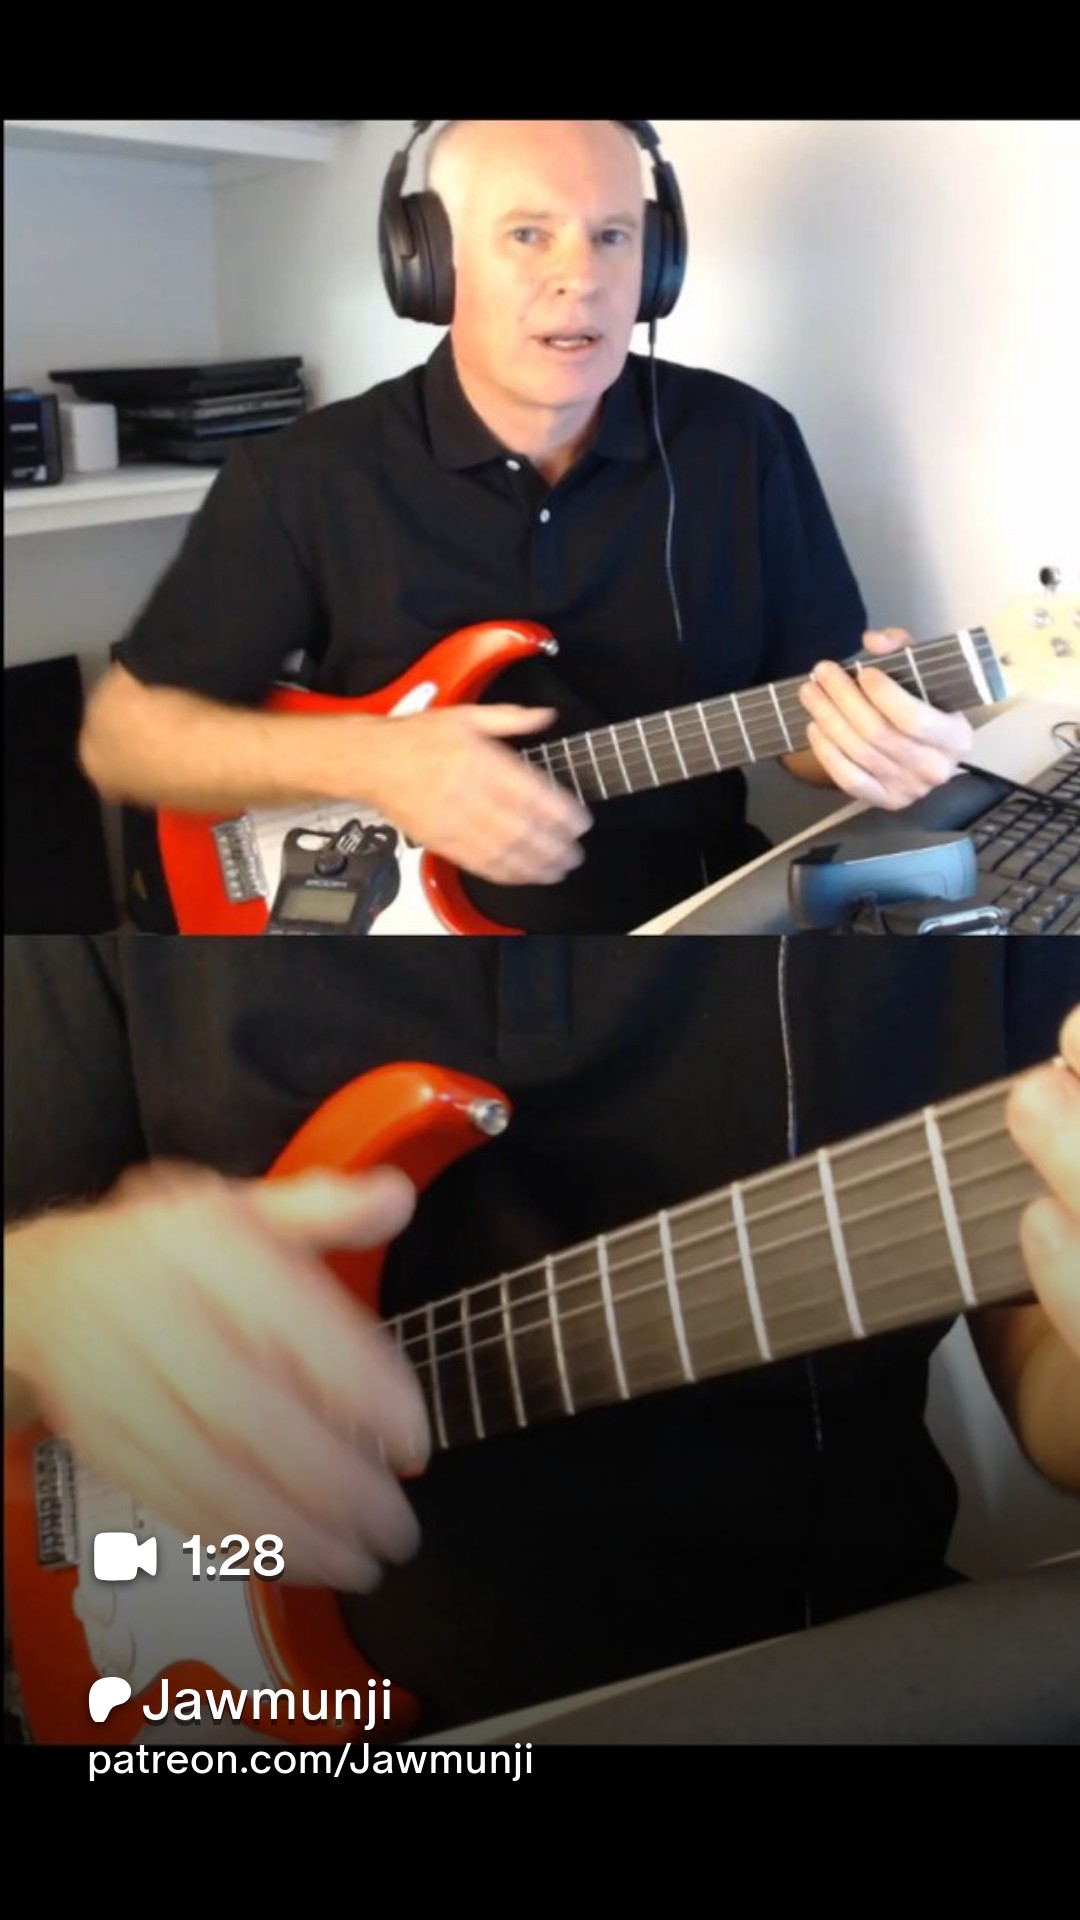
So he's just released a bunch of updates which included the concept of "Quips" - shortform videos on the platform, with the idea that they are just quick and not overproduced. Behind the scenes style. I can get onboard with that! I have been making Jawmunji Talks videos on and off for years, generally I go longer form, but I have also done a few Youtube shorts. Seeing as I'm a recovering perfectionist it's good for me to be less-producey, so I just recorded a Quip and popped it into Jack's machine. Will that machine turn ee-vil? Maybe, but I want to say no. People will game it for sure, but will it intentionally be made ee-vil like the social medias? I want to say no. Will it get traction? Maybe! It will if we feed it! Can Patreon be the vehicle where fans can actually support creatives? I kinda think it already is! I love the "1000 Fans" notion - that you "only" need 1000 fans to pay you $100 a year and that is a decent income. I think of my youngest daughter in her various bands, I know she has followers, and she sells merch at gigs, and it gets devoured. I helped her make 30 high quality CDs for Hyperfest - all sold (note to self - write a blog about that). The lino print cheap t-shirts she makes move easily at a greater profit...heh, I think the CDs are much better value for money, but there you go!

The point being that she is already supported by local fans who show up and buy merch at all her gigs. So that, applied world wide on the internet seems like an obvious step. But the current social media, the streamers, all the internet machinery for it - designed to make the maximum amount of money for shareholders and if the creatives got nothing from it then that would consider that great.

Stepping off my soapbox, I decided to post a Quip. I love to talk about creative stuff that excites me. I love to engage with people who also love to talk about the creative stuff that excites me. I don't need to make a living from being creative, but I wouldn't stop people who want to support me as well! I do have a bunch of mates already on Patreon - in the early days I used to offer stuff so I amassed a number of supporters - but I stopped offering stuff (it was in a very very grey legal area) - and encouraged supporters who were expecting stuff to cancel their subscriptions - but offered cheap tiers for anyone who wanted to keep supporting me. Some did! Thank you supporters - it is great to engage with fans but when someone supports financially it changes things...people making a sacrifice because they believe in something. They don't have to sacrifice but they want to.

Let's switch to tech talking.

I would dearly love to have a dedicated room with cool gear set up to make it super easy for me record a video whenever I am in the creative mood. I do not have that. So just now I spent more time setting up the gear than recording the video. Shame. So here are some notes to Future JAW to help him out:

  • OBS Studio: still amazing. Keep using it for this sort of thing.
  • Web cameras: I'm running a classic Logitech C922 Pro and a C920. Both are dated - I'm going to buy a more modern replacement for the C920. Important - don't saturate your USB bus with webcam feeds, try to make sure each one is plugged into a different USB bus...currently I have one on the laptop and one on the dock.
  • Microphone: my ever-useful Zoom H1D. Turn it on a set it into audio interface mode. Plug it into USB, it's low bandwidth so it will be fine. In OBS Studio go into Settings->Audio and point a Mic/Auxiliary Audio to it.
    Remember! Windows->Sound Settings for Input and Output definitively show what is connected. All apps refer to the devices there including OBS!
  • PeSonus Studio 1824 interface, via Reaper DAW: this is the complicated bit. Guitar instrument cable -> PreSonus interface -> USB to laptop -> Reaper DAW -> OBS + headphones. I use the 1824 in ASIO mode, which is the best way to interface with an interface, and Reaper can apply fx and send them back to the interface, so I plug my headphones into the front of it and get near-zero latency. HOWEVER that isn't shared on the Windows laptop I use UNLESS you turn on Loopback=virtual in the PreSonus Universal Control application. Once you do that, you will see in Sound Settings an input for PreSonus Virtual - which you can then add to OBS as another Mic/Auxiliary Audio.
  • OBS Studio again: brings it all together. I've tried different picture-in-picture/split/shifting/etc methods for the webcams, I went for portrait this time, one webcam on top another on the bottom. In Settings->Video I went Base of 1080x1920 (ie portrait HD). Then it is a case of adding the two webcams, cropping and moving them to fit. The Zoom HD1 microphone I initially added a gate filter, but the electric guitar acoustically was getting through the gate when I dug in. If I increased the gate I had to shout to trigger it. So I added a mute/unmute hotkey and remembered to deal with it. Not great.

When in doubt, just talk through your problems with a chatbot - that's what I did. General life tip with chatbots: you have to have some basic knowledge of what you are trying to achieve, you have to half know the answer or they will lead you down a never ending garden trail to nowhere. You have to have  a year's worth of built up a knowledge of knowing how to get what you need from a chatbot, accumulated from trial and error...hence I wrote the notes above to help Future JAW when he forgets things.

What I need to do to be a little better for next time (and there is always a next time, I have been doing "behind the scenes" videos for 20 years) - at least one better webcam, and a microphone stand that puts a microphone close to my mouth so I don't have to worry about mute/unmute, so I can just use gating.

Oh and I played Pink Floyd Learning to Fly. I was aiming for a more "Pulse" live feel, so more bassnotes, wasn't quite getting it, still undecided whether I should be hitting it that hard. The G string rings a bit too much, wasn't happy with my playthrough. BUT THAT'S ALRIGHT...if you want perfection use AI slop.

Sunday, 25 January 2026

Rode M5s for ambience mics

Over the Christmas break I picked up a matched pair of Rode M5 condenser mics, to fit in my local church auditorium, to mic up the congregation singing. Ambient mics, crowd mics, whatever you'd like to call them - I have fallen in love with the sound they can bring to a mix. We'd been using Samson C02 mics for a while now and they were doing a reasonable job, but the room/location/small diaphragm condenser style get a lot of house PA in them. I use vocal isolation to get rid of the drums and bass and other instruments but still get a lot of main vocalists reflecting into the isolated vocals so I can't go too hard with them in the mix.

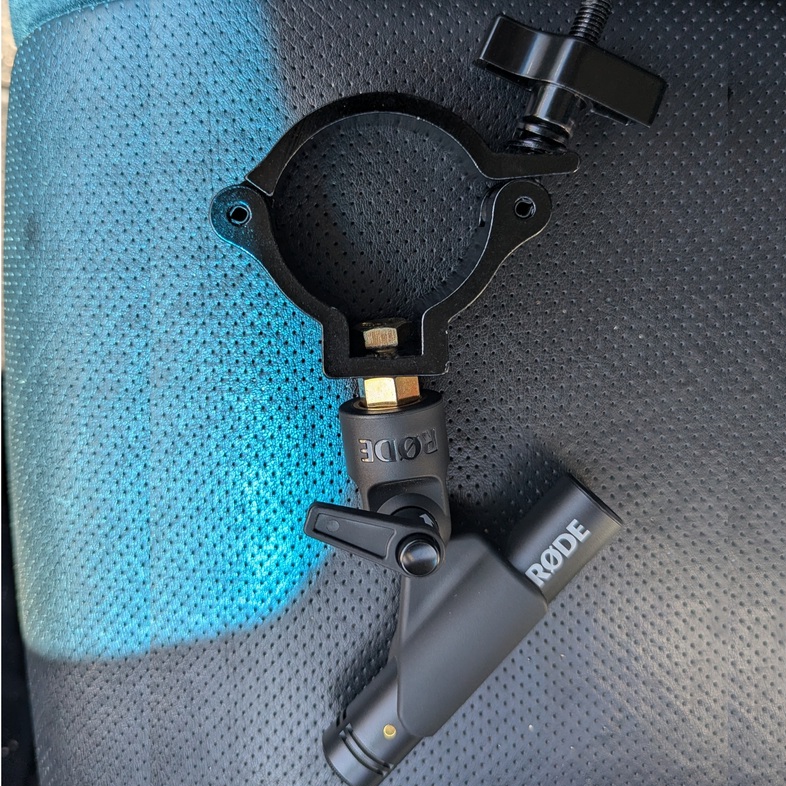
My thought was to upgrade the mics and to mount them up high on the lighting rail to get them away from the musos. The mounting bracket was interesting - you can buy lighting rail brackets very cheap, but they are all metric. However it was pretty easy to source a 3/8 UNC bolt so that the bracket would do the standard microphone mount.

First recording I discovered that I liked the Rode M5 frequency response - very faithful, with a crisp sound, an improvement over the Samson C02. However, mounting them high actually increased the distance to the audience so I reckon the house PA bleed may actually be slightly worse. Argh! In hindsight, that was probably always going to happen, condenser mics do a great job of picking up everything, so unless you really have them jammed into what you are trying to mic then they are going to get everything.

Experiment 2 is going to be putting a set of shotgun mics up high and moving the M5s lower and aiming closer. The shotgun mics are pretty much condensers as well except they have clever slots on the sides to reject side sound...so they are going to pickup a lot more of what you are pointing them at. To get the "pointing at" even better, I have a green laser pointer for next time - hold it against the side of the mic so it is pointing in the same direction as the mic, and set the location based on the green dot - for the shotguns that shall be middle left/middle right, for the M5s closer to the front.

It shall be an interesting experiment - once again I'm learning by doing. I might find that the auditorium reflections are complex and the shotguns won't help that much. It might take longer and cost more to come up with a solution, perhaps getting in an expert would get a better result faster, but there is nothing like learning the hard way through experimentation to really understand something!

Saturday, 29 November 2025

More cracked/torn nail repairs

Some of us guitar players like a bit of fingernail. on our right hands. Especially when plucking nylon strings, it brings out the higher frequencies. Nylon can be mellow and dull on just fleshy fingertips. As much as you try not to break fingernails - doing things left handed, avoiding some activities which are known fingernail crackers - it still happens, generally at the worst possible timing. I've written about nail repair before but now I've got some science to improve the process! And pictures!

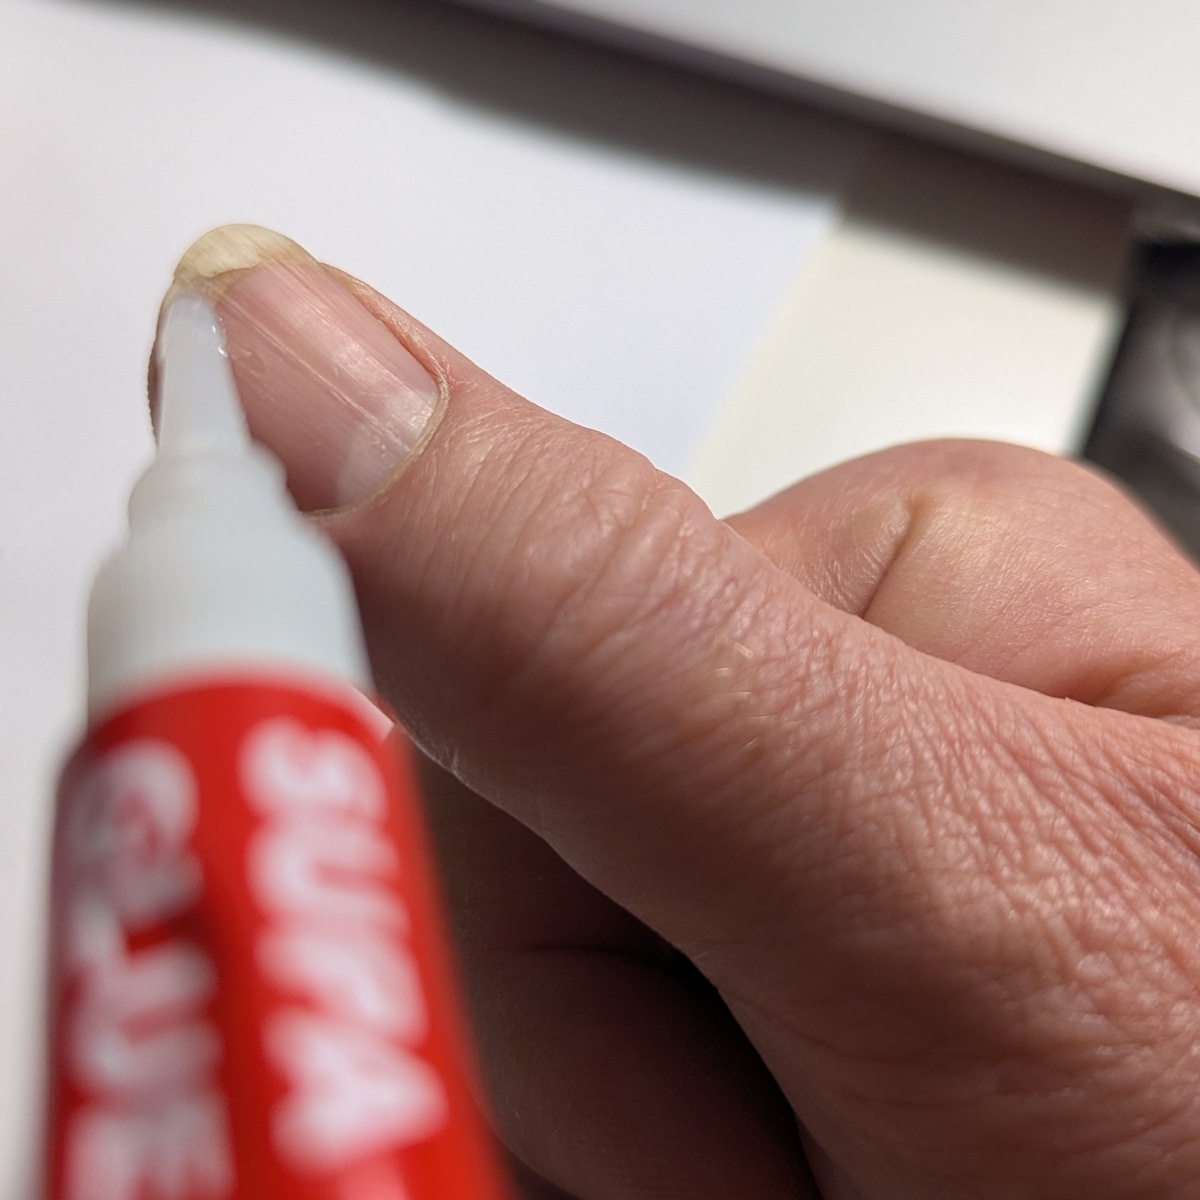
Superglue is still at the heart of it, but if you mix superglue with sodium bicarbonate - easily sourced while grocery shopping if you don't already have some - you get a really tough substance. I was using it while repairing guitar nuts. Last time I was applying superglue and waiting, now I add superglue and sodium bicarbonate makes an even tougher thicker layer that sets hard in seconds.

The science is that when you mix superglue (ethyl cyanoacrylate) with a weak base such as sodium bicarbonate firstly it hardens extremely quickly and secondly forms long polymer bonds. That's good, it's tough!

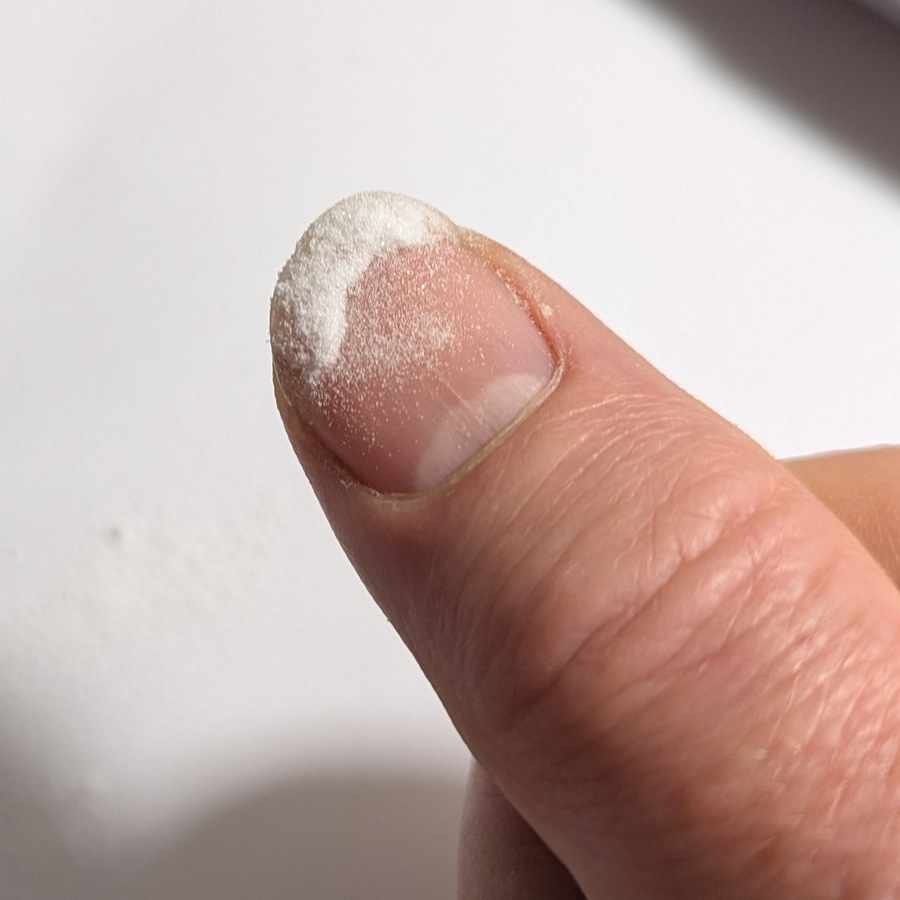
My process is to firstly have a stash of superglue tubes at the ready. Once opened it will eventually go off even when capped, and since you can get tubes for under 50c each in bulk, just have a stash at the ready. Step 1 is to put a drop or two across the affected area, let it flow out...basically just go for the tip of the nail over where you have cracked/torn it. If it is too challenging to get any into the tear (use toothpicks to poke around) don't stress it. What can be annoying is if you get a bit of glue on the underside of your nail and it sticks your skin to the nail... If that happens you can reset and start again - Acetone dissolves superglue.

Step 2 is to sprinkle sodium bicarbonate over the glue. Just add more than you need, once it sets you dust off the rest. Be cautious, it gets hot as it reacts. Don't do too much at once.

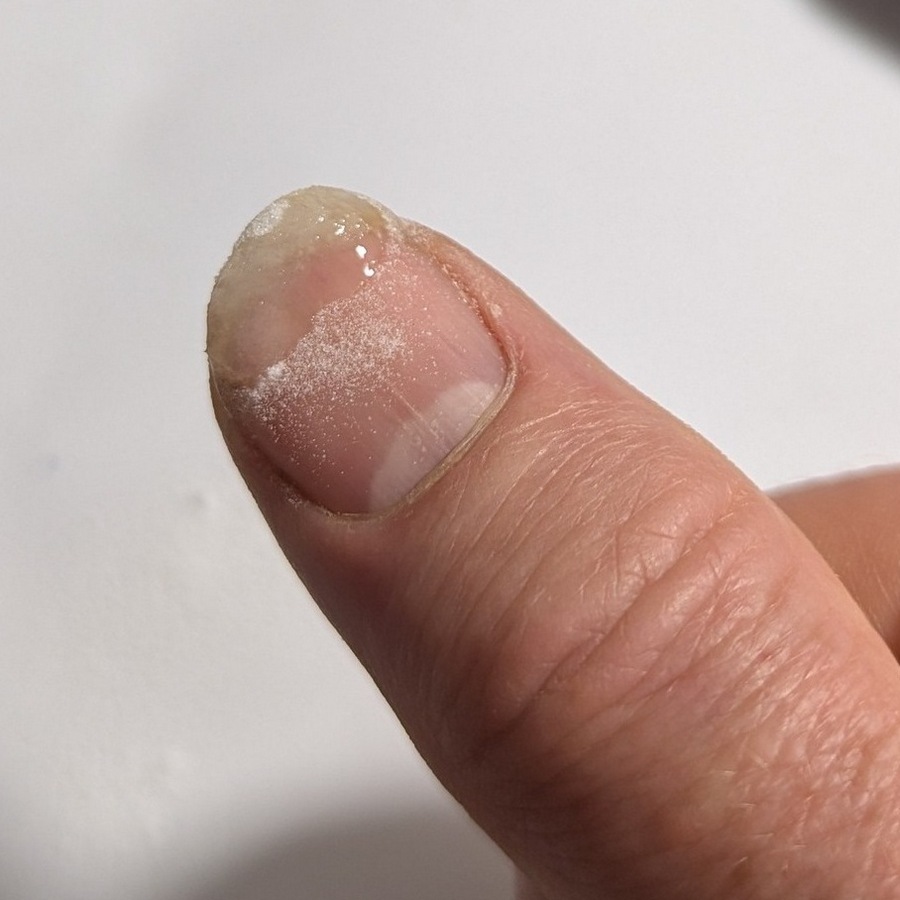
Step 3 is to then add another drop or two to float over the rough surface of bicarb. This will build a good thickness layer. Let it set, will only take a moment.

Step 4 is to do a bit of filing - just smooth it off, don't touch your actual nail. If you are a picker/fiddler, you will find having a lump of cement on the tip of your fingernail frustrating. Relax, let it go.

It will be good for a week before it will start to crack and peel away from your nail. Redo it again if you need. This time around I redid it a second time as I needed to play two gigs separated by a fortnight. After that, it will either have cracked off or just remove it with acetone.

Happy days!

Glued and powdered Second glue coat ready for light shaping

Sunday, 29 June 2025

Shine on you crazy Partscaster

As per last two times we spoke, "Shine On You Crazy Diamond" is coming along nicely, it's actually really addictive. I'm roughly following Yoni's version but I have different artistic directions, a different style and different ability...so a casual listener would say it is the same, but it's not. There is one thing him and I do agree upon - the second Gilmour solo in Part iii is not worth the effort! A lot of work, and by then only the diehard Floyd fans would still be listening. So I have also cut Part iii in half and launch into Part iv straight after Rick's minimoog solo. It's so nice that solo by the way, it could be my favourite part. It's quiet, understated but packs an emotional punch. Funny, it's only when you are studying a song like this that you notice the artistic differences between the soloists - Dave and Rick. It stands out!

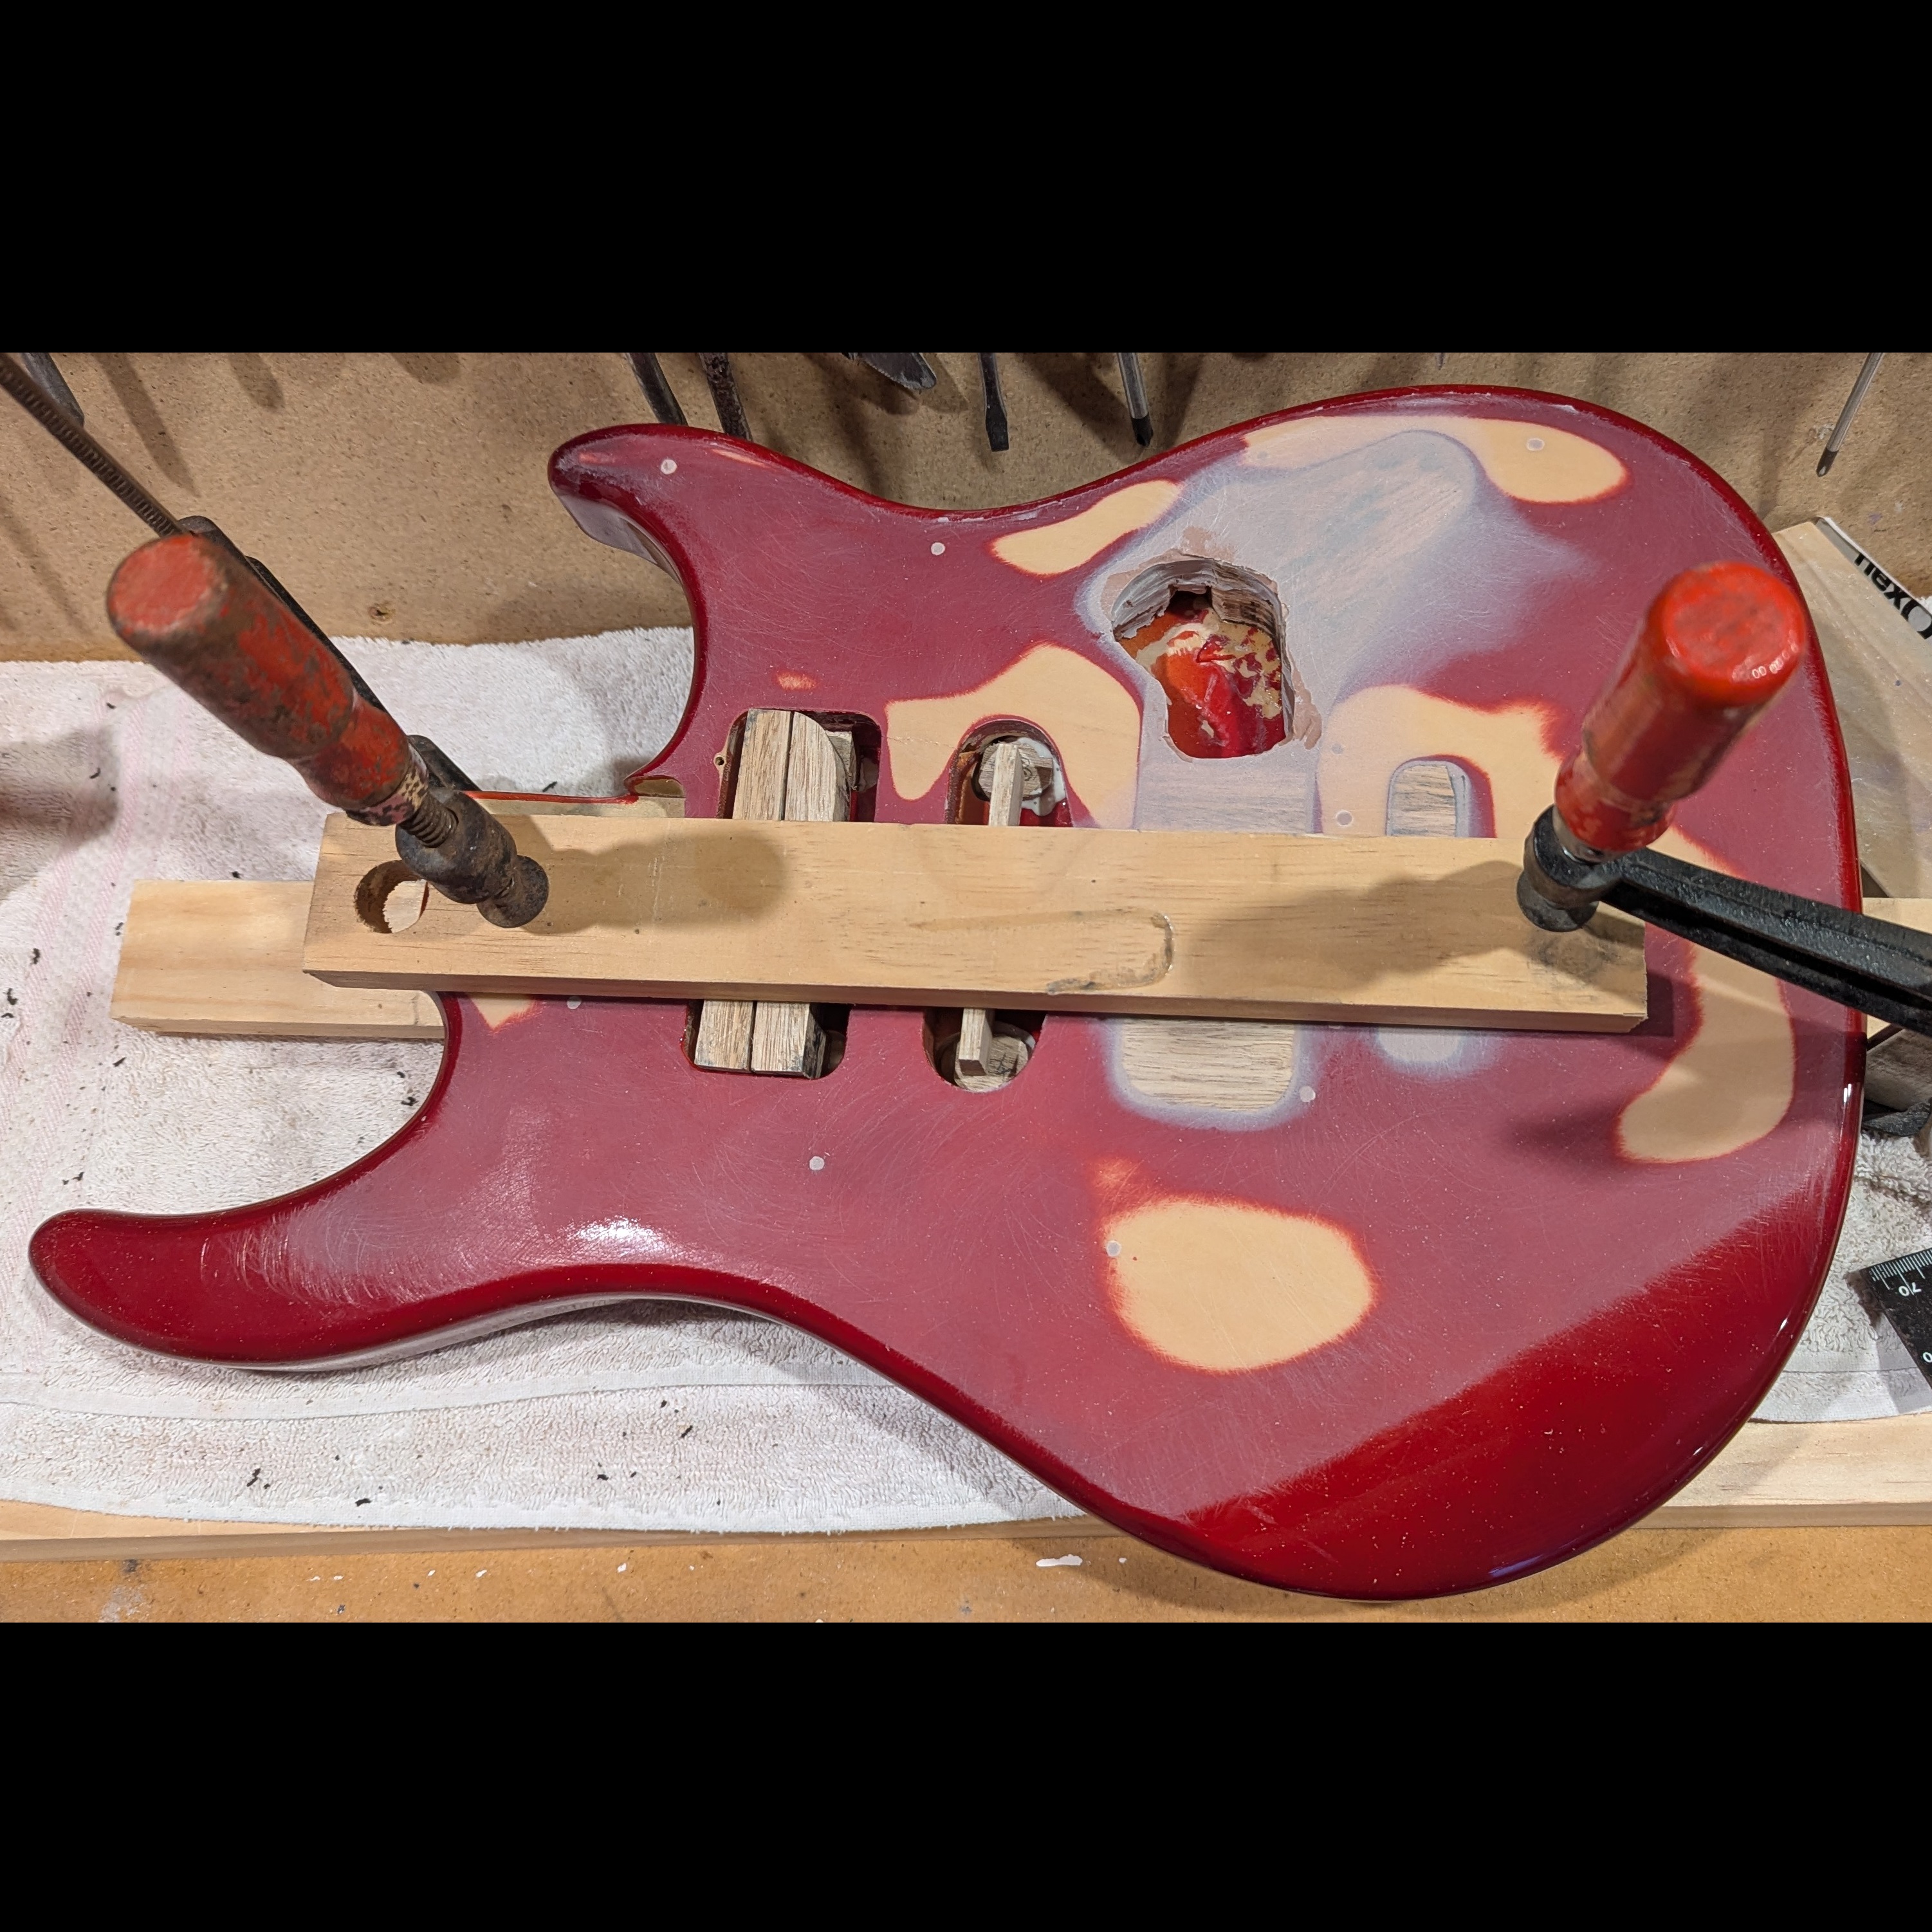
The Partscaster is underway, I am quite committed. I spent time cutting and glue pieces of wood into the cavities I'm no longer using, it was an interesting exercise in 3D. Took about 3 different gluing sessions. Then I hit the areas with builder's filler, which is pretty much the same as automotive filler, just a two part sandable filler. Came up really nice. Which led me to believe - I won't need to put on a layer of spray putty (high fill primer). Let me shout this out loud for Future JAW and anyone else listening: YOU ALWAYS NEED TO USE SPRAY PUTTY. I'm three coats of paint in and I can still see where my repairs are in a few places. Even thick primer style paint will not be enough to cover up repairs. If the only thing you are doing is repainting, okay, sure, don't worry about spray putty. But for anything else, SPRAY PUTTY.

It will be fine, it doesn't need to be perfect, but I know I could do better. I'm still vaguely thinking about applying a coat or putty and restarting the paint layer again. Not all the guitar parts are in yet so I still have time for more paint, wait, sand, paint, wait, sand...

More photos to come as I continue the work!

Wednesday, 4 June 2025

Custom Custom Electric

A few years ago I made a custom electric guitar. It was pretty rough at first, the nut was not great so it fretted poorly towards the nut - always went sharp. I later filed it down, and went too far, so then it buzzed in the open positions. But as a practice guitar it is quiet unplugged and has a soft touch like a classical guitar. My Esteve classical hurts my head - I have been playing guitars at full fingerstyle tilt for so long that when my ears send the signal to my brain it just says "NO MORE! JUST STOP". So I could play with earplugs to drop the amplitude, or I could just play quieter (that's actually a good idea), instead I built an electric that feels like a classical and I play it unplugged.

I've been playing it so long I'm used to it. But every time I think about recording something with it, I can't bear the tone. It's just so, umm, electric. I don't understand and don't have an ear for electric guitar tone.

Recently I'd been playing "Shine On You Crazy Diamond" as a fingerstyle piece, on the electric. I decided to have a try recording again this time through an interface and with Reaper DAW with some VSTs. The tone was better! I fiddled around with pickup and tone selection, ending up with neck only and tone about 3. So super mellow. But I then cranked the mid-high in EQ. I guess that means I could have backed off the EQ and rolled off the tone...but I'm thinking that I sculpted the tone in software in a much more complicated way than the simple RC analogue lowpass filter that is a tone knob.

So I didn't despise the sound, and it was Capo 3 so the nut buzz was masked - yes, I did tune at Capo 3 to account for any Capo-sharpened-my-bass-notes issues.

This got me thinking!

  • I like the feel of the guitar almost as much as I like the feel of nylon.
  • I can buy parts and do some alterations to the guitar so keep going down the path I discovered.
  • I'm sure I can get a pedal to do the EQ and the reverb so I don't have to play through a laptop.

I spitballed ideas with ChatGPT 4.5 and since I'm a total engineer and I take everything back to first principles, the plan I came up with seemed to make engineering sense. ChatGPT is a little too excited and encouraging and desperate to please, so you have to kinda work past that, so I tried to keep to the fundamentals of what the plan would result in. Ever since my great ChatGPT debacle I am quite wary of the LLMs. But they are great to hash out ideas with, because they know the entire internet. This is what I came up with:

  • Get some new pickups. I was amazed with Wilkinson pickups when I did the bass build for the daughter (still working on the build video), they rivalled the Seymour Duncan for 1/6th the price. Shhh, don't tell Dunc I said that. I did make a long tedious video about it here.
  • ChatGPT talked me out of a single neck humbucker. Because I play right up on the fretboard, the tone is already super mellow, and a humbucker will darken/smooth the tone rather than brighten it.
  • I don't want a bridge pickup. They just sound nasty for fingerstyle. But a middle pickup could be a nice touch, especially if it is reverse wound reverse polarity, because it will reduce hum, and add a bit of extra sparkle because it's going to pick up more harmonics than the primarily fundamentals of the neck pickup.
  • If I'm only going to have a neck and a middle, ChatGPT suggests a pot to blend the pickups. I had never really thought about this, but there is a thing called an MN pot which has two gangs, one reverse to the other, and it is logarithmic, which is better suited to volume, then there will be a middle point where both have the same resistance applied. So basically, a pot that means you can be just neck, just middle, or an infinite blend in between :-)
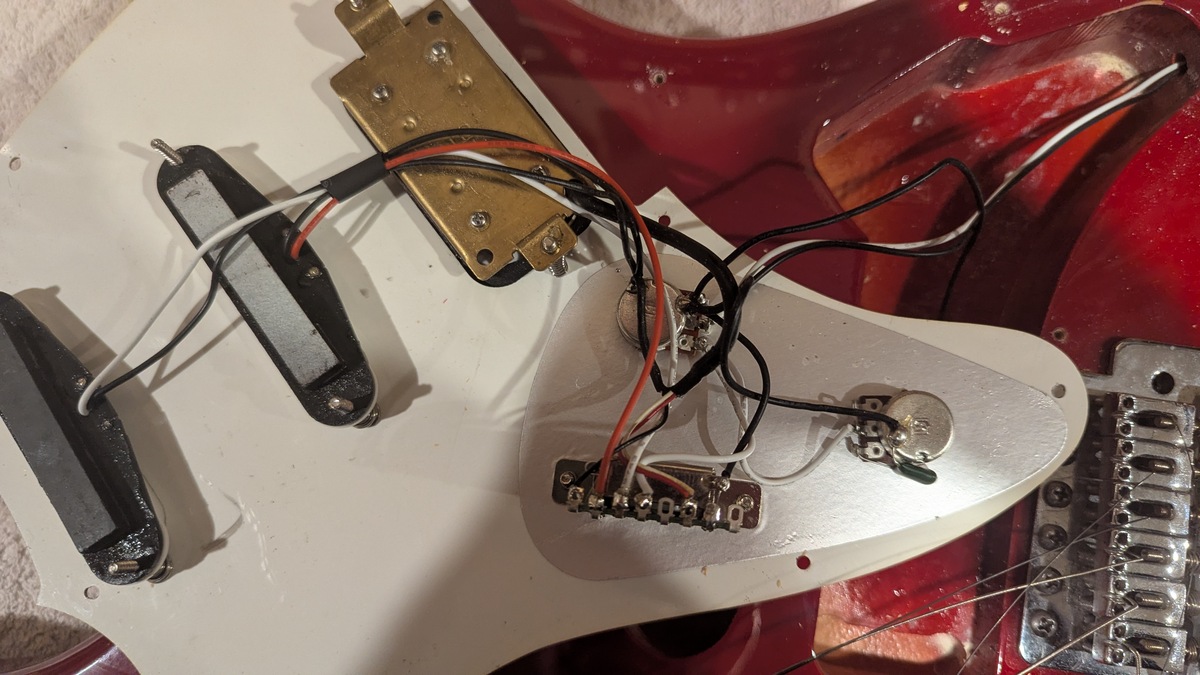
  • I don't think I've ever used a tremolo in my life. I will convert this to a hardtail. Which means I will fill the back cavity and the front, and I reckon I will even fill the bridge pickup area to give this thing even more stability.
  • Wood mounted pickups. I'm not a fan of this whole pickup-mounted-to-the-pickguard, to me it seems lazy. I did wood mounted pickup on the bass build - it's not hard, just fiddlier.
  • Position of middle pickup - I think I will push that back a touch. The pickups are placed in spots they capture the best flavour of harmonics...moving closer to the bridge should pick up brighter harmonics. If I'm blending, I want to be able to blend in a decent amount of brightness. Perhaps I will find I only ever want the neck pickup...I don't know! But I know I will never want a bridge pickup :-)
  • There will be a blending pot, so I will also want a master volume pot. MN500k for the blend, and A500k for the master volume. 500k is brighter than 250k. I don't want a tone knob. I will look after EQ in the effects pedal. And I don't need a pickup selector switch!
  • Shield the whole cavity. I already have a roll of copper from the last build (note to self - make sure to ground the shield...)
  • A pickguard blank. I think I will go olde school white pearl, with white pickups and knobs. I think that looks traditional with the Candy Apple Red colour!
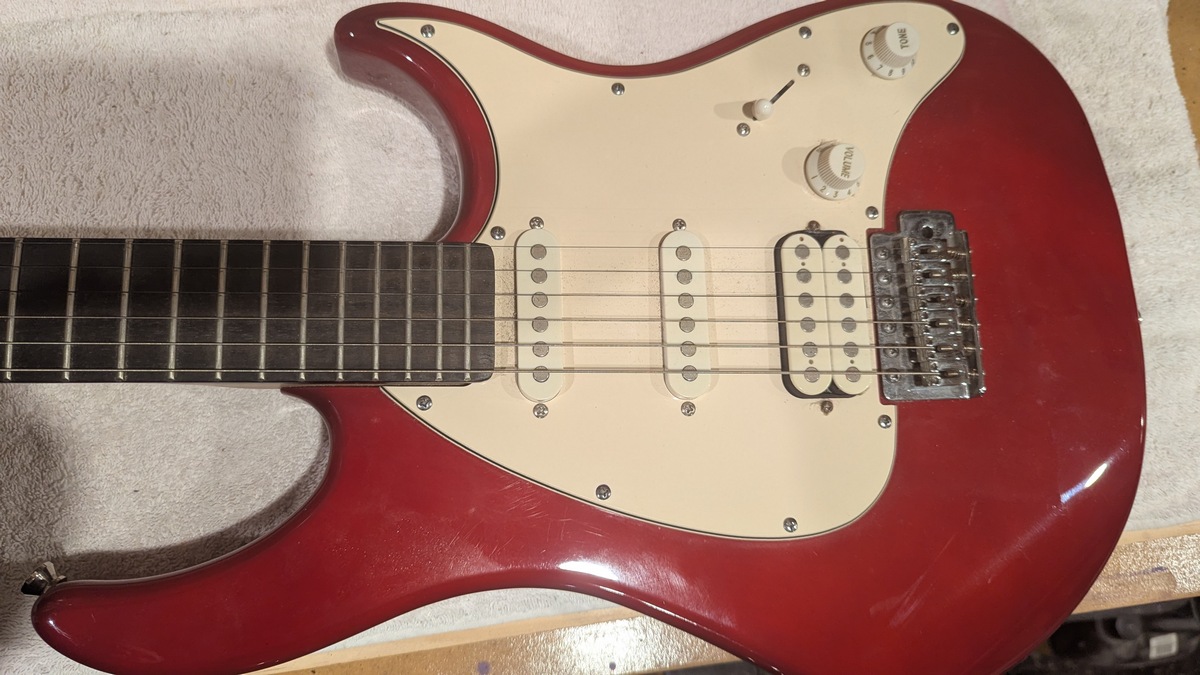
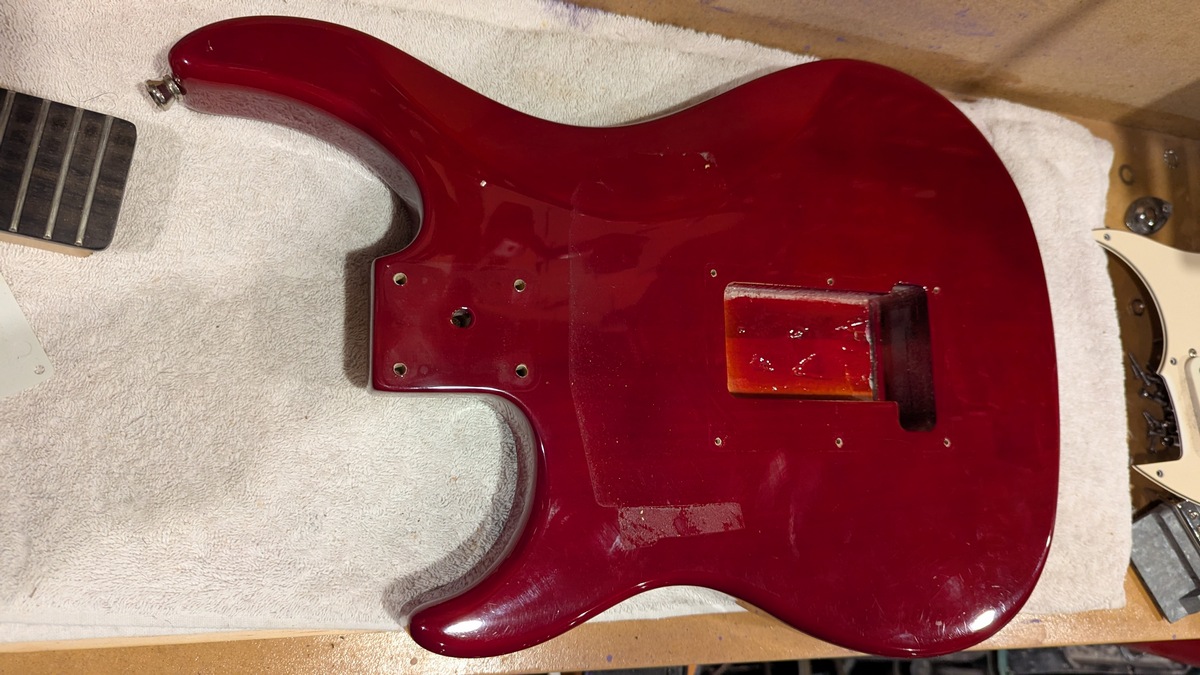
  • I might need to repaint. I'm not too frightened of paint guitar bodies anymore, I have done one. I know what mistakes I made :-) I would like to avoid repainting, but I will definitely need to do something to the back, maybe just a black undercoat. I think all the mods I'm making on the front will be hidden by the pickguard.
  • A fret grind and re-crown. The frets are SOOO high! Every time I fret a string, especially the low string, I bend it. And it has 2.6mm wide frets - I'm used to 1.9mm frets on classicals which are more immune to bending just through fretting. I want this thing to intonate nicely - I want to be able to put a Capo on and not have to re-tune for the Capo!

So all these things have a goal of making this guitar an acoustic fingerpicker's delight - with a warm but still sparkly tone, as good as I can get it. The body is a cheap Peavey, it's solid wood at least, maybe Basswood? I will probably block it up with Tassie oak which Bunnings have plenty of, and a bit of filler in the trickier spaces!

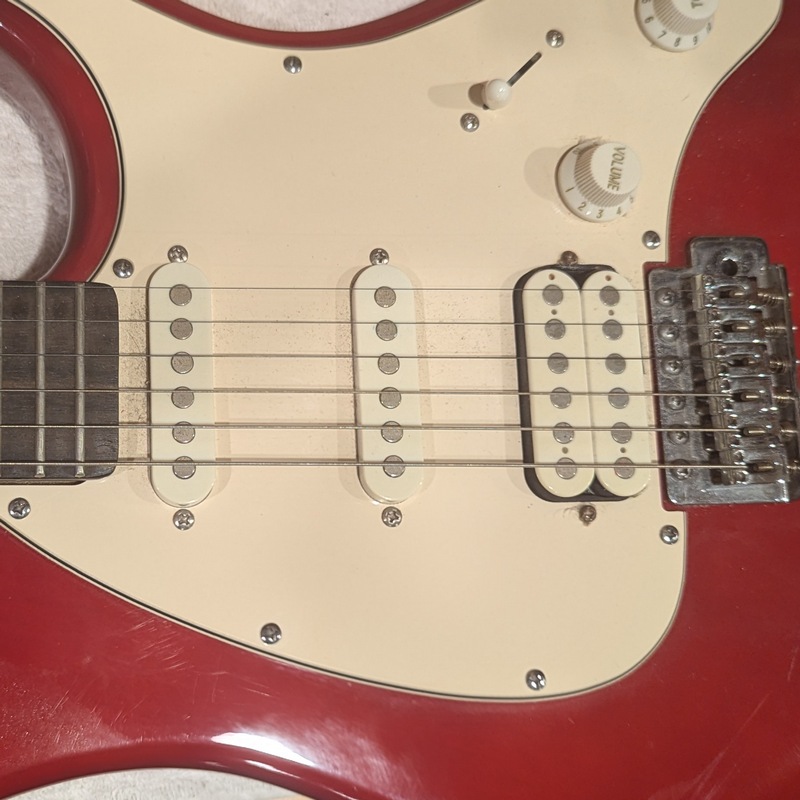
Experimental as anything! Watch this space! Here's some pictures!

Before Electrics
Front Back

Monday, 21 April 2025

Cole Clarke CCFL2EC-SRE and YouTube Shorts

"Birthday present." That was the rationale behind buying a new acoustic that is worth more than my car. Okay, I drive an old car.

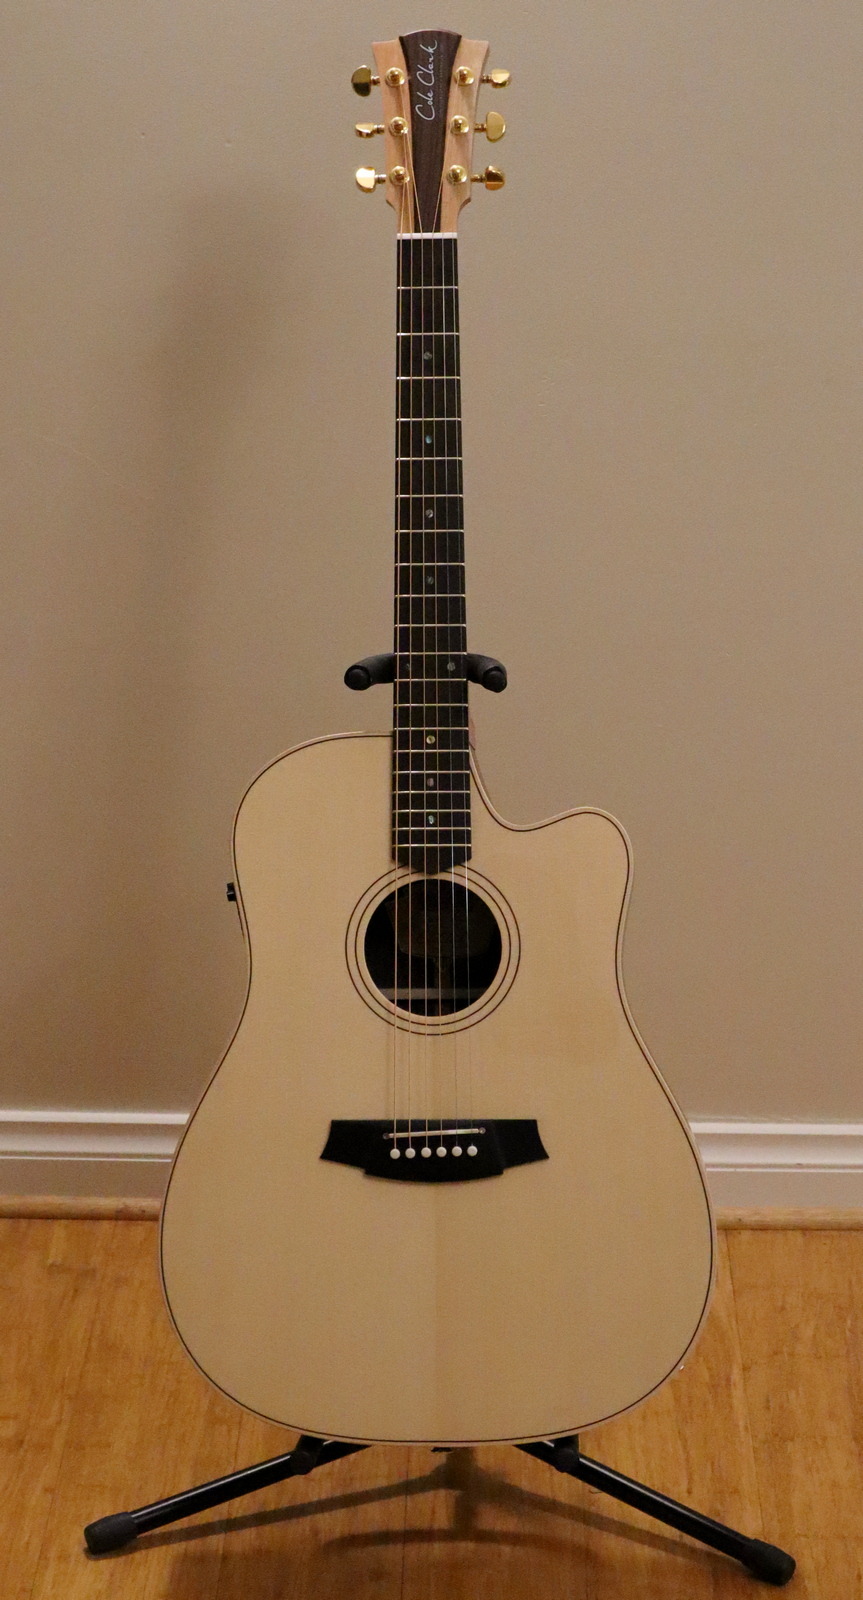
It's a Cole Clarke CCFL2EC-SRE dreadnaught, serial 241142042, as mentioned in my last post about acoustics. I went back the next day and bought it. Managed to convince them to knock $100 off and throw in a set of strings but it still came in at $3.3k. Cole Clarke do many different woods for the CCFL2, and the price seems to vary within the $2k-$3k brackets...but of course I had to like the one with the increasingly rare gold standard of soundboards, a Sitka Spruce top, a wood that is hundreds of years old, Indian Rosewood back and sides, and my absolute favourite, Ebony fretboard and bridge. Neck/headstock is Australian Queensland Maple. So woods - kinda as good as it gets and therefore priced appropriately.

I showed it to my wife "yeah, looks boring, about what I expected" "But the exotic rare woods! And the simplicity of design with clean lines, it's beautiful! (looks at the rosette, which is two circles) Oh, okay, maybe it is a little boring. But listen to this!"

Acoustically it sounds great. I did a side by side with the Maton and the Cole Clarke and my wife immediately recognised the better tone. Plugged in is sensational, which is the primary use I'm going to have for it - playing through a house PA. Definitely needs an introductory video.

...which I decided I would have another crack at making a YouTube Short. I kinda tried a few years back and it all seemed too hard I gave up very quickly. After an extremely brief internet search, all I had to do was make a portrait video, keep it short, heh, and upload it. YouTube will recognise it is a short and deal with it accordingly.

Now I've seen some shorts, and I could picture one in my head, it's interesting how they always wrap and restart. So I mentally prepared it with a cool epilogue as a wrapper. Mentally reminiscent to Pink Floyd The Wall wrapper "Isn't this...where we came in?" or maybe a bit more like Jeff Wayne's War of the Worlds "a green flare, coming from Mars". Yes I do think about these things. But ultimately it is wasted, only 15% of viewers made it to the end.

I set up the video camera in portrait mode and recorded me playing a few songs both with a mic and through my audio interface. I spoke a little. I played "Heart of Gold" fingerstyle, I played "Shine" with a pick, I played the first verse of "Wish You Were Here". Ultimately I only used Heart of Gold as the mic demo and Shine as the plugged in demo, which was a little unfair - I should have just played the same song and A/B'd it. I had too much going on in my brain at the time. And I failed on two and a half important points - I forgot to put my wedding ring on (I don't wear it overnight), I forgot to shave (it was Easter and I hadn't shaved for two days, being unshaven makes me look really old) and I should have put some lip balm on (my lips are always dry, the Australian sun was not kind to me as a child). So the one closeup made me wince a bit...when I was editing it "Argh, I need to do that again. Nope, I'm not doing all that again."

Shorts are a strange beast. Sure I'd had 1.5k views in the first day, but that is completely at the whim of YouTube. I've seen this profile before with my standard videos, was even more pronouced with the short. They give you a run, back off, give you another run, then stop. If you pay them money, you can be promoted. I guess that is great if you have something to sell, so the cost of promotion is less than the money to be made from selling. Maybe I will try that one day, record a short of me playing a favourite like Wish You Were Here, link it to a full playthrough, link that to my tab, and promote. As an interesting experiment. Not that I need to make a living from music and haven't agonised about what to do with tabs including my initial foray into Patreon.

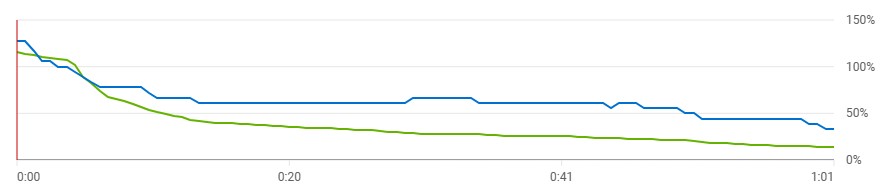
So here's two interesting stats, views over time and percentage watched, blue is subscribed green is everyone else:

I can see why so many YouTubers are turning to shorts - they get a lot more eyeballs, and while it looks like the retention drops off really quickly, it's on par with normal form videos. YouTubers always ask you to subscribe - audience attention is much higher. But the real tell is still the same - you are still totally at the whim of YouTube how many eyeballs you get - look at this video, 91.9% of views are decided by YouTube!

My answer to YouTubers who are looking to make a living? You must have something to sell, ad revenue is just a bonus. Promote your videos as much as you need to convert viewers into customers. The cost of promotion is not free, just pay it, so long as the cost of promotion is less than your revenue, you can tweak around the edges as you go to maximise your cut.

Lucky I'm just an engineer dabbling in playing guitar purely for enjoyment and interest - being a YouTuber seems incredibly stressful!

Saturday, 12 April 2025

Acoustics Again

This is an AI redraw in 3D animation style from a frame in a video feed of my son and I playing at church. Compared to the first time I posted an AI photo just slightly over two years ago this is astounding. What a world we live in, but I digress...

* * *

I have talked about my Maton EM225C in the past. It was the guitar I was playing in the heyday of youtube when I was getting millions of views. A guitar that I played so much I wore grooves into the frets so I had them redressed.  These days I take that work on personally, so the other week I had it on the bench yet again.

But before we go there, "what's the problem JAW?"

Here is a snippet of me isolated the other week at my local church:

That is gross on so many levels, but put aside I'm a boring rhythm guitarist and let's talk about the elephant in the room. First up there is just a general buzzy twang all the way through. I recently watched a video by Sor Hands in which he yet again bagged out steel string acoustic guitars. Some quotes of his: "Chains hanging off it" "Sounds like pots and pans" "No amount of money can be spent on a steel string that will sound any good". While I don't fully agree, I don't fully disagree either. That little snippet there did sound like chains were hanging off my guitar.

That section there was a crescendo, so I way playing full tilt which was bringing out the buzz. You can make any acoustic buzz, but it should be an extreme situation. You can also hear me hit some badly fretted chords, but come on, I was fretting an A chord. I have been fretting an A chord for 45 years, I can cleanly fret an A chord even on the worst day, and yet bleugh, buzzy buzzy bad fretting. No guitar should be so unforgiving that it buzzes out like that.

It *was* pots and pans.

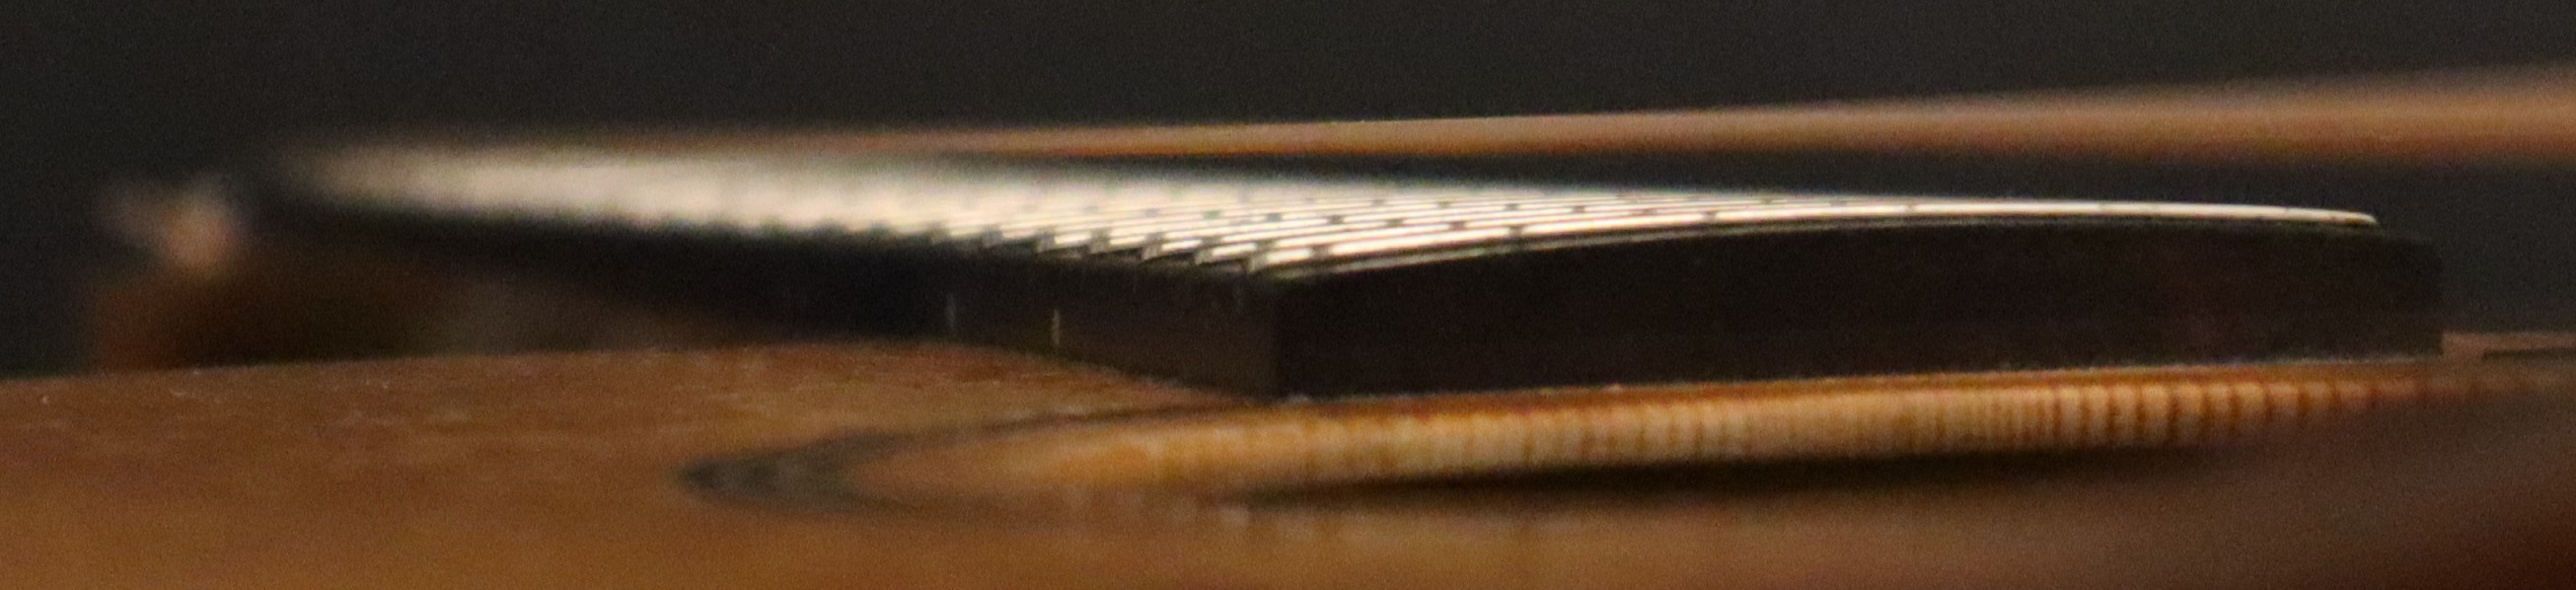
So rewind, the week before I played this I had the Maton on the bench, strings off, straight endge out. There were clearly some high frets close to the body, and the neck was generally warped around where it hits the body. Very hard to take that photo, but this shot does reveal it somewhat:

So eyeballing the fretboard like this I could see that from around the twelfth fret and definitely by the 14th fret where the fretboard joins the body, the wood is high. Ideally the fretboard should be dead straight with a touch of neck relief right up at the nut. But what I've got here is lick a spoon - everything behind the 12th fret is down, so the latter half of the fretboard are all pretty much high frets and thus will buzz when you dig in.

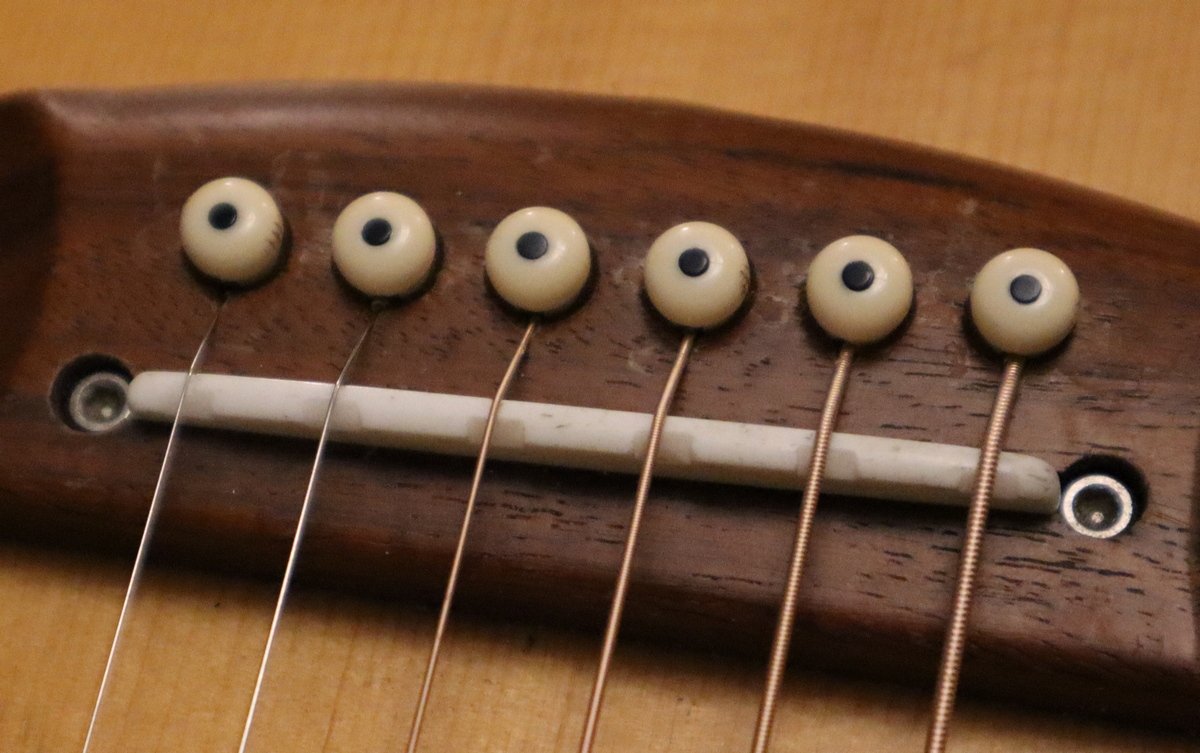
I blocked back all the frets to straighten the neck out, until I thought there was no more fret left to give and then stopped. Re-crowned the frets and put it back together. In conjunction with this a few years ago I had put in a higher saddle - to get the strings up and reduce buzz - which helps - but it brought it's own troubles. The saddle was leaning forward, effectively making the string length shorter which means that the intonation is out and all the notes are sharp across the board. I tried to deal with this but cutting some compensation into the saddle, which again helped, but it is no cure.

This is an improvement, I recommend it if you have some minor intonation issues. Sure the saddle will wear a groove faster, but in ten years time, make another one!

It's all just bandaids over the actual issue. I need to pull all the frets, sand the fretboard back to being straight again, and put in new frets. I will take that job on, one day, but my mind turned back...

...to nearly three years ago when I was in Perth's historically significant music store "Kosmic Music". Side note, Kosmic has been around since 1969 - older than me - but during covid it went out of business. But I'm pretty sure it was Billy Hyde music that bought it and stood it back up again. Anyway, I played a few acoustics and a Cole Clarke really stood out, I was quite impressed with it. But at $4k I put it back on the shelf.

I revisted it again - it is my favourite shop alongside Mega Music and Mannys for looking at/playing guitars. Chatted with Paul, "I want a big dreadnaught acoustic I can really dig into without getting buzz." At the lower price point the Yamaha A3M was nice enough. I could make the Maton Troubadour buzz too easily. I played at least two Martins and every time I have played a Martin I don't dig the sound. Can't explain it. World famous American guitars played by so many people and I've never played a Martin that felt good or had a sound I liked.

But the Cole Clarke Fat Lady 2 with spruce top, rosewood back and sides and ebony fretboard, not bad! Cole Clarke guitars are all made in Melbourne and generally use local woods, this particular one wasn't - was all traditional woods. I had to fully thrash before I heard buzz. The intonation was spot on, even when I fretted a low F, which I notoriously fret too hard and push sharp - yep, not bad at all. But the real killer was the 3 way pickup. Undersaddle piezo, soundboard transducer AND in body condenser mic. Three knobs, twist to add more or less of the three pickups. Bass/Mid/Treble EQ. The sound was just gorgeous. And since I will only ever be playing the guitar through a PA, that is pretty important.

The FL2 model comes in many many wood configurations and a lot of them are around $AUD2.5k(2025). However this one with the most expensive woods...Sitka Spruce, Rosewood and Ebony... $AUD3.4k(2025)

Exhorbitant, but seeing as I bought the Maton for around $AUD1.2k(1997) and it has lasted me this long, I think I might be able to pull the money together...

Sunday, 16 March 2025

Still a Zoom nut

In the late 90's my wife bought me a Zoom 707II multi effects guitar pedal. Some music shop guy talked her into it. It was a good call, the idea of a "programmable" effects pedal was far more appealing to me than collecting Boss pedals and chaining them together like my mate did. I had a lot of fun with that pedal, it really opened up my eyes as to what sounds you could get out of a guitar, I dropped two songs I had recorded through it in this post.

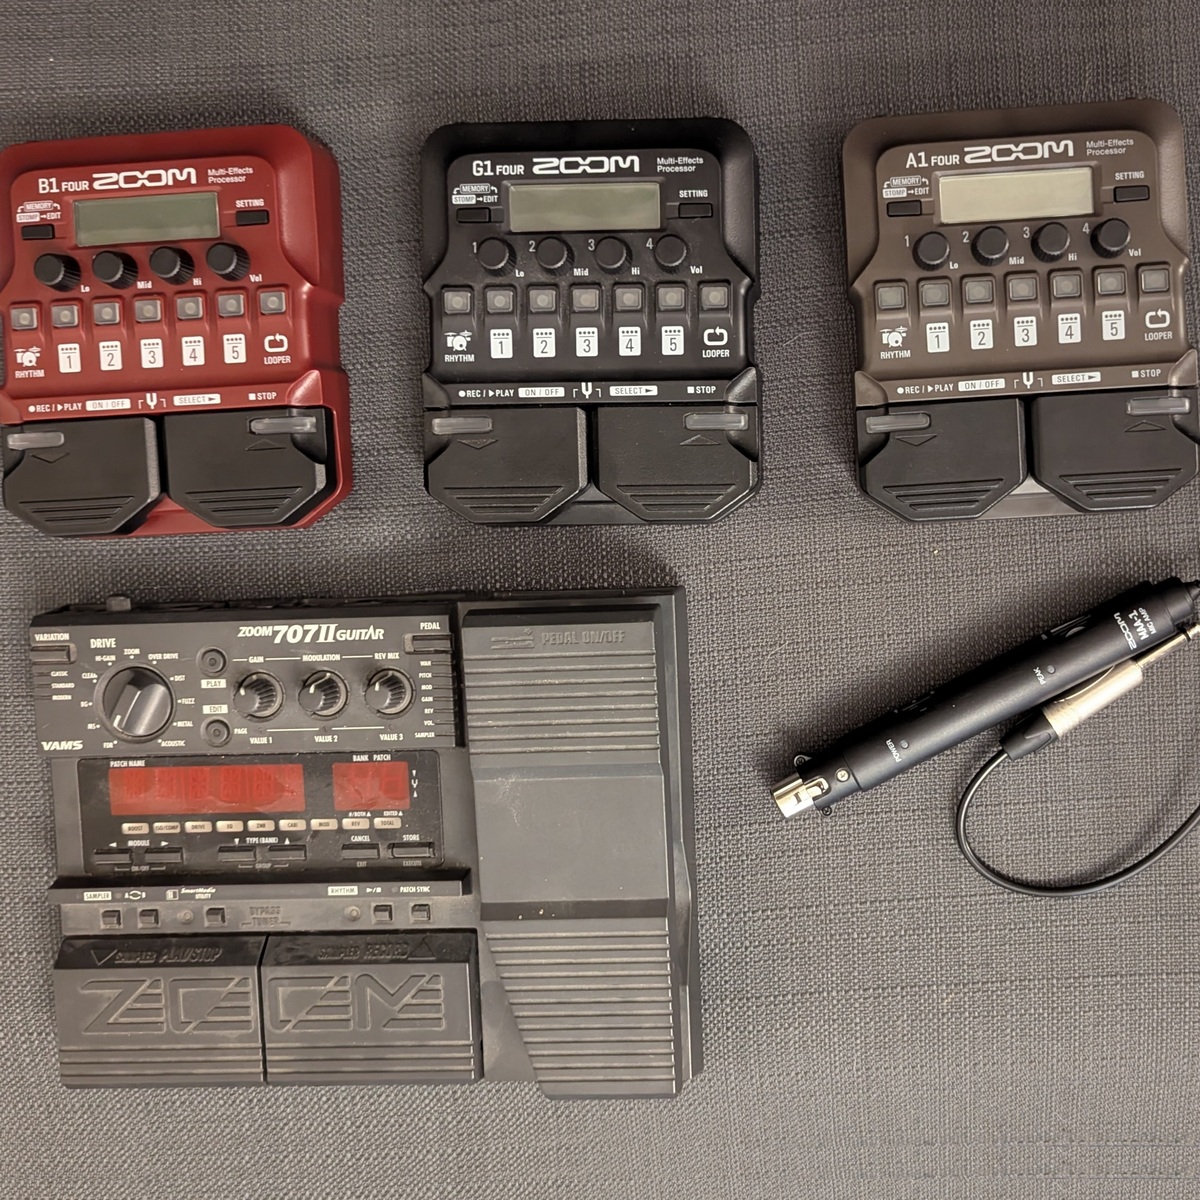
Fast forward twenty five years, and I have ordered yet another Zoom G1 Four as a birthday present for a young guitarist I know. I own 3 of the "FOUR" series pedals - a G1 which I bought shortly after they were released circa 2020, an A1 and a B1. Talking specifically about the G1:

  • It has a built in tuner. Set the output to mute while tuning, just mash the two pedals together and you get a really easy to use tuner that just takes a moment to retune between a song. It's not a mic so there is no interference from a noisy room. You can be standing up in the dark and those friendly red/green lights tell you exactly what you need to know. It is an absolute bedrock foundation that you need to be playing in tune, with this  tool there is no excuse. The pedal is almost worth it for this alone...
  • It has many built in "patches" that are inspiring and change the way you play. It's the kid-in-a-candy store thing; you will play more, because you are having fun, and there are so many delightful surprises to be found. It can make you sound like all the famous guitar legends, and while you might not use them in the long run, anything that keeps you playing, learning, developing - is a good thing.
  • It has all the basic effects that you need and you can stack up to five together. For example, the main patch I use when I'm strumming my acoustic with a pick has a compressor, an equaliser, a tape echo and reverb. Notice that is for my acoustic, not an electric! An effect is an effect regardless of what is plugged into it, so if you are looking for a limiter, a gate, various type of overdrives and distortions, delays, reverbs - they are there.
  • It has metronome, drum sequences and basic looping. Not something that I need, but it's there.
  • I love that I can plug it into my computer and using the aftermarket application ToneLib-Zoom I can tweak while I play through headphones. But that's the nerdy engineer in me.
  • I have programmed several different patches to suit the different live sounds I need, I can just tap my foot and go between them.
  • Whilst you can buy the X version and it has an expression pedal, that's never really been my thing - the 707II had one - I don't need one right now, but I understand why you would want one.
  • In defence of all the other very much more expensive pedals out there, it is possible the Zoom Fours don't have exceptionally good preamps or analogue<->digital converters. They are 24 bit, 44.1kHz sample frequency, which I think is plenty, I'd need to find a way of doing an A-B test to see if they introduce any signal degradation.

The main use for my G1 is to give my acoustic guitar a bit of character when it is played over a PA; and as a live setting tuner. Whilst I would say that when recording the acoustic I would only use microphones, and maybe some very minor shaping of the sound in post, when you are playing live you need that shaping to go live straight to the deck. And I have massaged the shape over many sessions to best fit the room. I could have achieved the same thing with a dedicated acoustic pedal with knobs, but for a better price I get an extremely configurable pedal that can do the same and a heap more.

Now sound modelling has been popular for a long time now, and it does that too. It has effects for simulating well known amplifiers and cabinets, so you can chain that into your patch. I've never been  heavy into guitar tone, being that I've mainly only played nylon string, so I didn't much care for those effects. But I did think about how I could get some acoustic modelling, so I bought the A1 Four, designed for acoustic instruments. I played with it for a bit but didn't really "get it". What I found however is it came with a pre-amp (the cylinder + wire thing in the photo above), I could pipe my son's saxophone mic through it. And it has patches for saxophone, and they are pretty good! I still find I need to compress saxophones more than what is built into the patch - hmm, I should dial in some more compression for him - but out of the box it really sweetens the tenor sax tone. So I stuck with my G1 Four and let him have the A1 Four.

And finally, my daughter plays in a rock band and they play a lot of originals, I remember seeing them one night and the weather was cold terrible, when they started playing they were hopelessly out of tune because they had only roughly tuned while in a warm room. They had to stop mid song and retune, it was shameful, ha ha! So my cure was to buy her the B1 Four - the bass guitar version - so she could always quickly check her tuning. And then she can dial in some overdrive and other shaping, to experiment with sounds and unleash creativity!

Which brings me back to why I ordered another G1 Four - the lead guitarist in her band plays through whatever effects the amp she plugs into has. And also suffers from tuning issues. Armed with a G1 Four I'm hoping she can spend time dialling in tones that suit her music and it inspires her creativity in song writing.

Possibly I have mostly been talking up that the Zoom FOUR series are good tuners. Well they are...and so much more!

Saturday, 9 November 2024

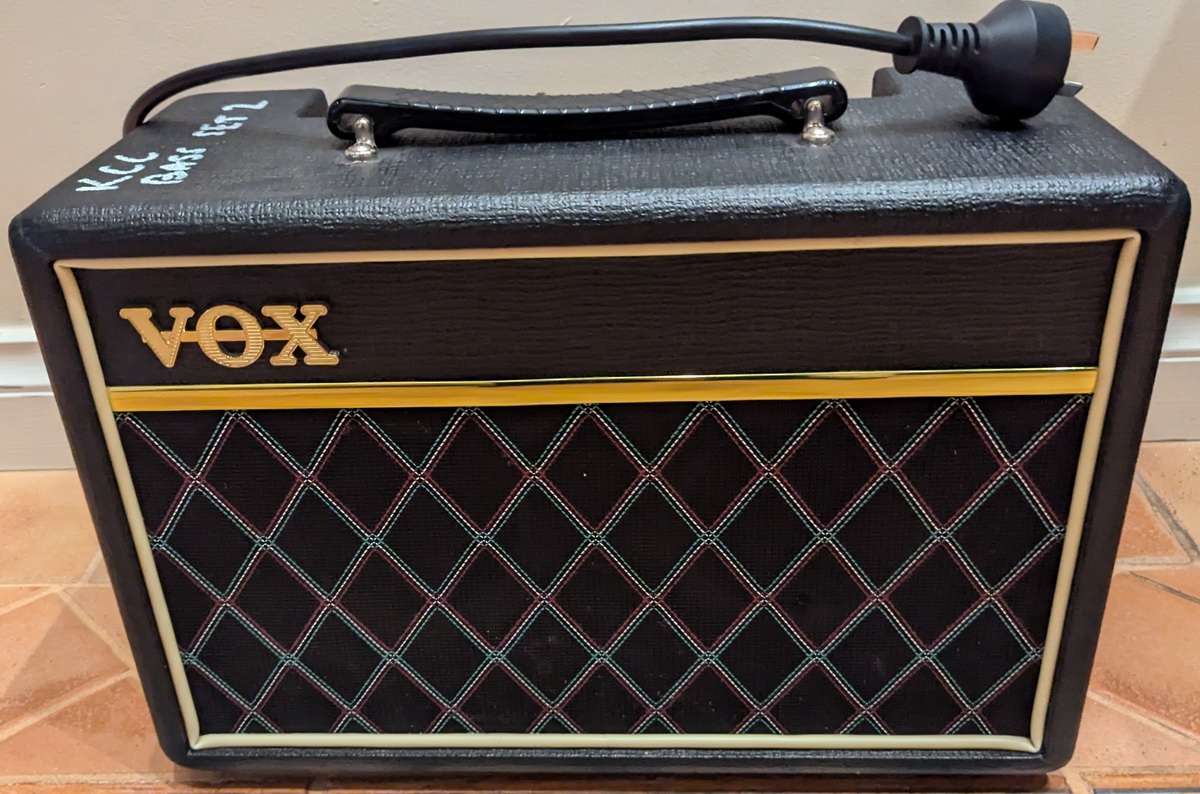
Vox Pathfinder Bass 10

My mate Steve and I both have pieces of paper that say "Batchelor of Electronic Engineering", but neither of us do that for a living. We both however want to be able to say that we can actually work on electronics. For example, a while back I fixed a broken amp. So when a broken Vox Pathfinder Bass 10 fell into my hands I felt compelled to fix it.

I have however come to realise that I will only go so far. If it's not a broken wire, popped fuse or simple power supply issue, then it's going to take too long and I neither have the patience or equipment to really dig in deep. This amp was no simple fix. It had a weird distortion coming through. Steve however, he loves a challenge. And since this is just a little analogue amp, I threw it his way and he persisted until he fixed it.

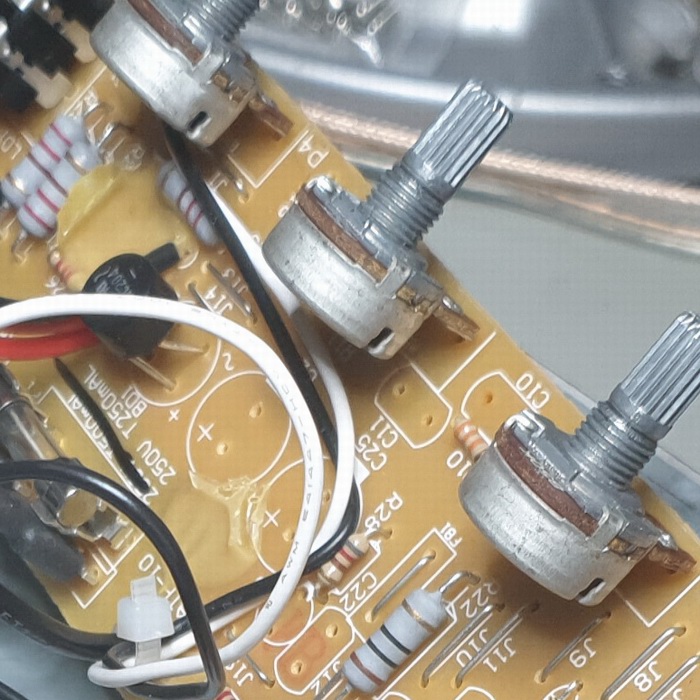
During the, I'm going to guess hundreds of hours he spent debugging it, he produced an electrical schematic. It needs to be on the internet, so here is a pdf of the electrical schematic and here is a jpg.

A short discourse...it presented with some high mid/high frequency distortion on top of the expected signal. You could set the bass volume and the amp volume to reduce it, and if you played softly it wasn't too bad, but it was always there.

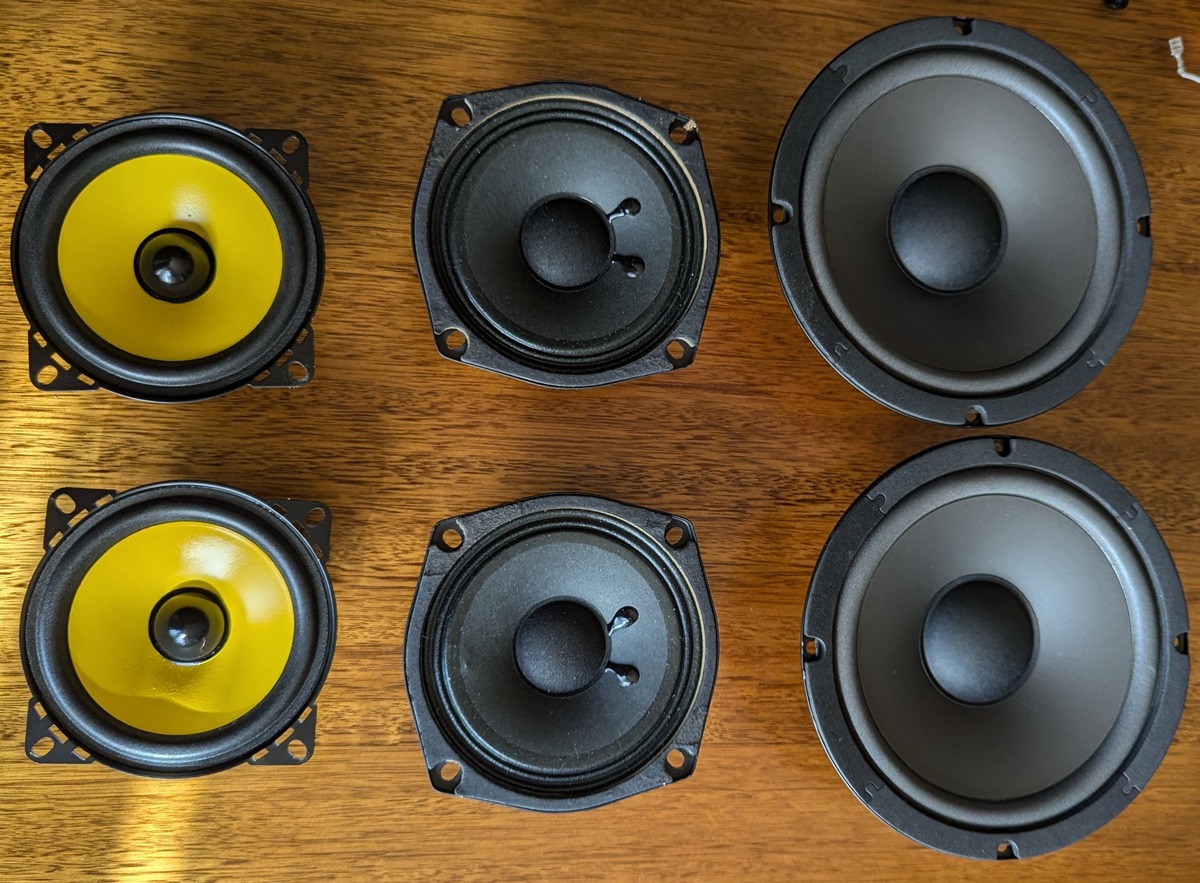
On first inspection Steve discovered a hole in one of the speakers which I hadn't noticed and sent it back. Seemed fair enough, that could cause noise. The speakers in there were a fairly non standard 5", I decided that some cheap 4" speakers from AliExpress would do the job. Put them in, no, distortion still there. and they were pretty rubbish. Without thinkng too hard I grabbed some slightly less cheap 6" speakers, and put them in with some slight hassle (they were a bit big, but I made them fit). Still distorting. I had concluded it wasn't the speakers and sent it back to Steve. He was not convinced and bought some not-so-cheap correctly fitting 5" speakers...still distorting.

During let's call it "the speaker phase" Steve mapped out a frequency response curve of the 4" (YH-1008) and 6" (YH-600) speakers, and for reference the sub speaker from his home theatre system. Remembering that the low E on a bass is around 40Hz you can see that the two cheapy speakers aren't great around there and don't really flatten out frequency reponse wise until over 100Hz. The sub speaker starts flattening out at 50Hz which is better, but we discovered that for bass amp design you really need to think about how you are going to get those low frequencies pumping air.

But the speakers proved to be a red herring.

Steve's equipment was struggling to show the nature of the distortion, which is kinda frustrating "I can hear it, but I can't see it". Looking at a bass guitar signal as it goes through the circuit, we could see that there seemed to be a few pixels of high frequence noise superimposed on sections of the waveform. But neither of us would declare "that was it". Steve, being persistent, then went to town replacing components.

Signal vs Opamp 1a
Maybe noisy?
Signal vs Opamp 1b
Inverted, looks fine!
Signal vs Opamp 2
Inverted, maybe noisy?
Signal vs power Opamp 3
Inverted, DC offset, some noise?

An interesting part of this amp design is that the power side is an opamp! That is, an Operational Amplifier, which is more of a circuit in a chip than just a transister/FET/tube valve. Opamps are great, because they have a pretty flat frequency response across the full spectrum, super high gain, super high input impedence...I didn't imagine a power opamp would be the power house behind an amp! There are some low power opamps in the circuit too, which are there to handle the overdrive circuit, the treble, mid and bass EQ signal adjustments.

Steve's experience with electronics makes him suspect capacitors every time. Because capacitors fail. He popped every single one of the board, and tested them. None were a problem.

He discovered that although the signal opamps and the power opamps were obsolete, there were equivalent replacements which he also swapped out. It was not a function of the opamp.

At this stage we were both scratching our heads. There wasn't much left to swap out. Something that he had noticed along the way is that the transformer power supply was being pulled down pretty hard, getting close to the minimum operating voltage for the power opamp. While the supply was within spec, after looking at what the opamps can handle voltage wise, he decided to buy a higher voltage transformer with a few more VAs too. The one he selected could fit in, it was right at the upper limit of the opamp capabilities, se he swapped out two resistors to ease back a little on the voltage.

Oh, and he grumbled a lot about the board. How 240VAC was intertwined with signal voltages, how there were so many links on the board and just a generally poor layout of the board, and how difficult it was to pull apart and put back together - that it, like so many things these days, is not designed to be easily serviced. Are you listening Vox?

Well Steve was right. With a new transformer kicking in a bit more juice, the distortion went away. Fixed. My take on this is that the power supply selection is build down to a price, and most of the time, when things are running to specification, it will work. But without a little bit of over-engineering in place, the moment the transformer had dropped a few VAs, some higher frequency weird opamp distortion crept in. Getting those opamps back up to plenty of voltage headspace, problem solved. Vox - spend a bit more money on parts!

Board Before Board Modified

Good work Steve! We both learnt something! Oh, and one other very cool thing I learnt - inside the unit were two LEDs back to back. "Why are there LEDs inside the unit, that will never be seen?" After staring at the circuit for a while, working from our electronics first principles knowledge Steve and I realised that as the "drive" level is turned up, the LED foward volt drop, probably around 2V, will start to kick in, which will begin to clip the waveform. As we know, if you raise the amplitude of a signal but then start to clip the peaks, you get both an additional loudness increase, and all those extra harmonics as it clips which brings more complexity to the sound. After reading up about it on the internet, aparently LEDs have quite a sonically pleasing soft-clipping sound rather than the much harder clipping found in other diodes!

Sunday, 15 September 2024

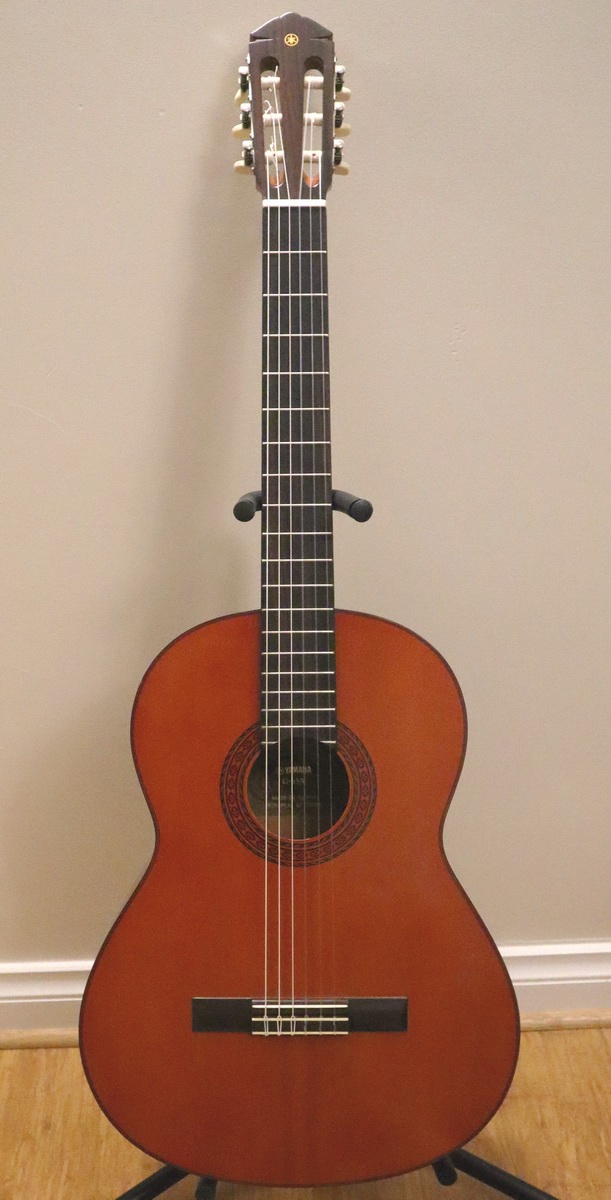
Yamaha G65-A

Another vintage Yamaha found its way to me, I was pleased that it was not a C40. Don't get me wrong, a Yamaha C40 is an adequate classical guitar, often not bad at all. But often not good. This G65-A (serial 31109517 - 0426423 so probably 1983) is in good condition, doesn't look like it has been played much. I whipped the few remaining strings off it and checked the fret level and neck angle, all was okay. Well, neck angles always seem out once a classical guitar is 20 years old, but we make do.

I ran a block with sandpaper across the frets and it did not take very long before it was touching everywhere.  I barely needed to put my fret file on it. Note: my latest fret file is nice, the one with the wooden handle, but the profile is too deep and was barely touching the frets. I am going to have to splurge on a decent fret file.

There were no sharp fret ends!  I think it is because the manufacturers tapped in frets already cut to size with pre-finished ends...and they are slightly too narrow!  It feel like that's not great because you lose a bit of fretboard at the edge. I want every bit of my fretboard to count. I reckon it is better to put the frets in and then sand them flush to the fretboard edge.

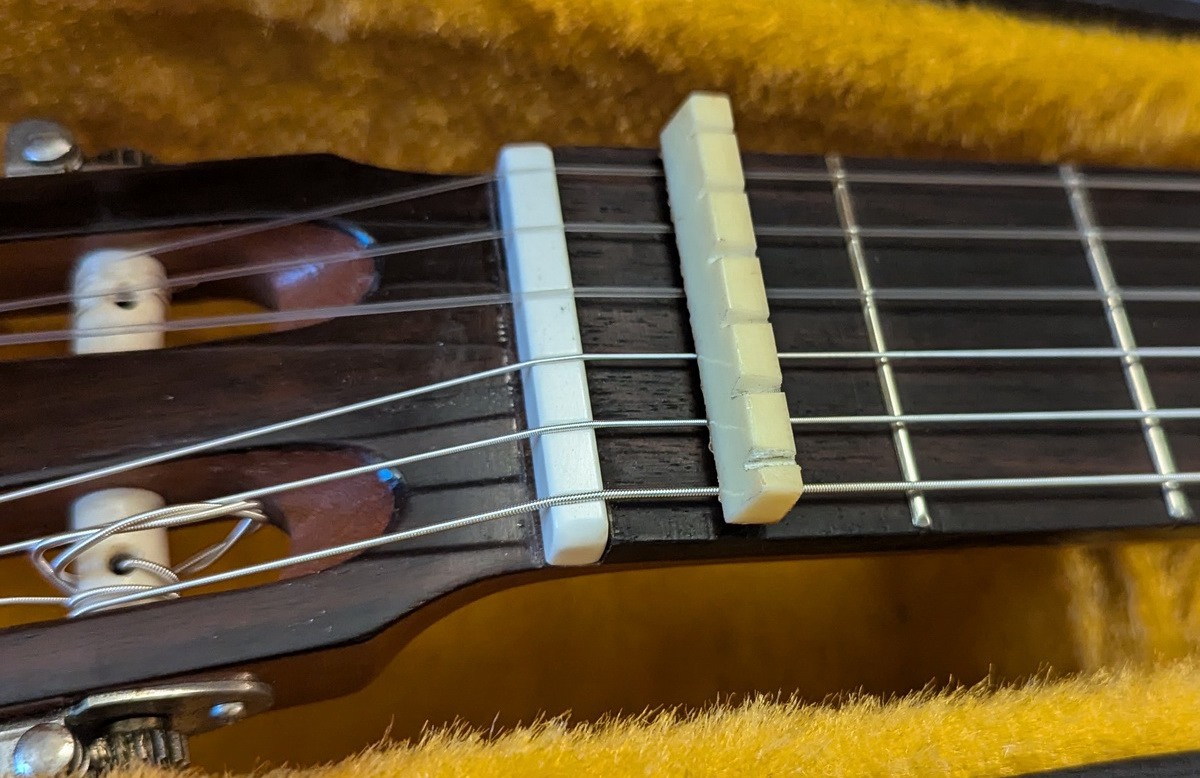
After polishing all the frets and giving the fretboard a heavy oiling, I decided to replace the nut. The existing one was pretty awful.  I had already bought a bag of standard classical bone nuts a while back, and they are a perfect fit.  Well, other than sanding the bottom down a few millimetres to get the nut height right.

The saddle was not the worst saddle I've ever seen, but, yikes, comes close! A cheap plastic one, and so thin! I've never seen a saddle so thin, I was tempted to open up the saddle slot a bit more to fit a bone saddle in, but, nah. A little too much effort for this calibre of guitar.

Restrung it up, it sounded okay.  Marginally better than your average C40. It has the usual G string resonance nastiness when you dig in, so many classical guitars have that.  I reckon that is your first test with a classical guitar. Pluck the G string hard, does it have a tedious resonance that grinds your ears - and does it sound a bit out of balance with the other strings? Otherwise this guitar has a good bass, the mids are bolder than I was expecting, and the trebles are adequate. It is not the worst vintage Yamaha I have played.

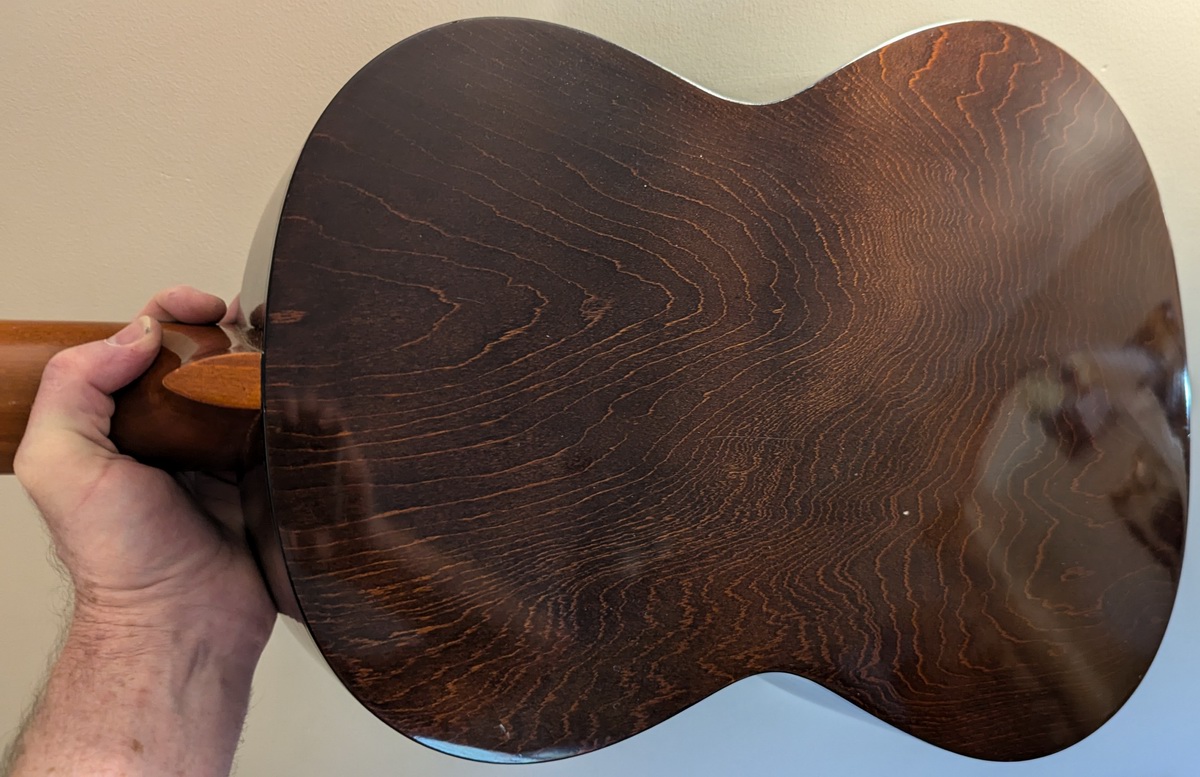
It is a cheap model, that's for sure, marginally up from my G-55A. For starters it does actually have a solid wood (rosewood?) fretboard, and a solid bookmatched soundboard (cedar?).  The rest of the body is all veneer, so quite cheap, and no attempts to bookmatch the back or sides. Although the back is interestingly pretty though, I mean veneer is still wood, just a really thin sheet of wood, I'm guessing this is an example of rotary peeled veneer. At least the veneer is not on a backing of MDF, it looks to be on some sort of (probably) laminated cheaper wood.

As found Fret tool not quite right sadly
New nut installed, compared with old Interesting veneer back

So overall it came up okay, sounds okay, and it is pretty, so ready to go back to its owner.

Here is my standard test song, raw from the microphone.

Yamaha G65-A:

Sunday, 28 April 2024

Yamaha G-231 II

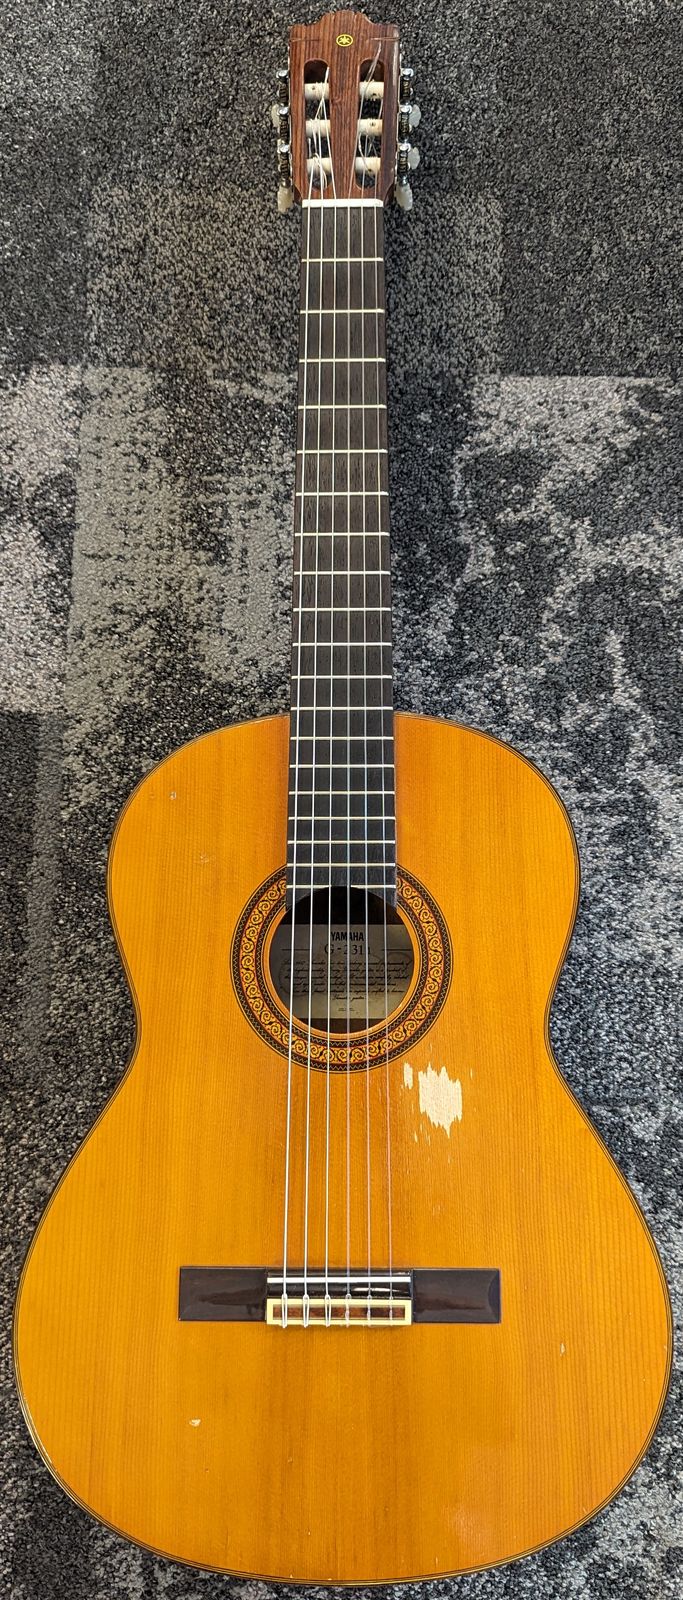
This G-231 II Yamaha guitar is quite sentimental to me, my parents gave it to me when I was eleven - I was big enough to upgrade from my 3/4 guitar to a full size guitar. It was not the cheapest guitar for its time, maybe a model or two up from basic - it's got an ebony fretboard and the build quality is not bad - thanks dad.

It's the guitar that made me. The one that I honed my fingerstyle skills on. That by the time I was 15 I was thrashing with a plectrum (you can see the damage on soundboard) - luckily my mum bought me an electric guitar shortly thereafter. It sat around for 10 years mostly unused, occasionally brought out as a reference guitar when I needed to remind myself about nylon string classical guitars. It was lent out a few times - it was with my nephew for a few years while he was learning guitar. It lived at my old holiday house for 10 years, I would play it to the trees when I was there. It sat under my desk at work for years and I would play it in the lunch room for an hour on Fridays.

It actually sounds quite nice. But, it hasn't been great to play for a long time. Two main problems - the neck has slightly caved into the body under string tension, which happens to pretty much any classical guitar by the time it is ten. So it makes the action really high. There's no truss rod to tweak it back a little, but besides, it's the neck-to-body connection that goes out; the truss rod is about neck relief, so it's not reeeally the right approach.

The other issue is that higher up the neck the fret  heights are a bit out of alignment. Possibly an issue stemming from problem 1, it certainly doesn't help, but some fret positions up the neck are buzzy.

I have thought in the past about sawing through the neck from underneath (stopping at the fretboard) and then regluing - essentially creating a little triangle that pulls the neck angle back - to fix the high action. Seems savage, so I haven't done it.

But after my water soaking to get the double bass bridge back to square, I wondered if there was something I could do similar - clamp the guitar up forcing the neck backwards, splashing some water around tp ,ake things pliable...so I asked the internet...and discovered a bloke in Queensland had been doing "Steam Neck Resets". I watched his videos and read some stories of other people who had tried it with success and I was convinced.

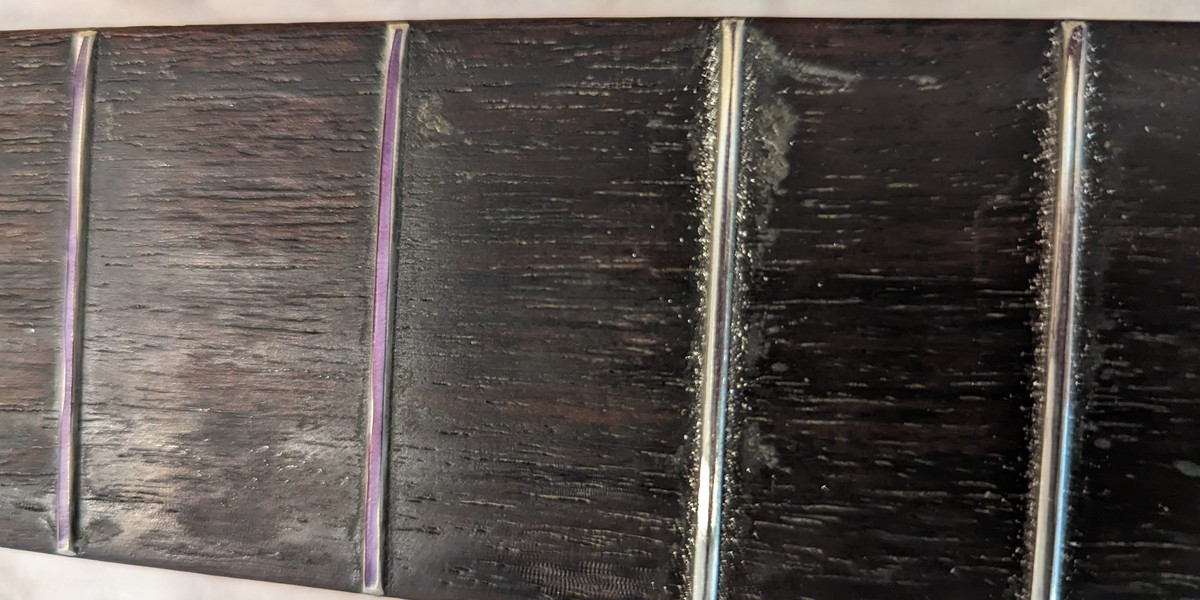
I decided to start with the fret grind and recrown. Classical guitar necks are flat, you so only need a flat block of wood and some sandpaper to do the initial grind back. I started with 240 grit, and I drew a black line across each fret with a permanent marker, sand for a bit, see whether all the black lines have been touched, draw the line back, repeat - basically I'm aiming to have a dead flat initial surface. I was suprised to find some grooves worn into the first few frets in the usual places. Nylon rubbing through steel!? That was unexpected. There was some very minor imperfections up where the fretting seemed buzzy, I wasn't convinced.

I spent a little time filing off any sharp fret ends as well, where the neck had shrunk a bit over time leaving some sharps. The file I used was a bit rough, I need to add a fret end file to my list for next time.

I then, still drawing black lines on each fret, ran my fret crowning file across. It worked okay, it's a cheap fret crowning tool, so I wasn't really happy. I will buy a good one for next time. Once I had each fret where there was approximately a thin black line across the top - meaning the original fret grind was still intact, but the rounded crown shape was still there - I moved to the next.

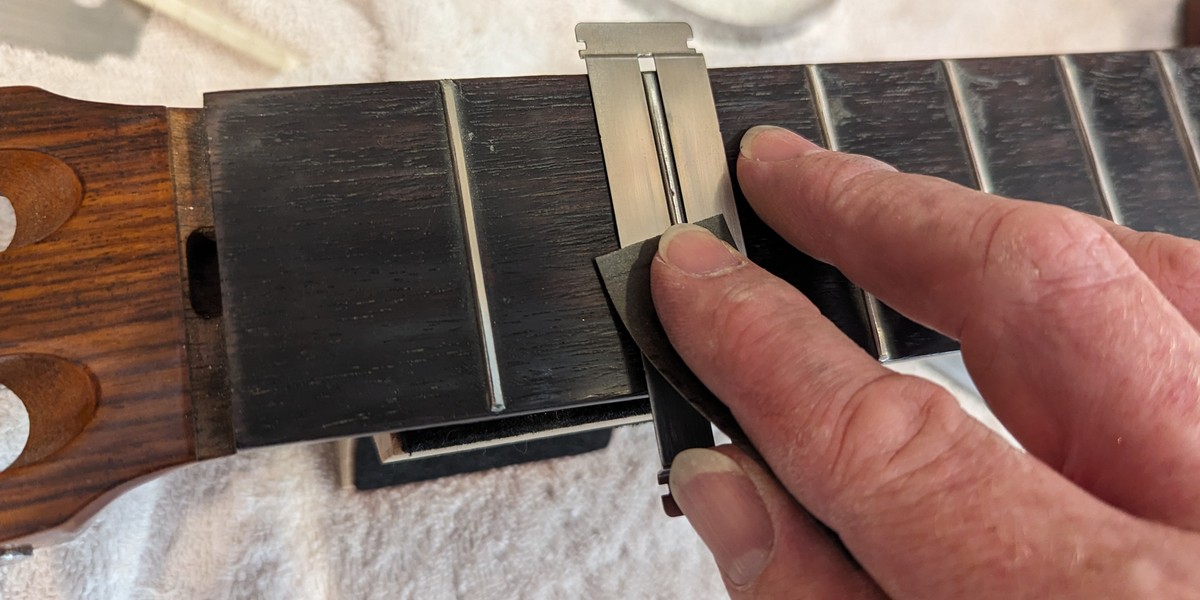
The final step was to hand polish each of the new crowns. I popped on my fretboard protector and worked my way down the frets, with decreasing grades of sandpaper, 400 to 600 to 800 to 1200 to steel wool. But the time I hit the steel wool it was nice'n'shiny. I could see in a few places where I had missed some scratches in earlier sanding, but over all, a nice job.

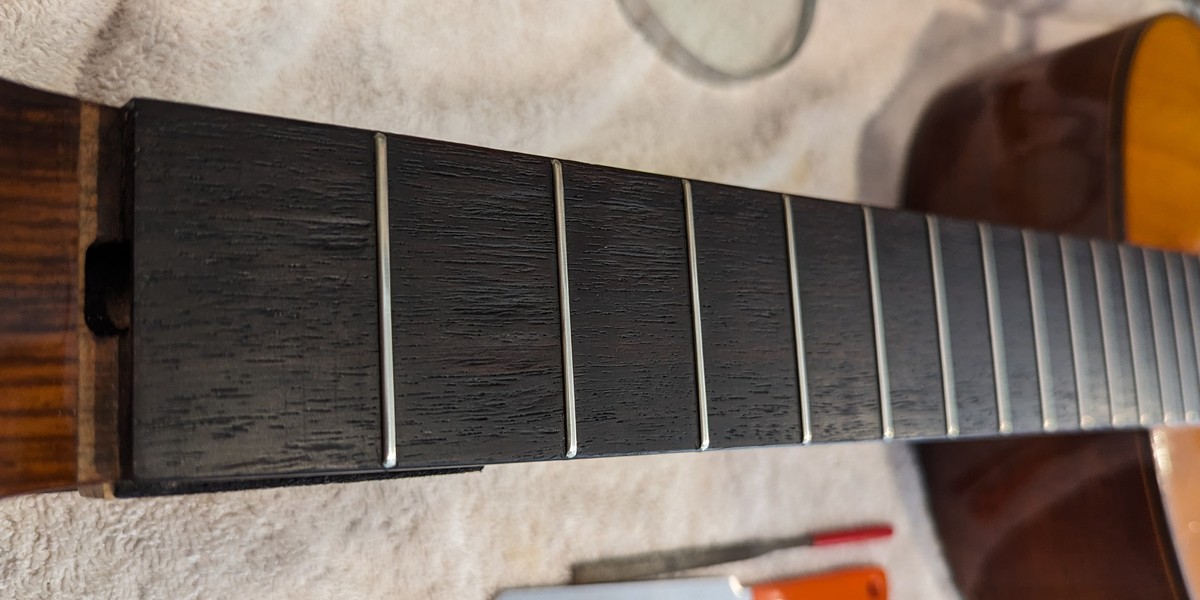
I had nicked the fretboard in a couple of places with the crowning file and the fret end file, nothing terrible, just a little amateur. I think it makes sense that the first fret grind I ever did was on the guitar that made me the guitarist I am today :-)

After an oiling it looked great. But no time to restring and test it - straight to the steam neck reset, I was very keen to try it out!
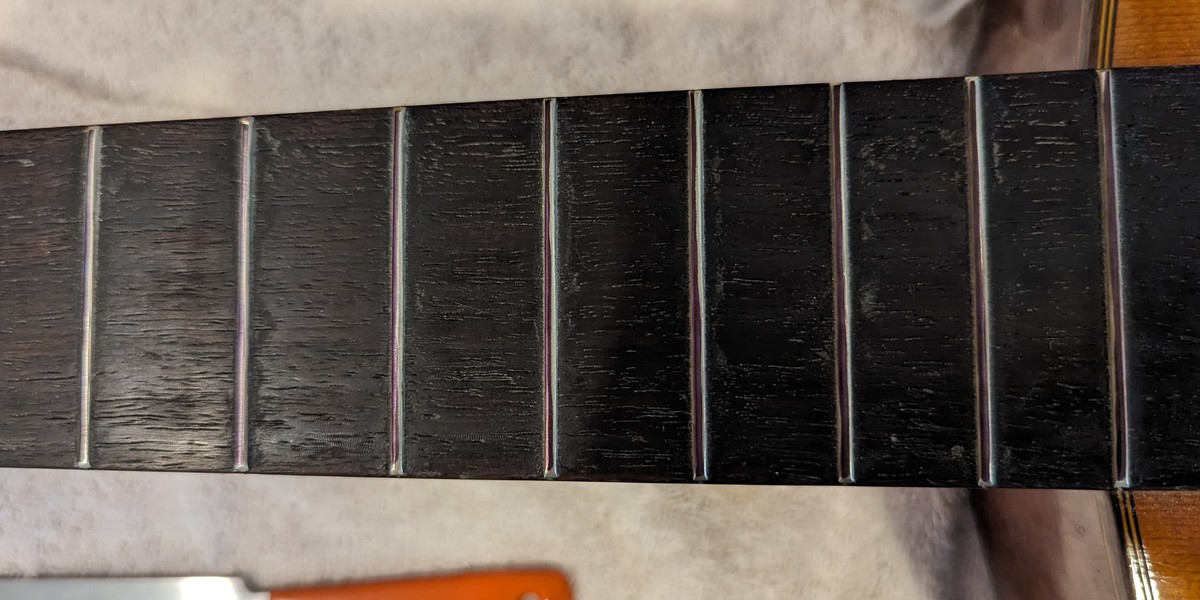
1. Make a mark across the frets 2. Block & sand until all marks touched
3. Fret crowning 4. Just a thin line still remains once filed
5. Sand through grits to polish 6. Sit back, admire

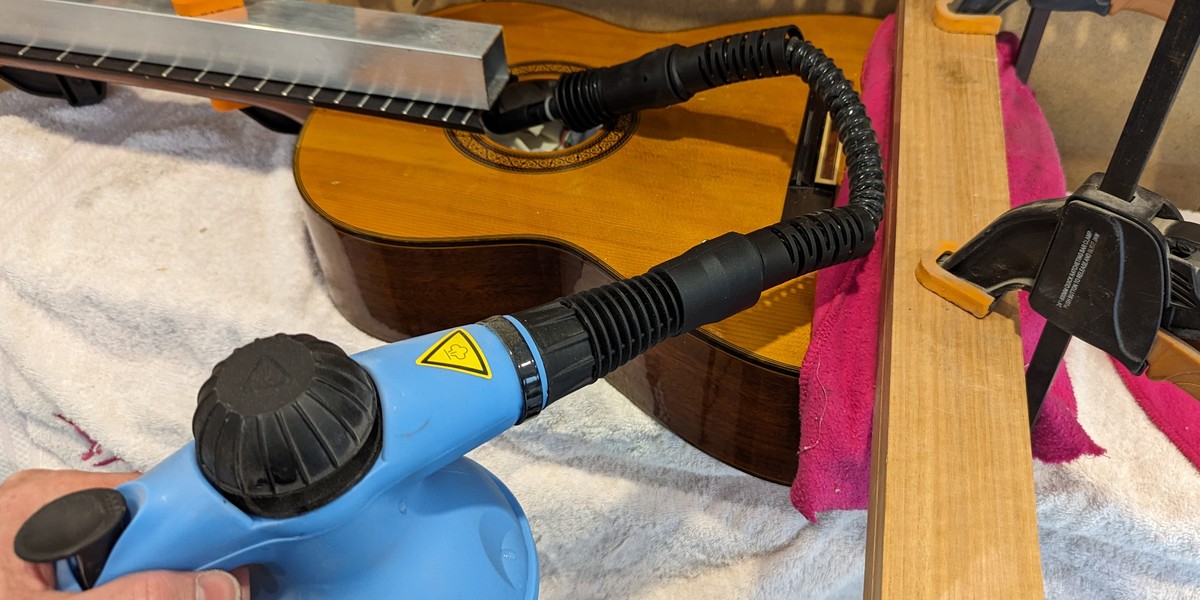
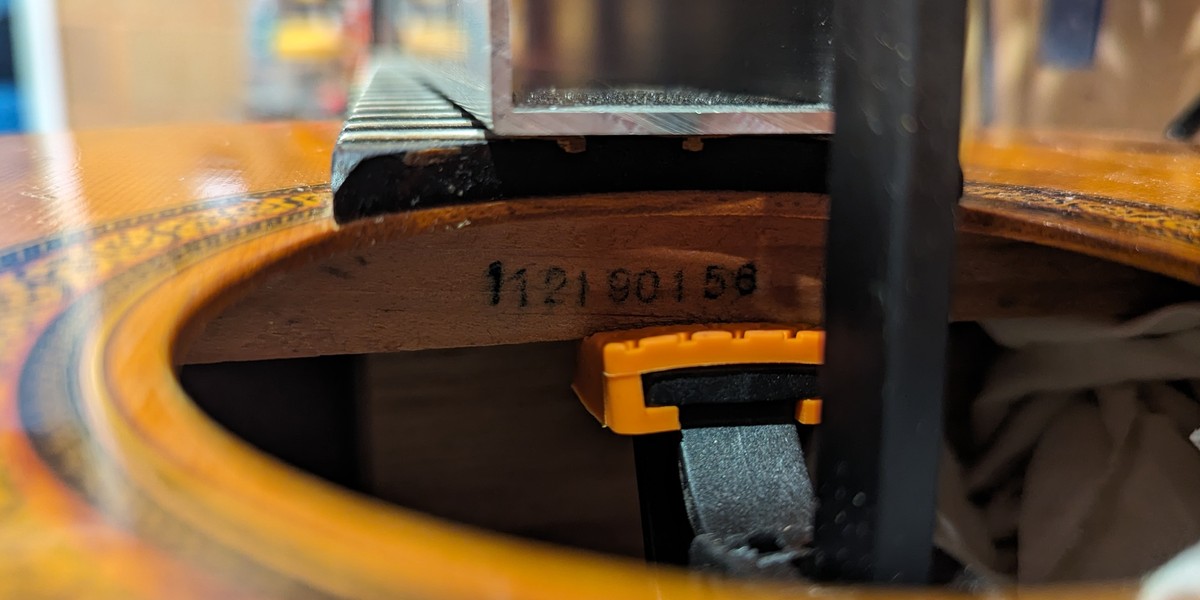
I bought a length of aluminium square tube and clamped it hard to the neck in a few places. I was using clamps that had rubber feet so they wouldn't mark the neck. The aluminium was sitting direct on the fretboard, but the frets are nickel-steel so they won't be marked by aluminium.

I then clamped the body to a length of board, with a few towels in between to keep surfaces safe. The goal is to have everything rigid so that when you apply the final clamp at the top it will pull the neck right back at the point when it joins the body. We aren't trying to bend the neck, we are trying to claw back the distortions where it all comes together. If you look carefully, kinda everything is involved - the soundboard, the heel, the sides, the internal ribbing.

I like concept though - put force in the direction you want to go, steam it so the wood and possibly glue becomes a bit pliable again, hold it there until it has dried out, and then when you release it and restring it, it will be back to where it once was. Maybe it won't last, maybe it will go back to where it once was? So what, do it again! - it can be a 5 year maintenance schedule.

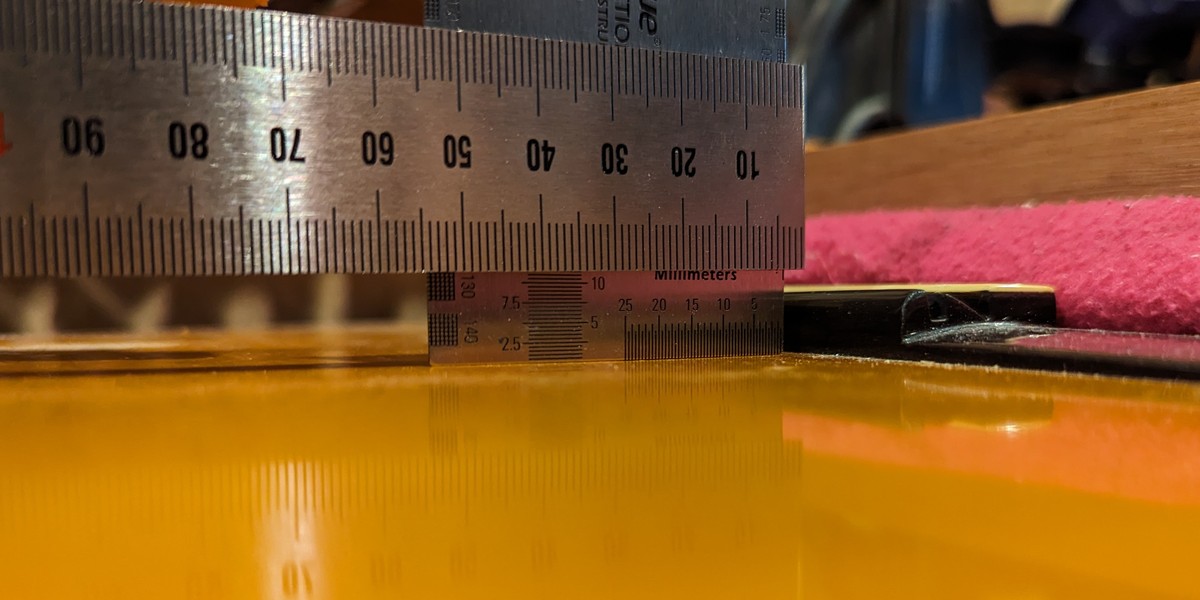
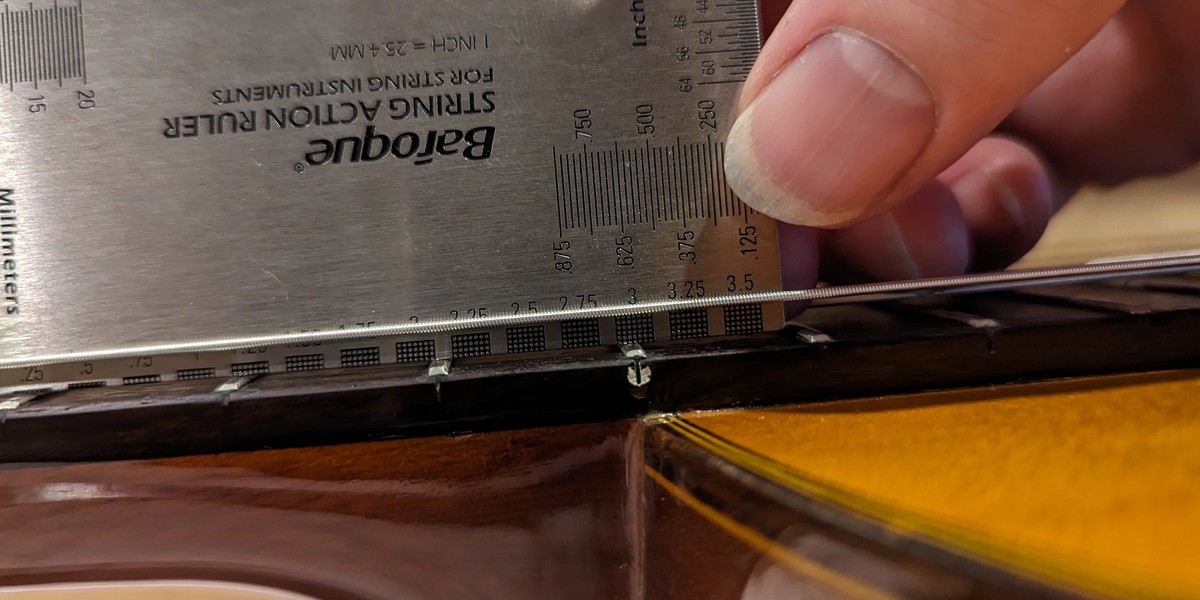
Result - I steamed it 3 times over the course of a week, and when I restrung it the action was about 0.25mm lower than before. So my verdict is yes it works, but you need to steam it more over a longer period of time, the consensus seems to be 3 weeks. And note that I really pulled a lot of force on - around 12mm deflection clamping force as measured at the saddle - and that only gave me 0.25mm resulting action decrease. So my lesson there is don't be frightened that you are going to accidentally go to zero action, you probably won't. Ahd then if you did, whip up a new higher saddle - they are easy enough to make.

Sometime I will have another crack at this, but I wanted to get this guitar back to work. After restringing there were improvements in playability, and the buzziness higher up the neck was reduced. Not gone, but more tolerable.

A worthwhile endeavour - for more info on this technique search for "John Miner Neck Steam Reset". Still not "great" to play , but better now.

Jig to hold everything in place Initial measure at bridge 8.0mm
Fill with rags and lots of steam This last clamp is particularly important
Cranked to 11.5mm - needed more Finished with 2.75mm action at 12th fret

In the meantime, I will keep my eye out for an unloved/broken vintage guitar that could do with my attention and I will go through these processes again, but without any pressure of needing to get it back to work.