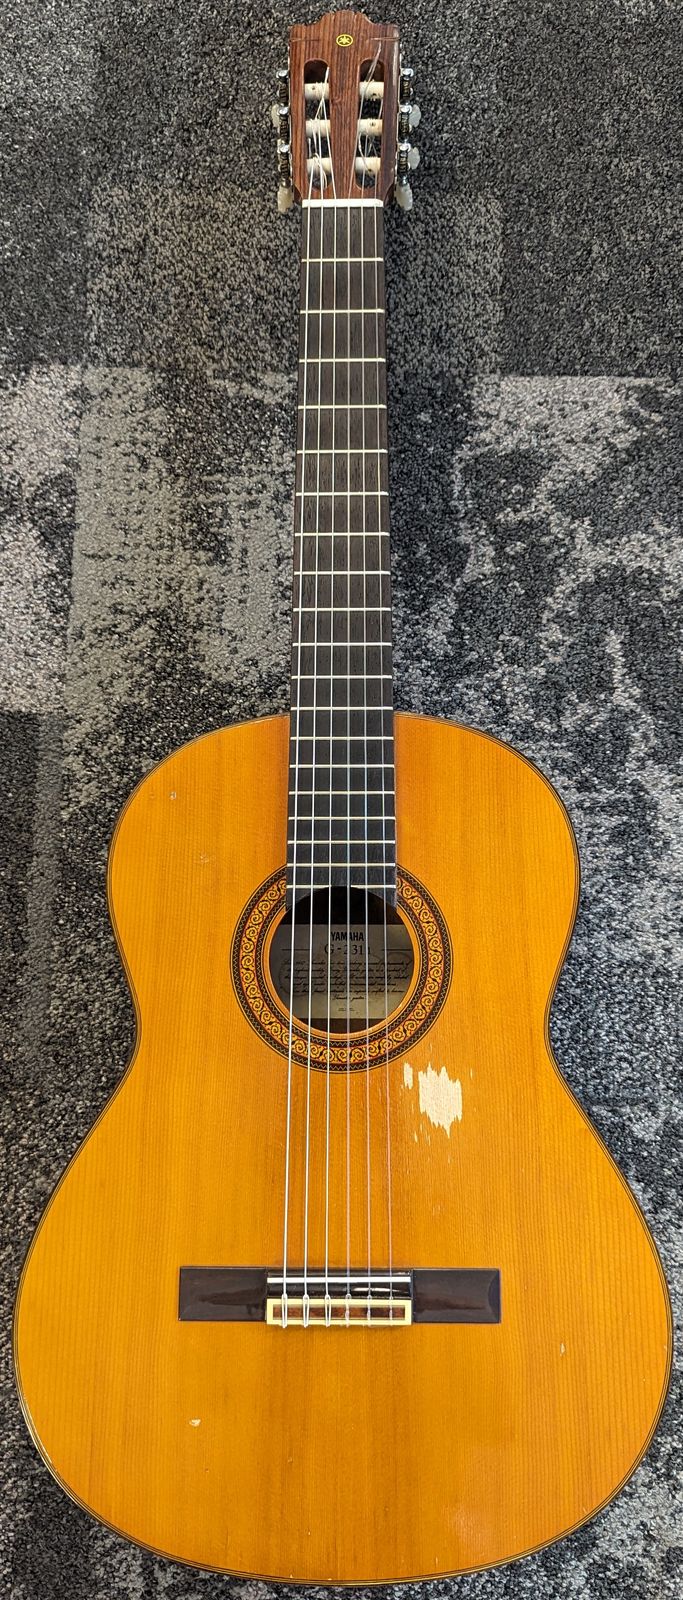
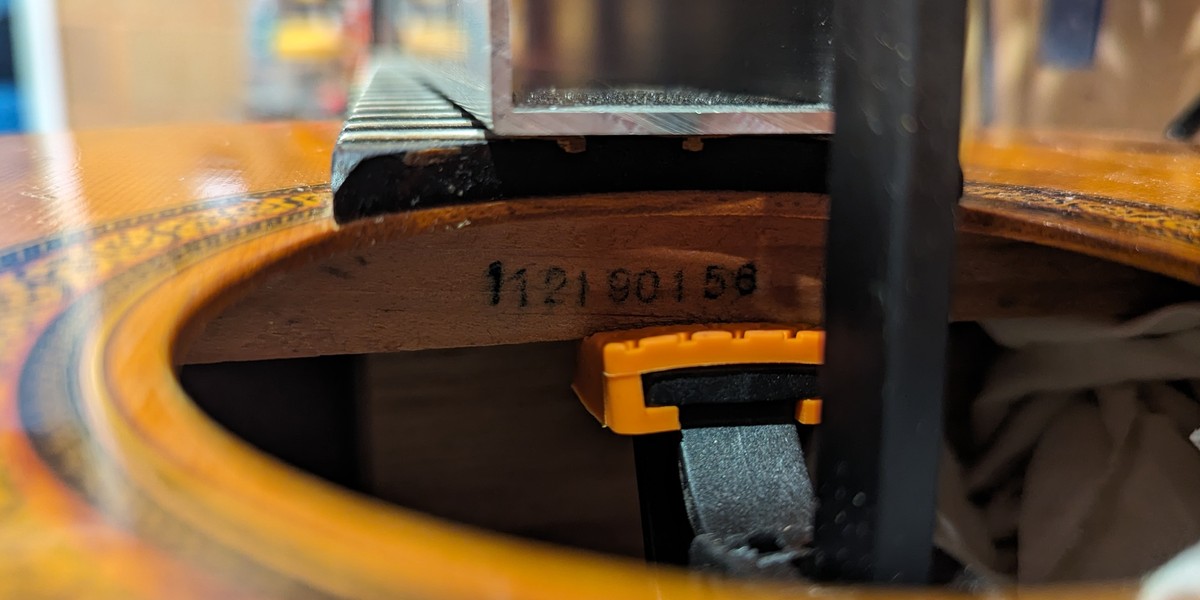
This G-231 II Yamaha guitar is quite sentimental to me, my parents gave it to me when I was eleven - I was big enough to upgrade from my 3/4 guitar to a full size guitar. It was not the cheapest guitar for its time, maybe a model or two up from basic - it's got an ebony fretboard and the build quality is not bad - thanks dad.
It's the guitar that made me. The one that I honed my fingerstyle skills on. That by the time I was 15 I was thrashing with a plectrum (you can see the damage on soundboard) - luckily my mum bought me an electric guitar shortly thereafter. It sat around for 10 years mostly unused, occasionally brought out as a reference guitar when I needed to remind myself about nylon string classical guitars. It was lent out a few times - it was with my nephew for a few years while he was learning guitar. It lived at my old holiday house for 10 years, I would play it to the trees when I was there. It sat under my desk at work for years and I would play it in the lunch room for an hour on Fridays.
It actually sounds quite nice. But, it hasn't been great to play for a long time. Two main problems - the neck has slightly caved into the body under string tension, which happens to pretty much any classical guitar by the time it is ten. So it makes the action really high. There's no truss rod to tweak it back a little, but besides, it's the neck-to-body connection that goes out; the truss rod is about neck relief, so it's not reeeally the right approach.
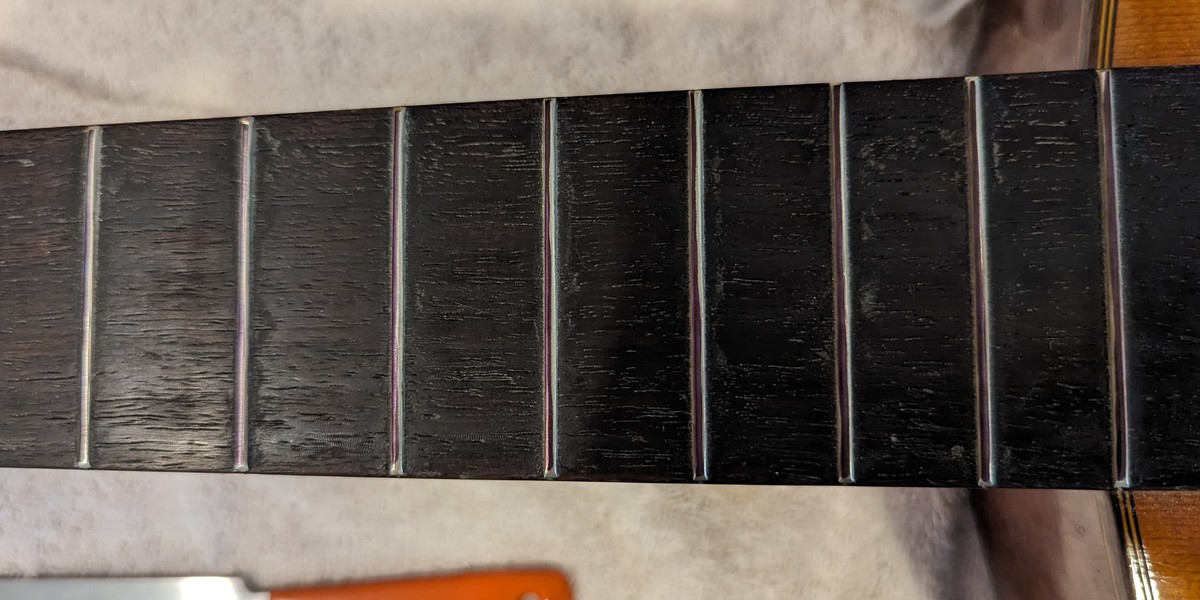
The other issue is that higher up the neck the fret heights are a bit out of alignment. Possibly an issue stemming from problem 1, it certainly doesn't help, but some fret positions up the neck are buzzy.
I have thought in the past about sawing through the neck from underneath (stopping at the fretboard) and then regluing - essentially creating a little triangle that pulls the neck angle back - to fix the high action. Seems savage, so I haven't done it.
But after my water soaking to get the double bass bridge back to square, I wondered if there was something I could do similar - clamp the guitar up forcing the neck backwards, splashing some water around tp ,ake things pliable...so I asked the internet...and discovered a bloke in Queensland had been doing "Steam Neck Resets". I watched his videos and read some stories of other people who had tried it with success and I was convinced.
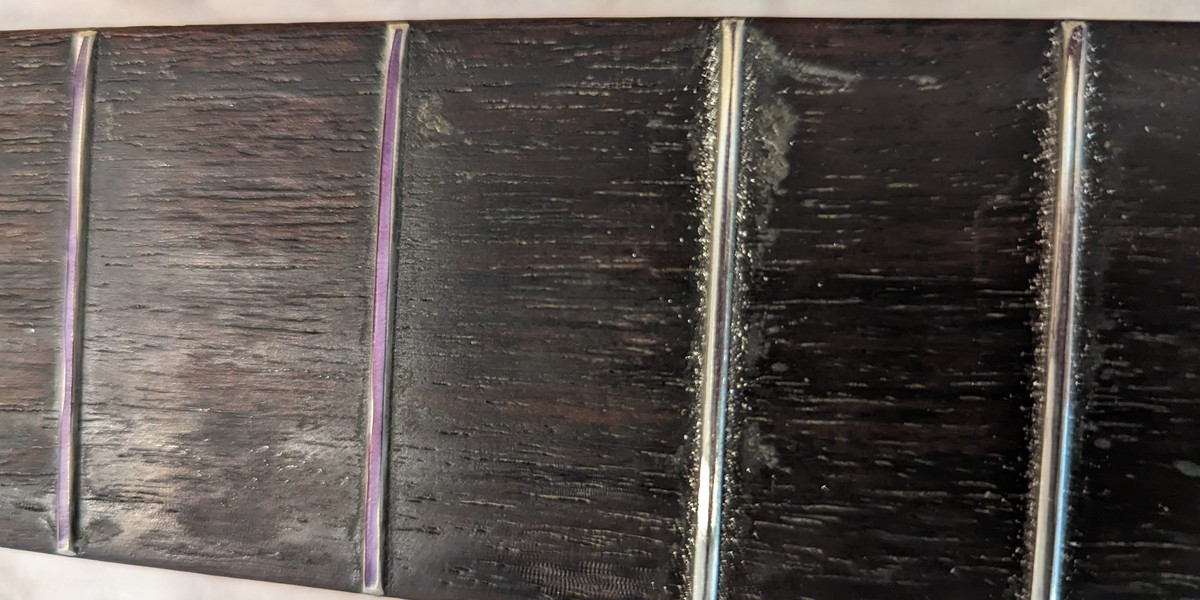
I decided to start with the fret grind and recrown. Classical guitar necks are flat, you so only need a flat block of wood and some sandpaper to do the initial grind back. I started with 240 grit, and I drew a black line across each fret with a permanent marker, sand for a bit, see whether all the black lines have been touched, draw the line back, repeat - basically I'm aiming to have a dead flat initial surface. I was suprised to find some grooves worn into the first few frets in the usual places. Nylon rubbing through steel!? That was unexpected. There was some very minor imperfections up where the fretting seemed buzzy, I wasn't convinced.
I spent a little time filing off any sharp fret ends as well, where the neck had shrunk a bit over time leaving some sharps. The file I used was a bit rough, I need to add a fret end file to my list for next time.
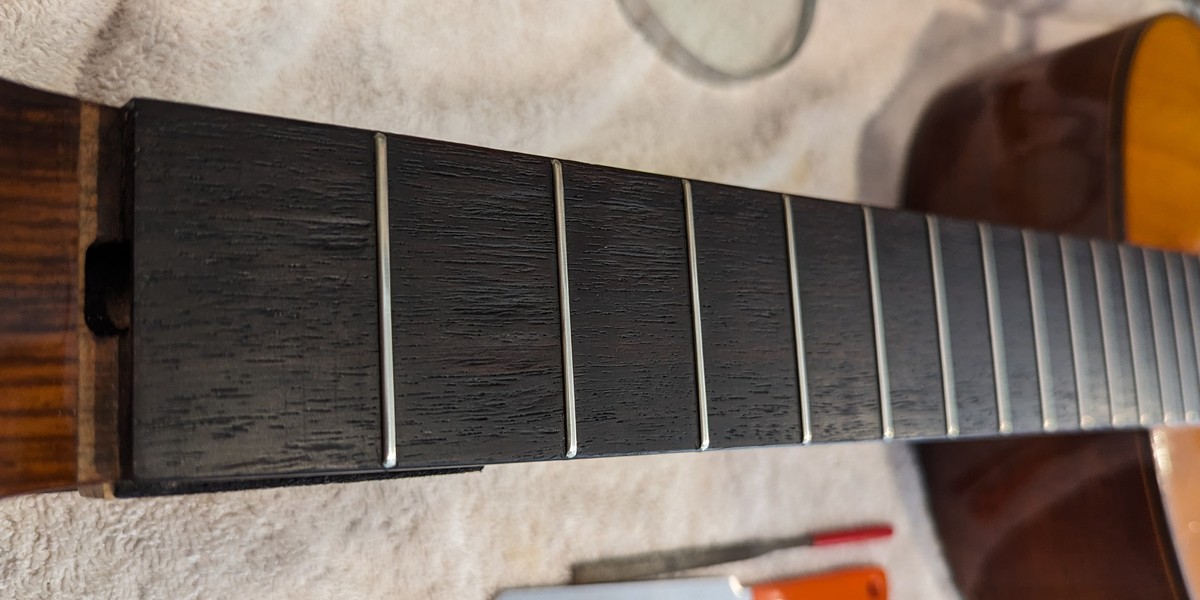
I then, still drawing black lines on each fret, ran my fret crowning file across. It worked okay, it's a cheap fret crowning tool, so I wasn't really happy. I will buy a good one for next time. Once I had each fret where there was approximately a thin black line across the top - meaning the original fret grind was still intact, but the rounded crown shape was still there - I moved to the next.
The final step was to hand polish each of the new crowns. I popped on my fretboard protector and worked my way down the frets, with decreasing grades of sandpaper, 400 to 600 to 800 to 1200 to steel wool. But the time I hit the steel wool it was nice'n'shiny. I could see in a few places where I had missed some scratches in earlier sanding, but over all, a nice job.
I had nicked the fretboard in a couple of places with the crowning file and the fret end file, nothing terrible, just a little amateur. I think it makes sense that the first fret grind I ever did was on the guitar that made me the guitarist I am today :-)
After an oiling it looked great. But no time to restring and test it - straight to the steam neck reset, I was very keen to try it out!
 1. Make a mark across the frets 1. Make a mark across the frets |
 2. Block & sand until all marks touched 2. Block & sand until all marks touched |
 3. Fret crowning 3. Fret crowning |
 4. Just a thin line still remains once filed 4. Just a thin line still remains once filed |
 5. Sand through grits to polish 5. Sand through grits to polish |
 6. Sit back, admire 6. Sit back, admire |
I bought a length of aluminium square tube and clamped it hard to the neck in a few places. I was using clamps that had rubber feet so they wouldn't mark the neck. The aluminium was sitting direct on the fretboard, but the frets are nickel-steel so they won't be marked by aluminium.
I then clamped the body to a length of board, with a few towels in between to keep surfaces safe. The goal is to have everything rigid so that when you apply the final clamp at the top it will pull the neck right back at the point when it joins the body. We aren't trying to bend the neck, we are trying to claw back the distortions where it all comes together. If you look carefully, kinda everything is involved - the soundboard, the heel, the sides, the internal ribbing.
I like concept though - put force in the direction you want to go, steam it so the wood and possibly glue becomes a bit pliable again, hold it there until it has dried out, and then when you release it and restring it, it will be back to where it once was. Maybe it won't last, maybe it will go back to where it once was? So what, do it again! - it can be a 5 year maintenance schedule.
Result - I steamed it 3 times over the course of a week, and when I restrung it the action was about 0.25mm lower than before. So my verdict is yes it works, but you need to steam it more over a longer period of time, the consensus seems to be 3 weeks. And note that I really pulled a lot of force on - around 12mm deflection clamping force as measured at the saddle - and that only gave me 0.25mm resulting action decrease. So my lesson there is don't be frightened that you are going to accidentally go to zero action, you probably won't. Ahd then if you did, whip up a new higher saddle - they are easy enough to make.
Sometime I will have another crack at this, but I wanted to get this guitar back to work. After restringing there were improvements in playability, and the buzziness higher up the neck was reduced. Not gone, but more tolerable.
A worthwhile endeavour - for more info on this technique search for "John Miner Neck Steam Reset". Still not "great" to play , but better now.
 Jig to hold everything in place Jig to hold everything in place |
 Initial measure at bridge 8.0mm Initial measure at bridge 8.0mm |
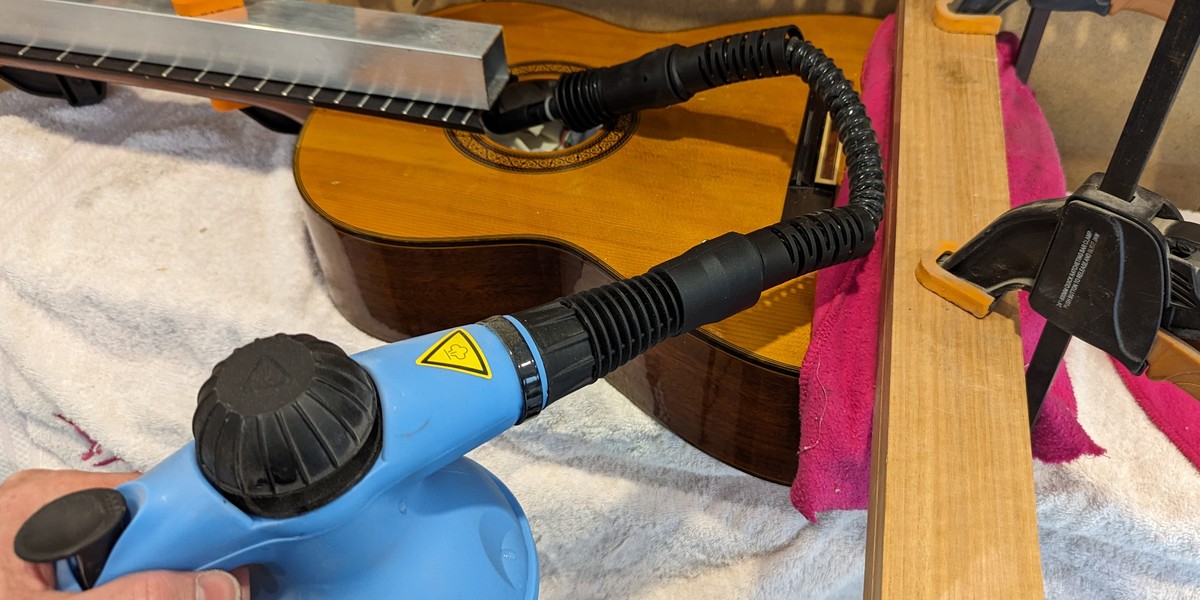 Fill with rags and lots of steam Fill with rags and lots of steam |
 This last clamp is particularly important This last clamp is particularly important |
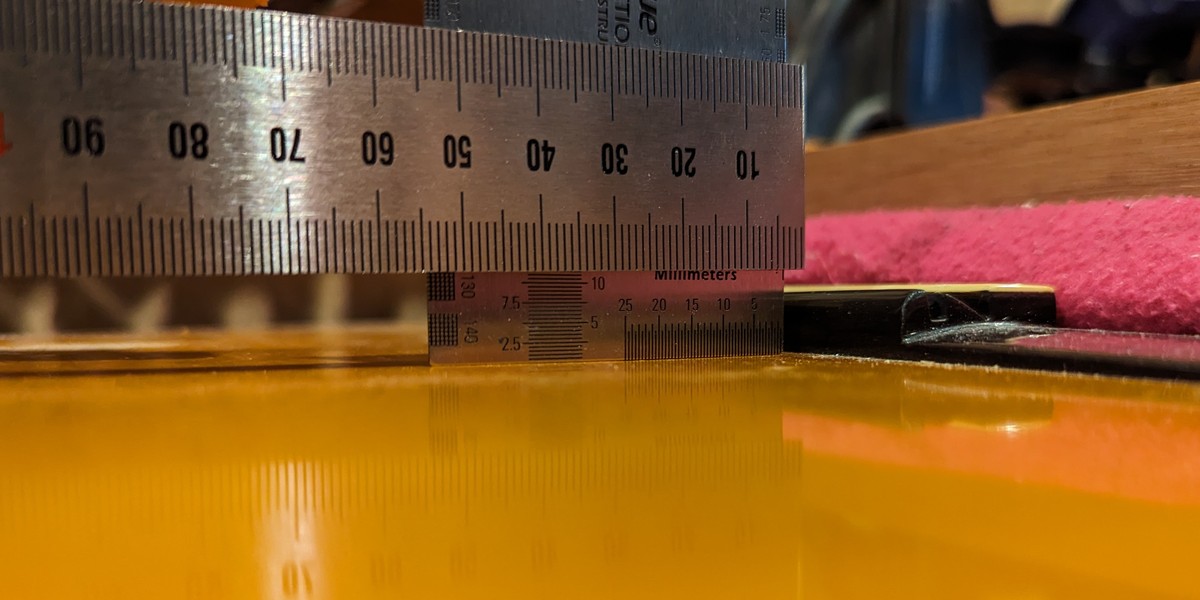 Cranked to 11.5mm - needed more Cranked to 11.5mm - needed more |
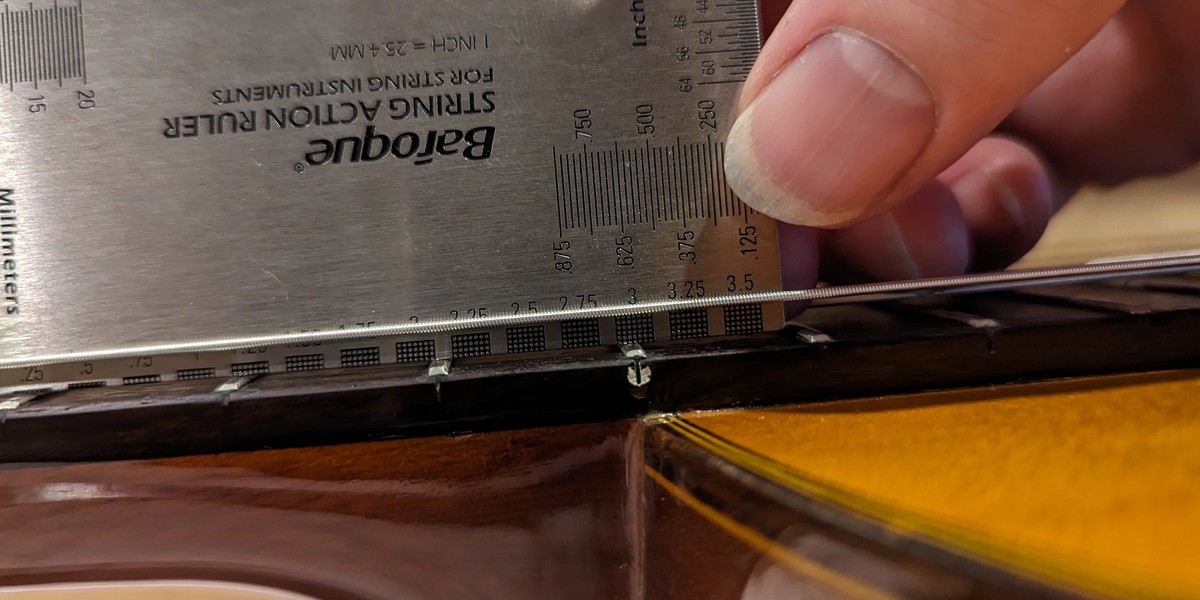 Finished with 2.75mm action at 12th fret Finished with 2.75mm action at 12th fret |
In the meantime, I will keep my eye out for an unloved/broken vintage guitar that could do with my attention and I will go through these processes again, but without any pressure of needing to get it back to work.
No comments:
Post a Comment