Showing posts with label Tips and Tricks. Show all posts

Saturday, 2 May 2026

Jack's Utopish social media and recording a Quip

Gotta love what Jack Conte tries to do. All the creatives out there, feeding the social media beast which has turned into a piece of crap algorithm driven attention seeking advertisement focus killing machine so billionaires can make more billions...creatives don't stand a chance of being truly creative if they need to feed that machine or are creative as a hobby with the day job pays the bills. I like my day job, but I also love creativity and I have been dabbling in sharing my creativeness with the world via the internet for more than two decades now. When Jack started up Patreon several years ago I jumped onboard - it's a way for fans to support artists.

So he's just released a bunch of updates which included the concept of "Quips" - shortform videos on the platform, with the idea that they are just quick and not overproduced. Behind the scenes style. I can get onboard with that! I have been making Jawmunji Talks videos on and off for years, generally I go longer form, but I have also done a few Youtube shorts. Seeing as I'm a recovering perfectionist it's good for me to be less-producey, so I just recorded a Quip and popped it into Jack's machine. Will that machine turn ee-vil? Maybe, but I want to say no. People will game it for sure, but will it intentionally be made ee-vil like the social medias? I want to say no. Will it get traction? Maybe! It will if we feed it! Can Patreon be the vehicle where fans can actually support creatives? I kinda think it already is! I love the "1000 Fans" notion - that you "only" need 1000 fans to pay you $100 a year and that is a decent income. I think of my youngest daughter in her various bands, I know she has followers, and she sells merch at gigs, and it gets devoured. I helped her make 30 high quality CDs for Hyperfest - all sold (note to self - write a blog about that). The lino print cheap t-shirts she makes move easily at a greater profit...heh, I think the CDs are much better value for money, but there you go!
The point being that she is already supported by local fans who show up and buy merch at all her gigs. So that, applied world wide on the internet seems like an obvious step. But the current social media, the streamers, all the internet machinery for it - designed to make the maximum amount of money for shareholders and if the creatives got nothing from it then that would consider that great.

Stepping off my soapbox, I decided to post a Quip. I love to talk about creative stuff that excites me. I love to engage with people who also love to talk about the creative stuff that excites me. I don't need to make a living from being creative, but I wouldn't stop people who want to support me as well! I do have a bunch of mates already on Patreon - in the early days I used to offer stuff so I amassed a number of supporters - but I stopped offering stuff (it was in a very very grey legal area) - and encouraged supporters who were expecting stuff to cancel their subscriptions - but offered cheap tiers for anyone who wanted to keep supporting me. Some did! Thank you supporters - it is great to engage with fans but when someone supports financially it changes things...people making a sacrifice because they believe in something. They don't have to sacrifice but they want to.

Let's switch to tech talking.

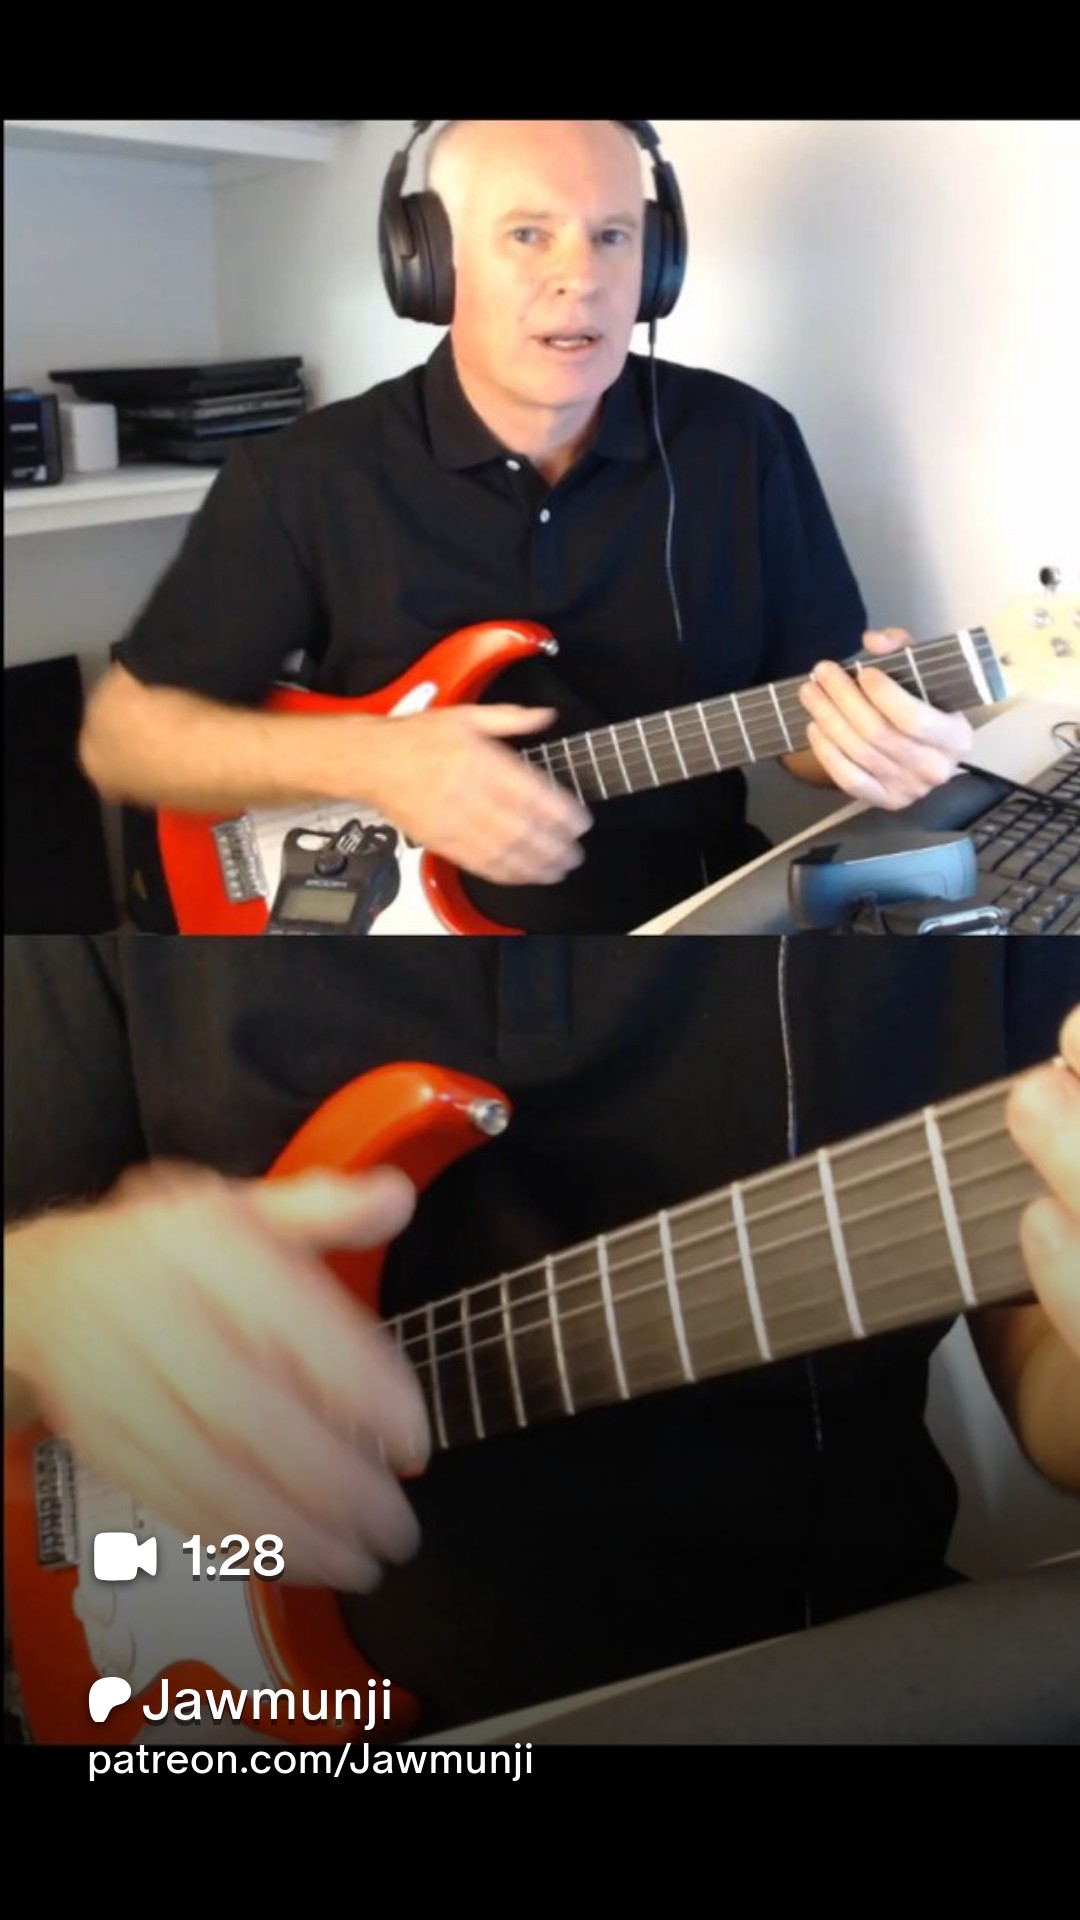
I would dearly love to have a dedicated room with cool gear set up to make it super easy for me record a video whenever I am in the creative mood. I do not have that. So just now I spent more time setting up the gear than recording the video. Shame. So here are some notes to Future JAW to help him out:

  • OBS Studio: still amazing. Keep using it for this sort of thing.
  • Web cameras: I'm running a classic Logitech C922 Pro and a C920. Both are dated - I'm going to buy a more modern replacement for the C920. Important - don't saturate your USB bus with webcam feeds, try to make sure each one is plugged into a different USB bus...currently I have one on the laptop and one on the dock.
  • Microphone: my ever-useful Zoom H1D. Turn it on a set it into audio interface mode. Plug it into USB, it's low bandwidth so it will be fine. In OBS Studio go into Settings->Audio and point a Mic/Auxiliary Audio to it.
    Remember! Windows->Sound Settings for Input and Output definitively show what is connected. All apps refer to the devices there including OBS!
  • PeSonus Studio 1824 interface, via Reaper DAW: this is the complicated bit. Guitar instrument cable -> PreSonus interface -> USB to laptop -> Reaper DAW -> OBS + headphones. I use the 1824 in ASIO mode, which is the best way to interface with an interface, and Reaper can apply fx and send them back to the interface, so I plug my headphones into the front of it and get near-zero latency. HOWEVER that isn't shared on the Windows laptop I use UNLESS you turn on Loopback=virtual in the PreSonus Universal Control application. Once you do that, you will see in Sound Settings an input for PreSonus Virtual - which you can then add to OBS as another Mic/Auxiliary Audio.
  • OBS Studio again: brings it all together. I've tried different picture-in-picture/split/shifting/etc methods for the webcams, I went for portrait this time, one webcam on top another on the bottom. In Settings->Video I went Base of 1080x1920 (ie portrait HD). Then it is a case of adding the two webcams, cropping and moving them to fit. The Zoom HD1 microphone I initially added a gate filter, but the electric guitar acoustically was getting through the gate when I dug in. If I increased the gate I had to shout to trigger it. So I added a mute/unmute hotkey and remembered to deal with it. Not great.

When in doubt, just talk through your problems with a chatbot - that's what I did. General life tip with chatbots: you have to have some basic knowledge of what you are trying to achieve, you have to half know the answer or they will lead you down a never ending garden trail to nowhere. You have to have  a year's worth of built up a knowledge of knowing how to get what you need from a chatbot, accumulated from trial and error...hence I wrote the notes above to help Future JAW when he forgets things.

What I need to do to be a little better for next time (and there is always a next time, I have been doing "behind the scenes" videos for 20 years) - at least one better webcam, and a microphone stand that puts a microphone close to my mouth so I don't have to worry about mute/unmute, so I can just use gating.

Oh and I played Pink Floyd Learning to Fly. I was aiming for a more "Pulse" live feel, so more bassnotes, wasn't quite getting it, still undecided whether I should be hitting it that hard. The G string rings a bit too much, wasn't happy with my playthrough. BUT THAT'S ALRIGHT...if you want perfection use AI slop.

Saturday, 11 April 2026

More vibe coding - song analysis

I am fascinated by the happenings in the LLM/Chatbot/"AI" landscape. I studied an "AI" unit at Uni more than 30 years ago, we called it "Artificial Neural Networks" in those days, but the underlying premise remains. I'm sure the tech is WAY more complicated than the simple models and training data we used. Heh, for my final year project I wrote a program in C, in DOS, that was running on a "luggable" computer (not quite a laptop, but a computer with battery you could carry around and use), that had a sound interface and a microphone. There was a small database of words, students would walk around with the computer and get volunteers to say the words that appeared on the screen and it would capture the audio - to be used for training data. I managed to put a pretty oscilloscope graphic on the screen as well - to make it fun for the person talking - as they pressed the space bar, said the word, pressed the space bar for the next word. After twenty or so words it would thank them and save all the sound files to folders to be later used as training and test data for speech to text. Very early stuff.

Anyway, it's fun to see it have come so far.

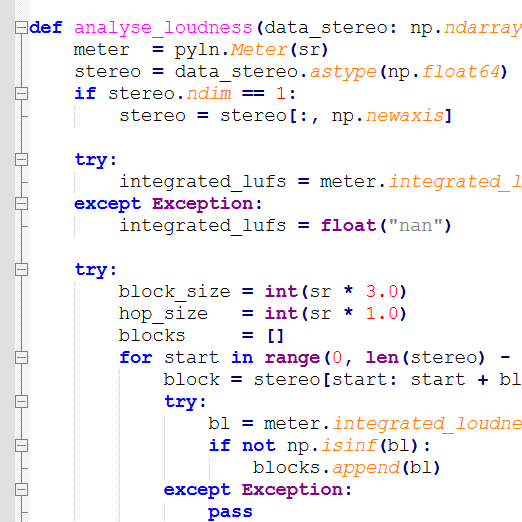
My most recent vibe code, with Claude who is my current favourite vibe coding chatbot, "we" wrote a python script to analyse music. Let me explain.

I have been mixing songs from my local church for a few years now, it's such a great way of practising and improving. Both as a musician and as a mixer/producer of a mixed song. I have mixed more than 60 songs over the last two years and I thought I'd take my favourite 12 from 2025 and make a playlist. But each mix has a different feel, as my ear developed, as my skills developed, so the 12 songs across 2025 have quite a different feel, even though they are all similar in style. Sure, there are differences - we aren't playing the same song over and over! - but I felt that as an "album" of 12 songs there should be a certain level of consistency.

I think you know where this is going

A basic consistency check is your LUFs and LRA. You don't want to be constantly turning the volume knob up and down between songs, or even within songs - so an overall perceived loudness (LUFs) and a measure of how much dynamics there are in a song (LRA) is important both for the listener and for a streaming service. Streaming services will adjust your loudness if you don't hit their metric.

In Reaper DAW I can easily track LUFs and LRA - but I was interested if I could get other sonic characteristics as a metric for comparison in Reaper.

In typical Chatbot style there was lots of talk about integrating various sonic libraries into Reaper (it has great programmability) blah blah, but chatbots just don't think outside the box. When it was talking about calling some python external to Reaper I said - "can we just do all this outside of Reaper?" and the answer was basically "yes that would be easy." Sheesh.

Suffice to say I now have an interesting python script that analyses a group of songs for an interesting range of metrics, looking for outliers and suggesting what needs to be changed and how it can be changed.

So much going on there. First thoughts are "C'mon JAW, are you trying to make all music hit the same bland boring metric?" No. And a little bit yes. Who else here turns down the start of "Time" on Dark Side of the Moon because they don't need to have extremely loud alarm clocks scaring them. I get it, the artistry, the "scare me into action because every year is getting shorter", but I don't need it on the 100th, 1000th listen. Or the first whalesong note in "Echos".

So I'm going to say yes, the LUFs should be close to each other (especially since the streamers will change them if you don't behave yourself) and the dynamics shouldn't be crazy wide. You don't want a listener turning up a song at the start because it is a quiet guitar intro only to turn it down again when the verse kicks in. At the same time you don't want your song to be so compressed that there is no dynamics at all (I was guilty of that on a few).

However for spectral data broken into bands, Sub - Bass - LoMid - Mid - Presence - Air, I do feel like there should be a certain amount of homogeneity across the board and yes, I did tweak some outliers. Frequency rolloff point at 85% is also another interesting metric. I don't want there to be some songs that sound like an AM radio and some that sound like you are standing outside of a rave party. Particularly when the recordings are from the same venue, the same style of music and the same groups of musos appearing in the songs.

From a vibe coding point of view - it s so good to do, fun and super effective and efficient. From an art point of view - I like consistency, I like having my mixes compared with each other to see where I went a bit wild in places. I have templates and recurring processes, but I mix to the song so they are always going to get a different vibe. From an album point of view I think reeling in some of the outliers is a good idea.

If you want to try it out, get it here.

Sunday, 1 March 2026

Chord Pro - make good guitar chord sheets

We'll all typed out guitar chords and lyrics into a text editor or word document and used spaces to try to line up the chords with the lyrics and then somebody wanted it in a different key so we painfully edited each chord.

Well no more, don't do that again!

There has been a standard around since the early 90's but in the mid 2010'sit was reworked to produce beautiful pdfs. It has so many features over using a text editor we're not going to even waste time discussing them.

Let's just get started!


  1. Download and install ChordPro. It's free, download the exe from GitHub last seen here
  2. You can edit text right there, or use a text editor, whichever way you want to did. BUT YOU NEED TO KNOW SOME OF THE STANDARDS! We'll get to that.
  3. You can use some of the built in styles to generate your pdf. I however wanted a very specific look and feel, so in the Settings window tick "Custom Configuration File" and point it to your json file style .
  4. As you change text, turn the preview on and off to re-render, tweak the pdf until you are happy with it.
  5. From the File menu, export your pdf, print, share, yay!

Let's talk the custom configuration file. I am very used to the SongSelect style so I made a json file that mimics it. If you want to make your own or edit mine, it is a little tedious...while the structure is "Really Relaxed JSON" ChordPro won't show you a preview if you have any errors at all. Open the Messages window to see what your problems are. Get a copy of the config file I am using here.

Title

This is self explanatory - add it to the top and fill it out:

{title: Happy Birthday}
{artist: Hill sisters}
{key: C}
{tempo: 82}
{time: 3/4}

This what you will get, very pretty and easy on the eyes:

Chord Diagrams

I like chords fretting to be shown. It doesn't hurt, it is on the far right it's not in the way. Any usual chords you use in your song will be shown, any unusual ones you can define yourself like this:

{define: Fadd#11 frets 1 2 2 1 0 X fingers T 3 4 2 X X}

Notice that the "fingers" part is what give the circles numbers, or leave it out to let the guitarist decide how they are going to do it - there will just be black dots. If however you specifically DON'T want a chord shown, use:

{define: E diagram off}

Here's an example of a simple barre chord, using the "fingers" definition with the same finger 1 groups them into the usual barre look:

{define: F#m7 frets 2 4 2 2 2 2 fingers 1 3 1 1 1 1}

You can make ultra advanced diagrams, for example this one is at 7th fret, using your first finger as a normal barre and then your fourth finger as a second barre:

{define: Bsus4 base-fret 7 frets 1 3 3 3 1 1 fingers 1 4 4 4 1 1}

Arrangement

Layout the arrangement. I like to have two pages max so when they are on your music stand in your folder you can see the whole score without changing pages. So reusing verse/chorus/intro/turnaround is great, but list the order they are going to go at the top. I defined a bunch of fonts, the one I use for the default arrangement is "comment_italic". Example:

{comment_italic: Default Arrangement: V1, V2, C1, V3, C1, V4, C2, C1}

Verse/Chorus

Once again there are are headers for sections. Use the keywords: comment, start_of_verse, end_of_verse, start_of_chorus, end_of_chorus.

Most importantly, use [<chord>] at the start of a word/syllable so that the chord will be shown above on that word/syllable. As for layout, add in extra spaces to pad lines out so they line up in the pdf. A bit clunky, but it does the job.

Mark out syllables! Sing it to yourself - hyphen the syllables to match the melody and rhythm - help the guitarist/singer know when to change chord, try to line up bars across a verse:

{comment: VERSE 1}
{start_of_verse}
Hap - py [C]birth - day to [G]you
Hap - py birth - day to [C]you
Hap - py birth - day dear [Fadd#11]Some - bod - y
[F]Hap - py [C]birth - day [G]to [C]you
{end_of_verse}

Intro/Turnaround/Instrumental

An Intro/turnaround/instrumental doesn't have a section as such, it's just inline text. Use barlines to help the reader out:

{comment: INTRO}
[|][G] [|][C]

If there is some tab you want to include, to show a riff or something:

{comment: INTRO}
  [G]                [C]
{start_of_tab}
E|------------------|------------------||
B|----------0-------|-------1----------||
G|-------0-----0----|-------0----------||
D|----0-----------0-|----2-------------||
A|------------------|-3----------------||
E|-3----------------|------------------||
{end_of_tab}

Other Good Stuff

  • Change the key! From Settings->Notation click on Transpose, specify the key From/To and refresh the preview! (Note: any unusual chords you defined will need to have the new key versions defined)
  • Force a new page with {new_page}
  • In the same way you use spaces to pad out horizontally, use carriage returns to pad out vertically. If you can make your score fit on one page try to do that, but if it has to go over two pages then space it out.

Download my "Happy Birthday" chordpro file I was using here as an example, and the resulting pdf it made.

Saturday, 21 February 2026

Crowd vocal isolation Part 1

So speaking of AI I used my current favourite Chatbot (Gemini 3 Flash) to research deeper into vocal isolation models. I had been using Demucs then Demucs FT (Fine Tuned) for a while but seeing as the space is active and busy I was interested to know what else was going on.

Let's back up.

If you are recording a live sound, which I do quite regularly at my local church, then having the sound of all the people singing in your mix is an ABSOLUTE GAMECHANGER. I also used crowd mics for recording my daughter's band concert - basically I will want to use ambience/crowd microphones for anything live. It's how the resulting mix sounds like you are there, part of it, with the crowd, rather than a studio performance.

Here's the problem - the crowd microphones are going to pick up the PA, of course. So step 1 is to use the right microphones and have them in the right place. I was lucky that someone had previously set up a pair of Samson C02 condenser mics at my local church and they kicked my inspiration into overdrive for adding them into a mix. What I found however was they were very low on the stage and pointed forward and would pick up what was in front of them rather than the "wider bigger vibe". We moved them up onto stands which helped a lot - they picked up a wider sound of the people but the PA house sound was still very loud in them. I have since experimented with location and different mics, which is ongoing hence this is Part 1 of an ongoing experiment.

One way of reducing the house PA sound is to use the right sort of mic in the right sort of placement and use EQ/etc to draw out the people's voices...but it's the 2020's and we have software models for everything. The application of music isolation blew my mind when models overtook the algorithmic systems (thanks for your persistence Steinberg, it was a good effort but it was the wrong approach). So if I run an ambience mic through a model to separate just Voices and Not Voices I get this wonderful ambient I can mix back in.

"Remind me why you can't just use the raw audio with some EQ and effects?"

As you turn up the crowd mics, even with a sculptured signal, the drums/bass/instruments in the recording starts to overpower the actual recordings of the drum/bass/instruments. You will start getting that phasey reverby roomy echo which sounds more like mud than like the crowd. A little is okay, too much is meh. So if you really want the people big in the mix, isolate out the instruments.

The Chatbot talked to me about other models to try beyond HTDemucs FT (developed by Meta (Facebook) trained on a massive set of internal data). We have the MelBand Roformer (developed by ByteDance (TikTok) and Kimberley Jensen) and community expansions of it with extra data of messy real world audio.

I discovered that for some of my recordings The MelBand Roformers were a lot better! But it is not a one-size-fits all unfortunately - if you really want to go to town you would run all the models and mix them together.

Okay, let's have a look/listen at an example - here is a recording straight from the crowd mics:

For reference here is what the microphones being held by the vocalists sounds like, mixed:

Notice that there is some instrument present, especially drums. They are dynamic mics and the vocalists are holding them close to their mouths so it's not getting much drums/instruments, but it is there. But also notice they are clear and crisp. That should be the predominant sound in the mix - not the mushy crowd mic version - but we want that underlying crowd sound as well!

I'm not going to mess with EQ and effects for this example - although that would make it a sound better/balanced - for the purpose of this discussion let's just listen to what the isolators do. To initially blow your mind like it did mine, here is just the instruments (for reference this was done with MelBand Roformer InstVox Duality V2 model).

Righto - let's first listen to HTDemucs FT. You can run this yourself - make sure you have python installed and execute:

demucs -n htdemucs_ft "test_raw.wav" --two-stems=vocals

Of course it's not perfect! But wow it is very very clever. The main vocals are lound in there - coming back through the house PA quite strongly - which is to be expected - but the crowd is underneath. Not as much as I want - but save that for Part 2 - different mics and different placement to better pick up the people and not the house PA.

Now for MelBand Roformer Big Beta (community)

audio-separator "test_raw.wav" --model_filename "melband_roformer_big_beta5e.ckpt" --mdxc_segment_size 256 --mdxc_overlap 2 --mdxc_batch_size 1 --use_autocast --output_format=WAV

Code tips: ask your favourite Chatbot. Some of these parameters are tuned for my laptop GPU which is not very powerful.

Notice it dropped off a little towards the end, and it grabbed a bit more bass towards the start - I think that was more the bass guitar then vox. Not bad but I don't think it beat HTDemucs.

MelBand Roformer original Kim version

audio-separator "test_raw.wav" --model_filename "vocals_mel_band_roformer.ckpt" --mdxc_segment_size 256 --mdxc_overlap 2 --use_autocast --output_format=WAV

Similar, handled the end a bit better, it picked up more nuance with the singing, for example the word "Surely" at the start has been captured better in this model than the other two.

MelBand Roformer Duality

audio-separator "test_raw.wav" --model_filename "melband_roformer_instvox_duality_v2.ckpt" --mdxc_segment_size 256 --mdxc_overlap 4 --use_autocast --output_format=WAV

Similar again, seemed to be slightly more gatey - decided the gap between phrases was silence, which is technically correct. Didn't grab quite as much bass as the other two.

Look I could go with any of them, in this test snippet I reckon the winner is HTDemucs FT or MBR Duality.

As a final closeout, this is what a people-less mix sounds like:

Notice there was an electric guitar being played, but the house had it down so low it was barely present in the crowd mics! But because I had all the channels recorded, I turned him up, because it sounded so good. So finally, with people mixed in, the point of all of this:

It brings out the "liveness" of the room. Because there was still a lot of main vocalists in the mix they come through a bit echo-ey, but the fact the people are singing underneath really turns the mix around.

There you have it! Using the power of AI to isolate vocals - but it's only as good as the original mic signals and I have room to make them better. Watch this space!

Saturday, 29 November 2025

More cracked/torn nail repairs

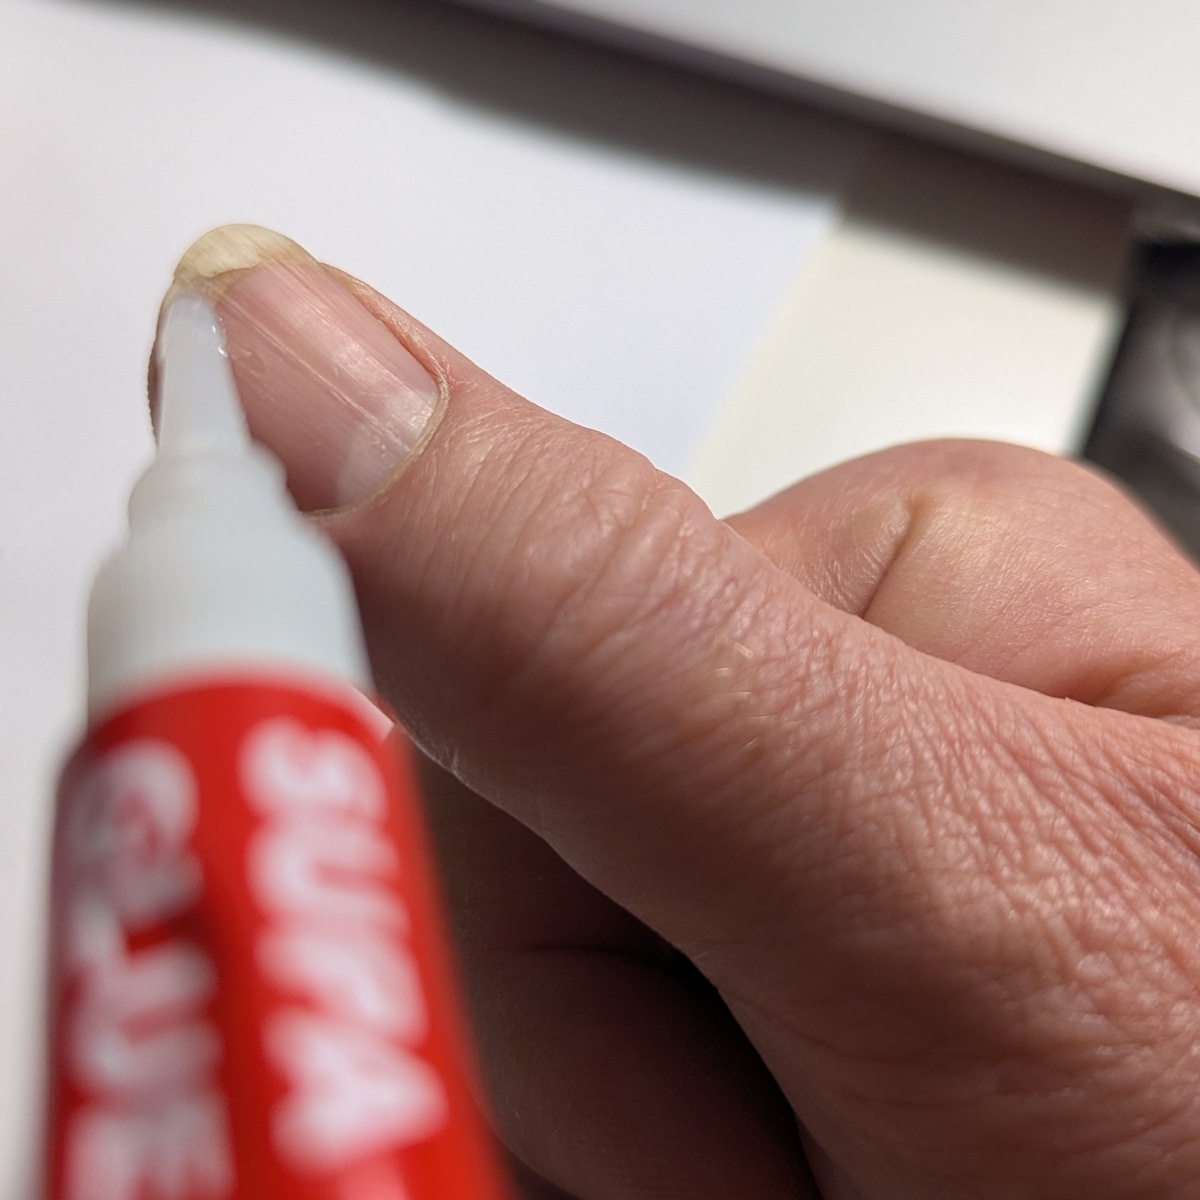
Some of us guitar players like a bit of fingernail. on our right hands. Especially when plucking nylon strings, it brings out the higher frequencies. Nylon can be mellow and dull on just fleshy fingertips. As much as you try not to break fingernails - doing things left handed, avoiding some activities which are known fingernail crackers - it still happens, generally at the worst possible timing. I've written about nail repair before but now I've got some science to improve the process! And pictures!

Superglue is still at the heart of it, but if you mix superglue with sodium bicarbonate - easily sourced while grocery shopping if you don't already have some - you get a really tough substance. I was using it while repairing guitar nuts. Last time I was applying superglue and waiting, now I add superglue and sodium bicarbonate makes an even tougher thicker layer that sets hard in seconds.

The science is that when you mix superglue (ethyl cyanoacrylate) with a weak base such as sodium bicarbonate firstly it hardens extremely quickly and secondly forms long polymer bonds. That's good, it's tough!

My process is to firstly have a stash of superglue tubes at the ready. Once opened it will eventually go off even when capped, and since you can get tubes for under 50c each in bulk, just have a stash at the ready. Step 1 is to put a drop or two across the affected area, let it flow out...basically just go for the tip of the nail over where you have cracked/torn it. If it is too challenging to get any into the tear (use toothpicks to poke around) don't stress it. What can be annoying is if you get a bit of glue on the underside of your nail and it sticks your skin to the nail... If that happens you can reset and start again - Acetone dissolves superglue.

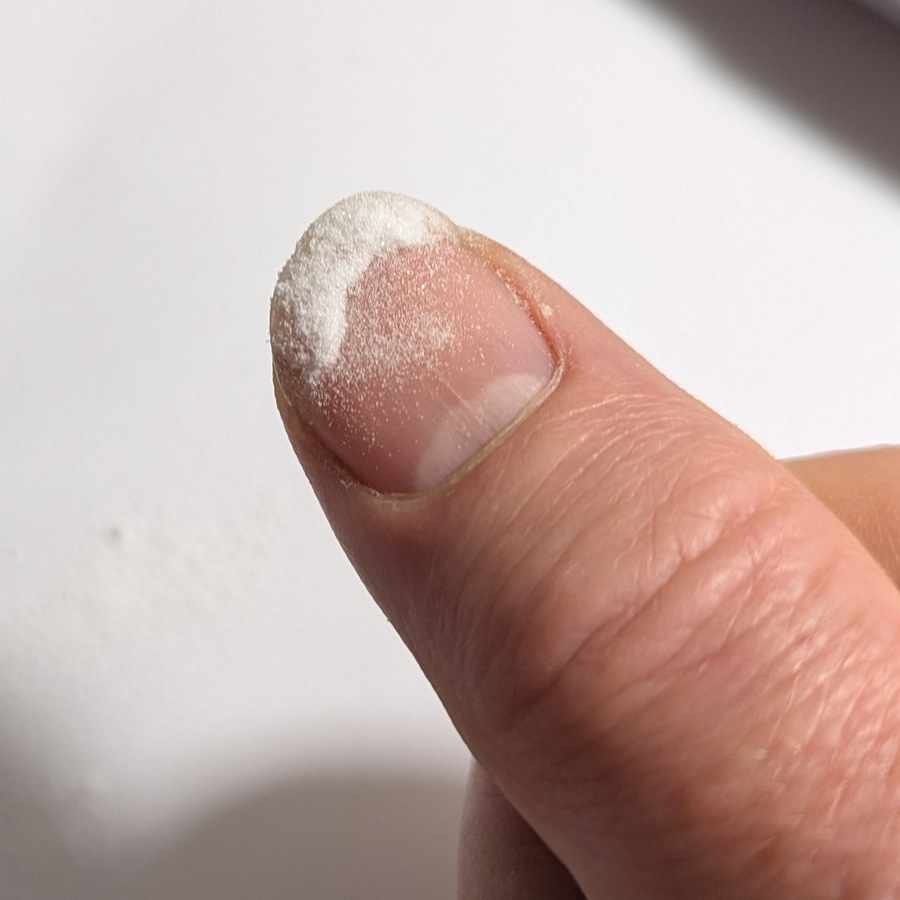
Step 2 is to sprinkle sodium bicarbonate over the glue. Just add more than you need, once it sets you dust off the rest. Be cautious, it gets hot as it reacts. Don't do too much at once.

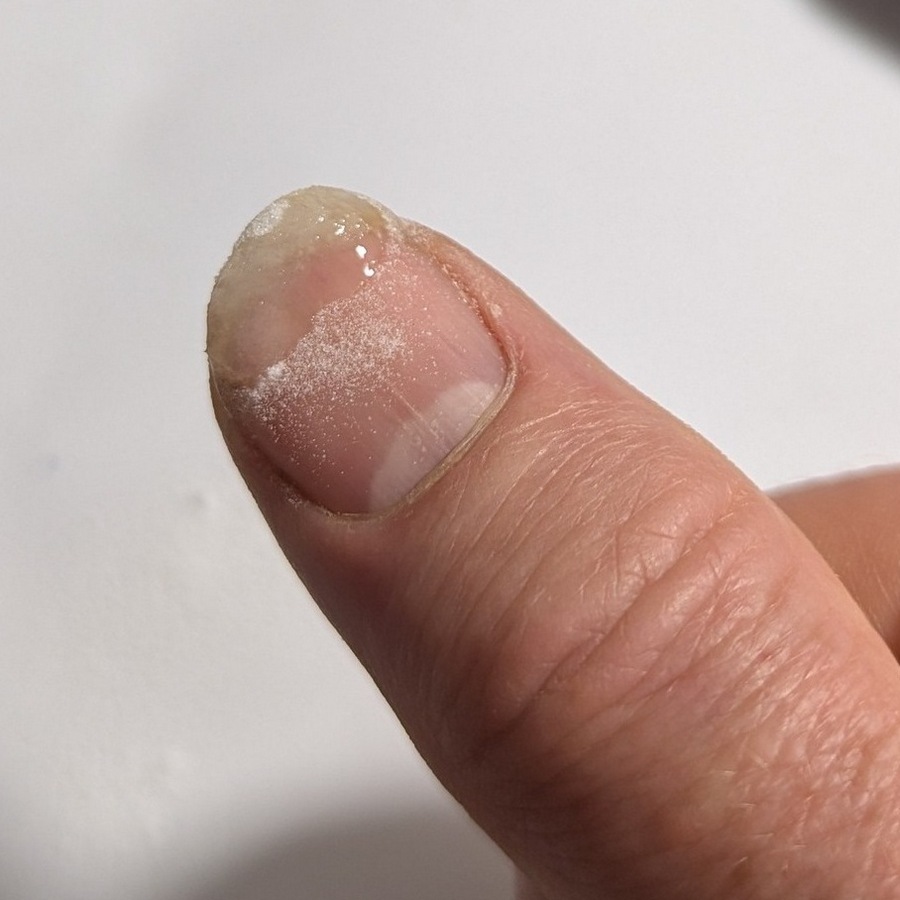
Step 3 is to then add another drop or two to float over the rough surface of bicarb. This will build a good thickness layer. Let it set, will only take a moment.

Step 4 is to do a bit of filing - just smooth it off, don't touch your actual nail. If you are a picker/fiddler, you will find having a lump of cement on the tip of your fingernail frustrating. Relax, let it go.

It will be good for a week before it will start to crack and peel away from your nail. Redo it again if you need. This time around I redid it a second time as I needed to play two gigs separated by a fortnight. After that, it will either have cracked off or just remove it with acetone.

Happy days!

Glued and powdered Second glue coat ready for light shaping

Sunday, 19 October 2025

Restoration: Cassette

A mate of mine pulled out an old cassette of a recording from the late 70's that he played on, and ripped it to digital, handed it to me and said "if you feel like a challenge, see if you can clean this up." I do like a challenge.

The songs were really well done - great old Gospel hymns sung by a talented dude, backed with piano/guitar/bass/drums and a Gospel choir - I could hear through the bad quality that they were pros. But yikes, how do you recover that? Armed with my ability to use an AI model to do isolation, I set about trying to separate the instruments and vocals. Clearly the model was not made for such recordings, it couldn't separate out vocals/bass/drums/other, but it did a pretty reasonable job of separating vocals and other. I then had a chat to the Chatbots about what is going on a learnt a few new things.

My main issues were the usual hiss, boxiness and lack of sparkle, but the two other things that bothered me was the recording drifting from left pan to right pan, and the times the recording seemed to be out of tune. Some other minor things like vocals too loud at times and the drums were so mashed into the mix they were barely discernible.

So far, I have used the following approach and the initial results are quite satisfying:

  • Separate vocals from everything else. The lead vocalist, not a problem, but the choir sometimes appeared in the lead vocals and sometimes in the other. Kinda makes sense, it was a dense choir, it wasn't too bad I found I could volume envelope my way around most of it.
  • Collapse both tracks to mono, then re-expand them with:
    • a hard left/right two tap delay which gives a mud-free perceived stereo effect. Depending on the difference in delays you can tweak how much expansion you want. My ears can detect even a 1ms left - 2ms right difference, it's subtle but it is there. At 5ms - 10ms it is quite clear. >50ms is starting to sound cavernous.
    • Magic 7 is my favourite reverb at the moment which adds spatiality, but also adds muddiness for me, so I dial in a room sound and then adjust the wetness.
  • EQ - lows and mids: I found the bass was booming annoyingly and the low mids were too prominent. I used a normal EQ to get this more like what I wanted to hear. I wanted to do a multiband EQ compressor but I find them hard to use - I need to practise more - so where there were sudden thumps I used a volume envelope to contain them. It's brutal, but if you don't push it too hard I don't hear it "everything suddenly ducked". Hmm, I really do need to practice using EQ compression.
  • EQ - highs: Cassette seems to rob us of sparkle. When I tried to push it back in I was just increasing the hiss. So I used a little bit of EQ in the areas that didn't sound like his, and a saturator to create more high frequency overtones to "artificially" add more sparkle back. This seemed to work okay - what else can you do?
  • Compression and limiting to help smooth out the dropouts and dips. And this might just be me, but I like smoothness and consistency in what I listen to. I like swells but I don't like to be jarred. Dynamics in music is great, maybe my ears are already too shot, but I like only subtle dynamics, I prefer a consistent balance. I don't want everything to be the same perceived loudness the entire time...well, maybe I do a little :-)

I noticed while trying to sweep the EQ listening for what annoyed me that "it seems to ring everywhere!" When I chatted to the bots about it, it's all artifacts from tape. Head misalignment, tape speed inaccuracies and just the nature of tape as a data storage medium. I found a compromise...these recordings are never going to sound crystal like they were recorded with modern gear, my main aim was to remove the panning warble, to balance the EQ, some re-producing/mixing to smooth out the dynamics, and I had to accept pitch drifts and out-of-tune sounds.

"Old school analogue vibe."

Monday, 29 September 2025

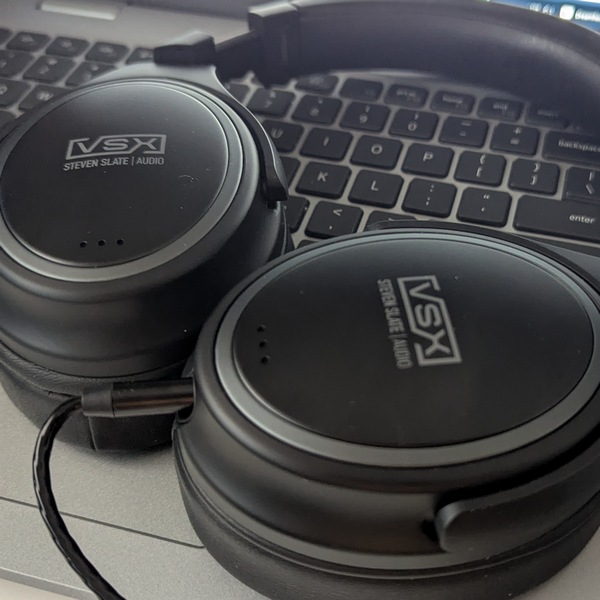
Steve Slate VSX Listening Routine

What to Listen For, What to Check, How Do You Use These Things Anyway?

This is a reminder to myself about how to do a mix translation test using VSX headphones through the VST plugin, after doing the bulk of mixing in Linear Mode.

* * *

1. Linear (Flat / Microscope View)

Play 20–30 sec mid-strength section

  • Check local loudness relative to snare/kick.
  • EQ balance has no harsh spikes, not dull anywhere.
  • Bass and kick drum has nice separation.
  • Listen for sibilance, cymbal/hi-hat/high end harshness
  • Mono check (quick flip: does vocal stay centred? Does low end collapse?).

2. Mix Room – Nearfield (Producer’s Laptop Monitors)

Play the same section.

  • Vocal placement sits in the mix, not on top or buried.
  • Snare/guitar/keys clarity in the mids.
  • Kick vs bass relationship in low end okay?
  • Does reverb delay stick out?
  • Small level tweaks (1-2 dB) often shine here.

3. Mix Room – Midfield (Full Mix Perspective)

Play peak song section.

  • In low end does kick + bass still feel solid.
  • Panning/reverb/stereo balance feels okay, no phaseyness.
  • Automations and arrangement flow - do transitions lift the energy?
  • Overall size - not too thin, not boxy.

4. SUV (Car Test)

Play full chorus/bridge at a higher volume.

  • Vocals still audible? (cars bury them if too low).
  • Kick + bass groove not too boomy?
  • Sub-bass control - does anything rattle or overwhelm?
  • Harshness at loud playback - does the mix stay smooth?
  • Does the song feel exciting/hyped?

5. SA-Pods (Earbud Reality Check)

Play chorus at low–moderate volume.

  • Vocals cut clearly (lyrics understandable).
  • Snare/guitar mids provide drive even if bass vanishes.
  • Quiet-volume test - does the mix still feel compelling?
  • If it works here, it works anywhere.

Sunday, 29 December 2024

Reaper, you've done it again. ReaSamplOmatic5000.

As I mentioned earlier I decided to make some drum tracks to play along with for my fingerstyle arrangements, equally to improve my tempo and equally to make them more engaging to audiences. I've played with drummers many times over the years, solo fingerstyle, it makes sense. Solo fingerstyle already incorporates a bassline so don't need a bassist, it incorporates a melody so don't need a singer, it incorporates a rhythm so don't need a rhythm guitarist are out...there's some but not a lot of percussion so drummers are a good fit! I've talked about playing with drummers many times as far back as 2009 and 2010 and at an open night a decade ago not to mention a gig I did this very year at work with my mate Geoff.

I'm not a very good drummer. I own an entry level electric drum kit, a Yamaha DTX Explorer, I dabbled a bit years ago, decided drumming is best left to drummers. But I've always had a love for the drums and how they fit with guitars, and it goes right back. Let my wax nostalgically for a moment.

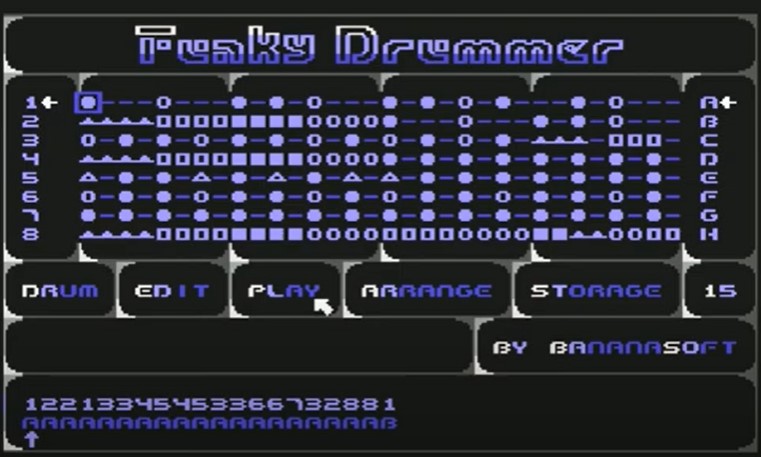
In the mid 80's I was a Commodore 64 nut. It's where I learnt to program - C64 basic and even hand coded 6502 assembler. Musically, there were a few programs I used on it, one was "Funky Drummer". I would make drum loops and play along with them endlessly. Sadly no recordings of that exist anymore...I do have a few cassette tapes with various stuff on it, perhaps one day I will stand up a cassette player and see if I can find any!

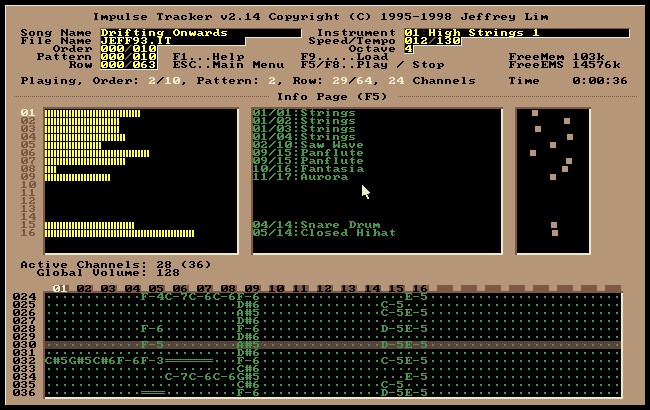
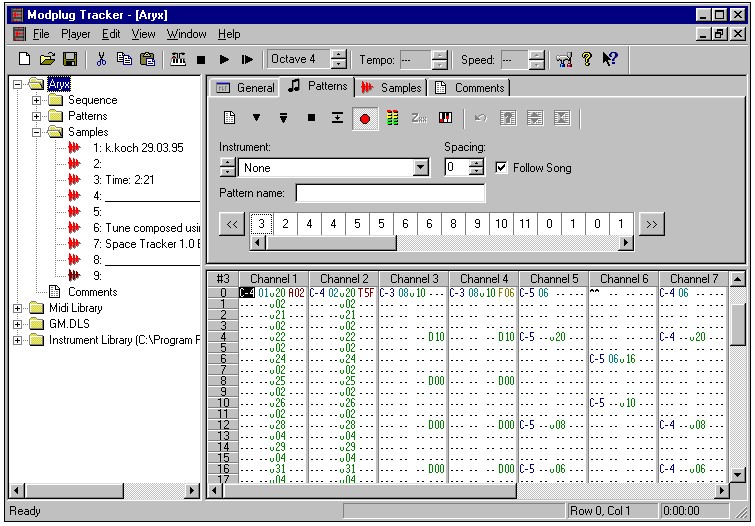
In the mid-late 90's a mate of mine at work introduced me to the DOS multi-track sequencer "Impulse Tracker" which was a whole new level of drum machine, with actual drum samples! I had a lot of fun with that. That eventually gave way to "Modplug Tracker", being Windows based, but I never enjoyed it quite as much. I wrote several original songs in the late 90's early 2000's during the time I was getting more into arranging fingerstyle covers. Fingerstyle had always been my first love, but I had a fun experimental "full band" period of time which ended around 2001.

Impulse Tracker ModPlug Tracker

Yes, recordings exist from that era...I need to find the masters and remix them...one day. I've never shared any here before, I'm not sure why - possibly because they just aren't any good - but why not. Have a listen to these badly mixed songs I wrote - using Impulse Tracker, my electric guitar, bass and some vocals. Ask me if you want me to talk more about songs from my distant past :-)

Blue Metal:
Sheister Meister:

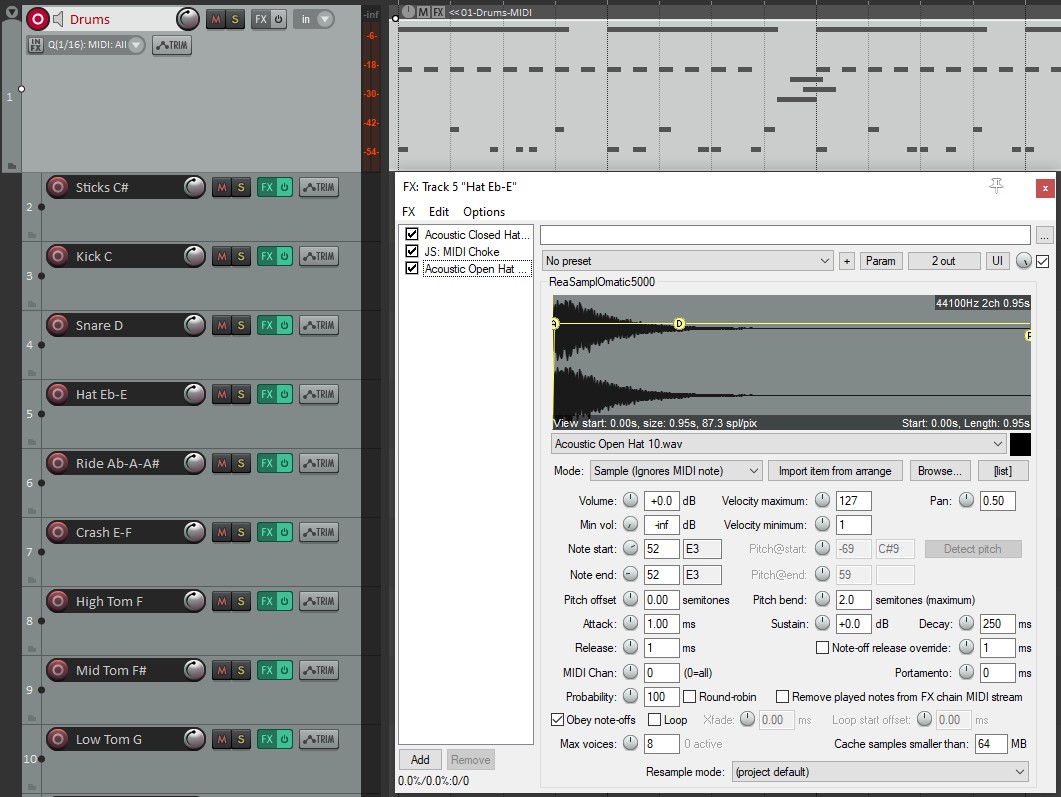
Which brings me back to the topic of the day, making drum tracks. I'm not going to revive any of that old software, but I have my DAW Reaper, and I have Kenny Gioia, The Legendary Reaperian of Lore. He showed me the FX called "ReaSamplOmatic5000", which is EXACTLY what a sample tracker in the context of Reaper should look like. Good job Repearians. It took me a while to get my head around it, but it is just what I needed. Essentially using MIDI to track samples, making it the drum machine sequencer I loved from my youth. I've already churned out a backing drum track for "Wish You Were Here". What really makes ReaSamplOmatic5000 special for me is that I can us my little AKAI MPK mini mk3 MIDI device as a drum trigger - OR - I can use my Yamaha DTX Explorer as an actual kit through my PreSonus interface to record the drum hits, when I have drummer in the house. Or even, olde school, just click away in the MIDI editor and make them all like I did when I was a kid.

So nice. I've got my WAVBVKERY vintage kit drum samples, I will need to look for others for the various songs I do - but the 70's Ludwig is a great starting point . It will take some time, but it will be good to make these drum backing tracks.

JAW's guide to using ReaSamplOmatic based on Kenny G's tutorials

References: Youtube 1 Youtube 2

Note for Windows OS: In Options->Preferences Device, if you are just using your computer soundcard, then don't use DirectSound, it is gross and laggy. You could use ASIO (either the one that came with your MIDI controller or ASIO4All) but the driver takes over windows sounds so you wan't be able to listen to youtube/music/etc. A good option however is WASAPI, which is Microsoft's answer to ASIO. If you use it in Exclusive mode it is pretty close to ASIO, but then you may as well use ASIO. In Shared mode it is quite good - not too laggy, and you can listen to Youtube at the same time. Change your Block size to be low for low latency, but high enough that you aren't hearing crunchiness.

  • Make a new track called Drums. Set it to Record, set the Input to MIDI, All Channels.
  • Right mouse click Input, Track Recording Setting, turn on Quantise to 16th notes.
  • Right mouse click Input again, set Record MIDI to Overdub. That way each pass just adds drums.
  • Make another track called "Kick". Add the FX ReaSamplOmatic5000.
  • In the ReaSamplOmatic5000 drag in a Kick Drum sample. The View->MediaExplorer is a great way to browse your sample library, when you have found the one you like, drag it into the waveform window.
  • Set the Note start and note end to both be the MIDI number for your target MIDI note. It's a good idea to turn on View->Virtual Keyboard so you can see what number/what is happening.
  • Set Min vol to -inf if you are using a touch sensitive (velocity) MIDI trigger. If you are just using your computer keyboard, not really an issue, it's only on/off
  • Make sure the Mode is set to Sample (Ignores MIDI note).
  • Route your Drums track to the Kick track by dragging the routing icon from one to the other. Set Audio to Off, you only want to route MIDI.

You are now at a stage where you have a MIDI track to record your MIDI triggers, it passes the MIDI down to a drum track, the drum track listens out for the one specific MIDI note and then plays the sample when it gets it. You can add other normal FXs to it, adjust faders, panning, etc, like a normal track.

A few other tips/tricks:

  • Obviously, add a track per drum type!
  • You can include multiple samples per track, for instance I will have a "Hat" track, and it will include an open and close hat sample.
  • In the case of an open hat which rings out, you can make it stop ringing if another hat strike is made. Add an FX "JS: MIDI Choke", set the Choke Note Range Start to the the MIDI note that you want to kill the ringing drum, set the Affected Note Range Start to the MIDI note of the ringing drum. In the ringing drum, set "Obey note-offs" to true. Now, if you trigger an open hat, then a moment later trigger a closed hat, the open hat sample will stop ringing, so more like a real drum kit.
  • When in the MIDI editor, setting to "Named Notes" view is nicer, and double right click on a note to name it.
  • You can change the Grid size in the MIDI editor in the drop down box at the bottom of the window.
  • If you need a different time signature, for example there is a 2/4 bar, then right click on the bar in the main window, Insert Time Signature/Tempo Marker, set it to your new time signature, and then repeat the proces in the next bar to change it back to the previous timing.