Showing posts with label Guitar Physics. Show all posts

Wednesday, 4 June 2025

Custom Custom Electric

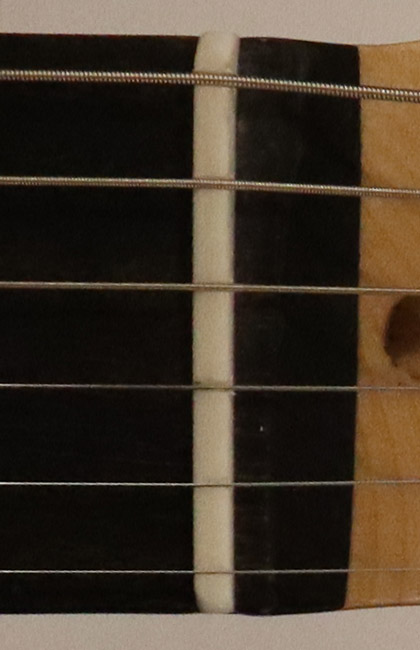
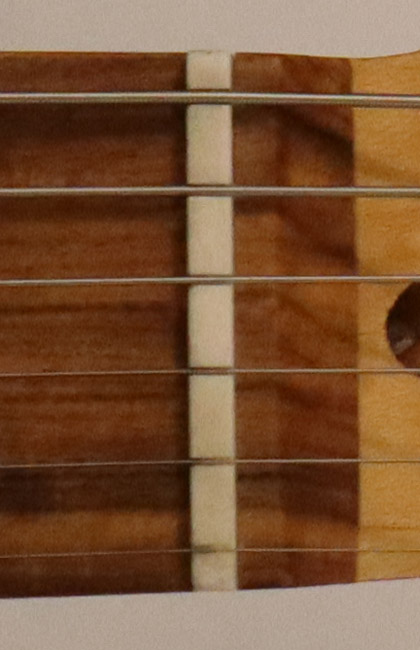
A few years ago I made a custom electric guitar. It was pretty rough at first, the nut was not great so it fretted poorly towards the nut - always went sharp. I later filed it down, and went too far, so then it buzzed in the open positions. But as a practice guitar it is quiet unplugged and has a soft touch like a classical guitar. My Esteve classical hurts my head - I have been playing guitars at full fingerstyle tilt for so long that when my ears send the signal to my brain it just says "NO MORE! JUST STOP". So I could play with earplugs to drop the amplitude, or I could just play quieter (that's actually a good idea), instead I built an electric that feels like a classical and I play it unplugged.

I've been playing it so long I'm used to it. But every time I think about recording something with it, I can't bear the tone. It's just so, umm, electric. I don't understand and don't have an ear for electric guitar tone.

Recently I'd been playing "Shine On You Crazy Diamond" as a fingerstyle piece, on the electric. I decided to have a try recording again this time through an interface and with Reaper DAW with some VSTs. The tone was better! I fiddled around with pickup and tone selection, ending up with neck only and tone about 3. So super mellow. But I then cranked the mid-high in EQ. I guess that means I could have backed off the EQ and rolled off the tone...but I'm thinking that I sculpted the tone in software in a much more complicated way than the simple RC analogue lowpass filter that is a tone knob.

So I didn't despise the sound, and it was Capo 3 so the nut buzz was masked - yes, I did tune at Capo 3 to account for any Capo-sharpened-my-bass-notes issues.

This got me thinking!

  • I like the feel of the guitar almost as much as I like the feel of nylon.
  • I can buy parts and do some alterations to the guitar so keep going down the path I discovered.
  • I'm sure I can get a pedal to do the EQ and the reverb so I don't have to play through a laptop.

I spitballed ideas with ChatGPT 4.5 and since I'm a total engineer and I take everything back to first principles, the plan I came up with seemed to make engineering sense. ChatGPT is a little too excited and encouraging and desperate to please, so you have to kinda work past that, so I tried to keep to the fundamentals of what the plan would result in. Ever since my great ChatGPT debacle I am quite wary of the LLMs. But they are great to hash out ideas with, because they know the entire internet. This is what I came up with:

  • Get some new pickups. I was amazed with Wilkinson pickups when I did the bass build for the daughter (still working on the build video), they rivalled the Seymour Duncan for 1/6th the price. Shhh, don't tell Dunc I said that. I did make a long tedious video about it here.
  • ChatGPT talked me out of a single neck humbucker. Because I play right up on the fretboard, the tone is already super mellow, and a humbucker will darken/smooth the tone rather than brighten it.
  • I don't want a bridge pickup. They just sound nasty for fingerstyle. But a middle pickup could be a nice touch, especially if it is reverse wound reverse polarity, because it will reduce hum, and add a bit of extra sparkle because it's going to pick up more harmonics than the primarily fundamentals of the neck pickup.
  • If I'm only going to have a neck and a middle, ChatGPT suggests a pot to blend the pickups. I had never really thought about this, but there is a thing called an MN pot which has two gangs, one reverse to the other, and it is logarithmic, which is better suited to volume, then there will be a middle point where both have the same resistance applied. So basically, a pot that means you can be just neck, just middle, or an infinite blend in between :-)
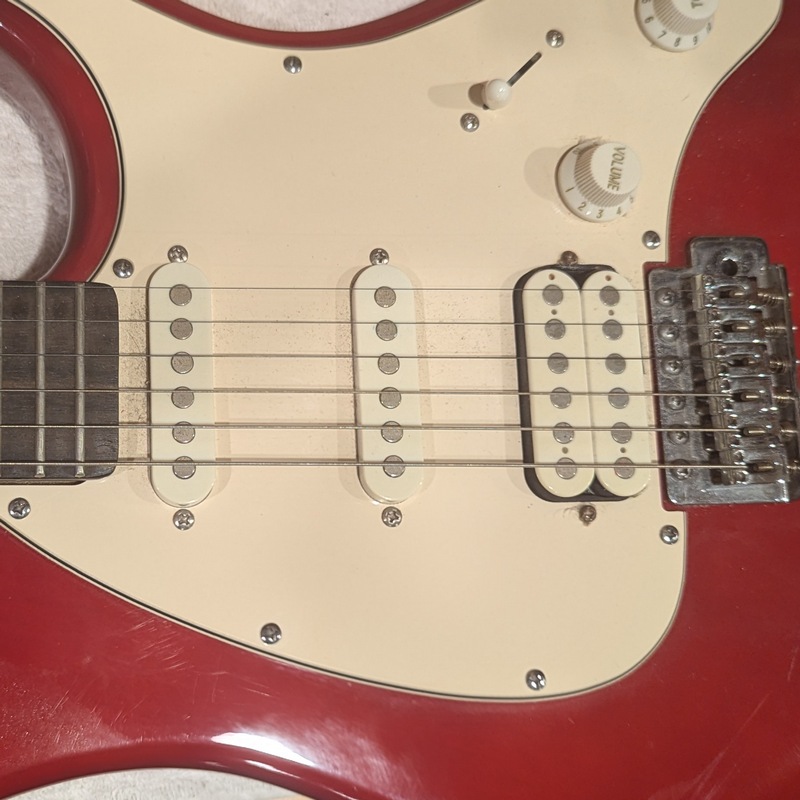
  • I don't think I've ever used a tremolo in my life. I will convert this to a hardtail. Which means I will fill the back cavity and the front, and I reckon I will even fill the bridge pickup area to give this thing even more stability.
  • Wood mounted pickups. I'm not a fan of this whole pickup-mounted-to-the-pickguard, to me it seems lazy. I did wood mounted pickup on the bass build - it's not hard, just fiddlier.
  • Position of middle pickup - I think I will push that back a touch. The pickups are placed in spots they capture the best flavour of harmonics...moving closer to the bridge should pick up brighter harmonics. If I'm blending, I want to be able to blend in a decent amount of brightness. Perhaps I will find I only ever want the neck pickup...I don't know! But I know I will never want a bridge pickup :-)
  • There will be a blending pot, so I will also want a master volume pot. MN500k for the blend, and A500k for the master volume. 500k is brighter than 250k. I don't want a tone knob. I will look after EQ in the effects pedal. And I don't need a pickup selector switch!
  • Shield the whole cavity. I already have a roll of copper from the last build (note to self - make sure to ground the shield...)
  • A pickguard blank. I think I will go olde school white pearl, with white pickups and knobs. I think that looks traditional with the Candy Apple Red colour!
  • I might need to repaint. I'm not too frightened of paint guitar bodies anymore, I have done one. I know what mistakes I made :-) I would like to avoid repainting, but I will definitely need to do something to the back, maybe just a black undercoat. I think all the mods I'm making on the front will be hidden by the pickguard.
  • A fret grind and re-crown. The frets are SOOO high! Every time I fret a string, especially the low string, I bend it. And it has 2.6mm wide frets - I'm used to 1.9mm frets on classicals which are more immune to bending just through fretting. I want this thing to intonate nicely - I want to be able to put a Capo on and not have to re-tune for the Capo!

So all these things have a goal of making this guitar an acoustic fingerpicker's delight - with a warm but still sparkly tone, as good as I can get it. The body is a cheap Peavey, it's solid wood at least, maybe Basswood? I will probably block it up with Tassie oak which Bunnings have plenty of, and a bit of filler in the trickier spaces!

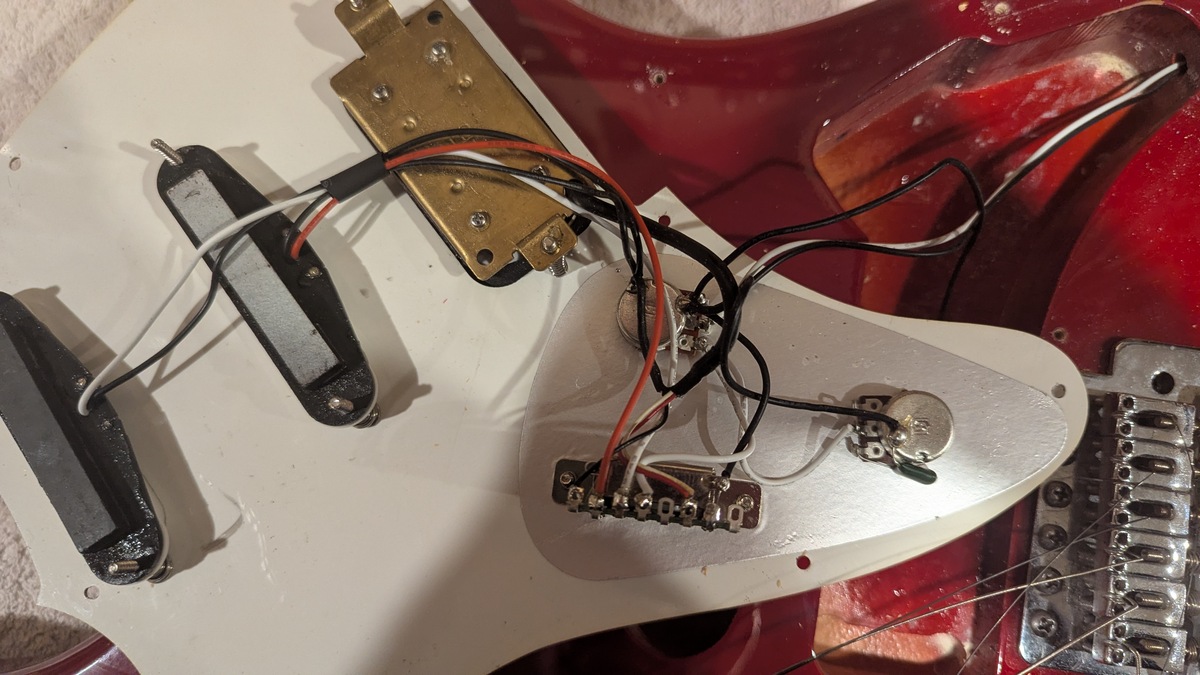
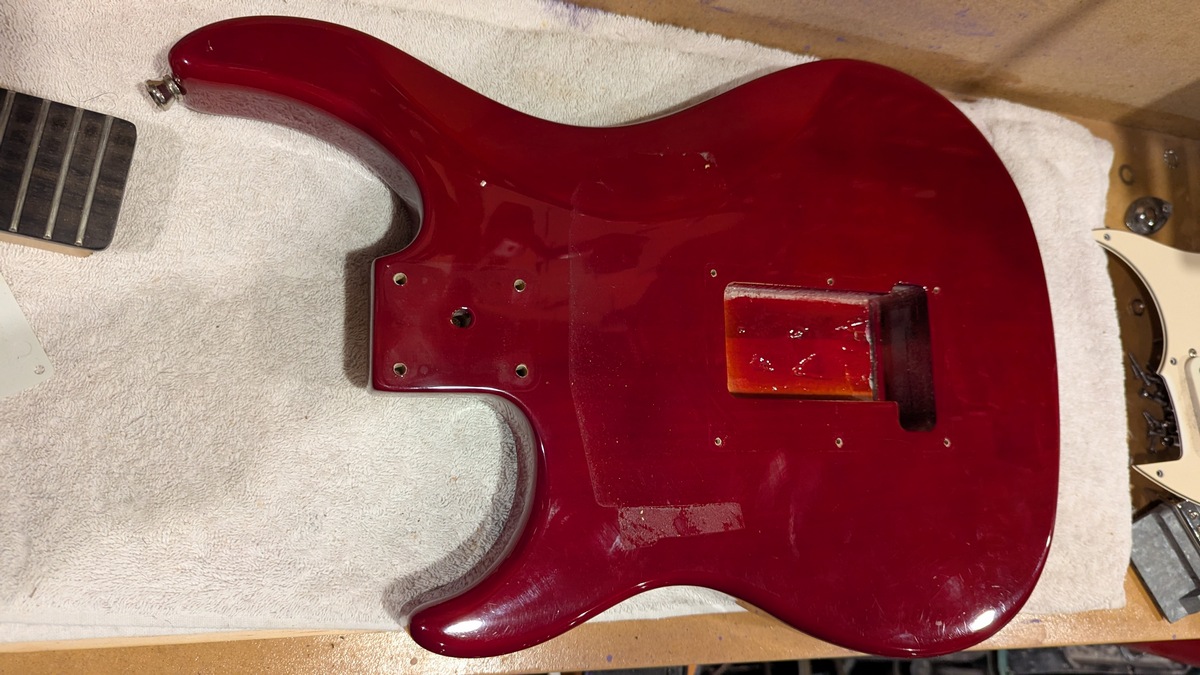
Experimental as anything! Watch this space! Here's some pictures!
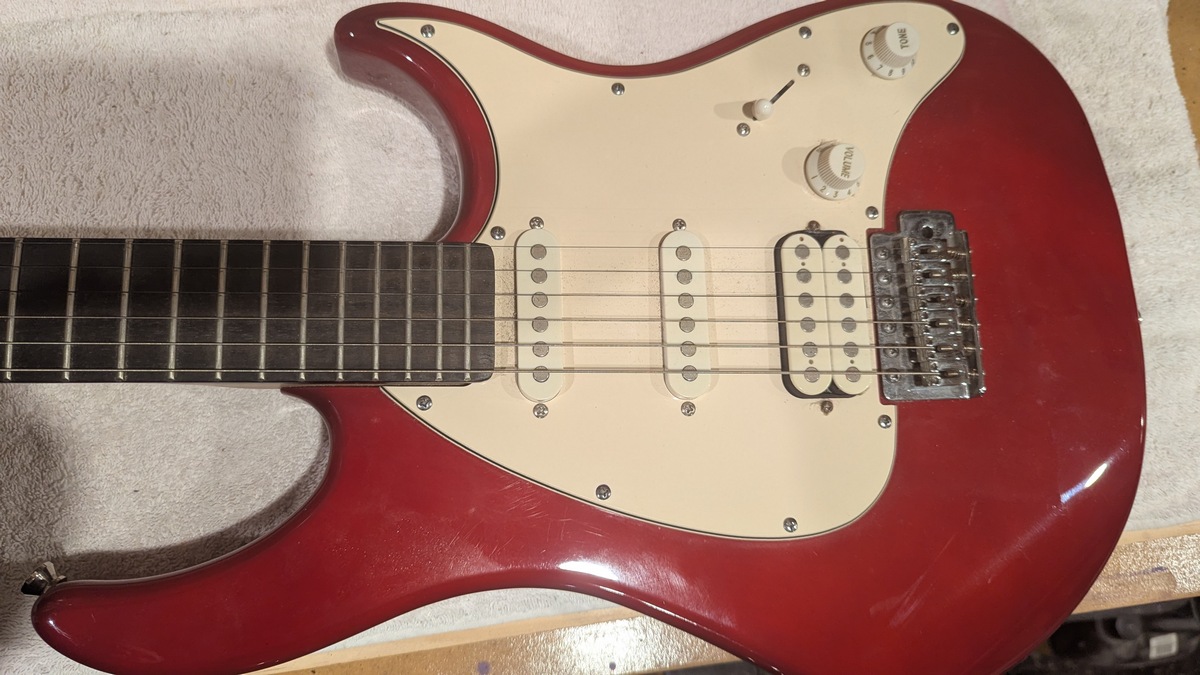
Before Electrics
Front Back

Sunday, 28 April 2024

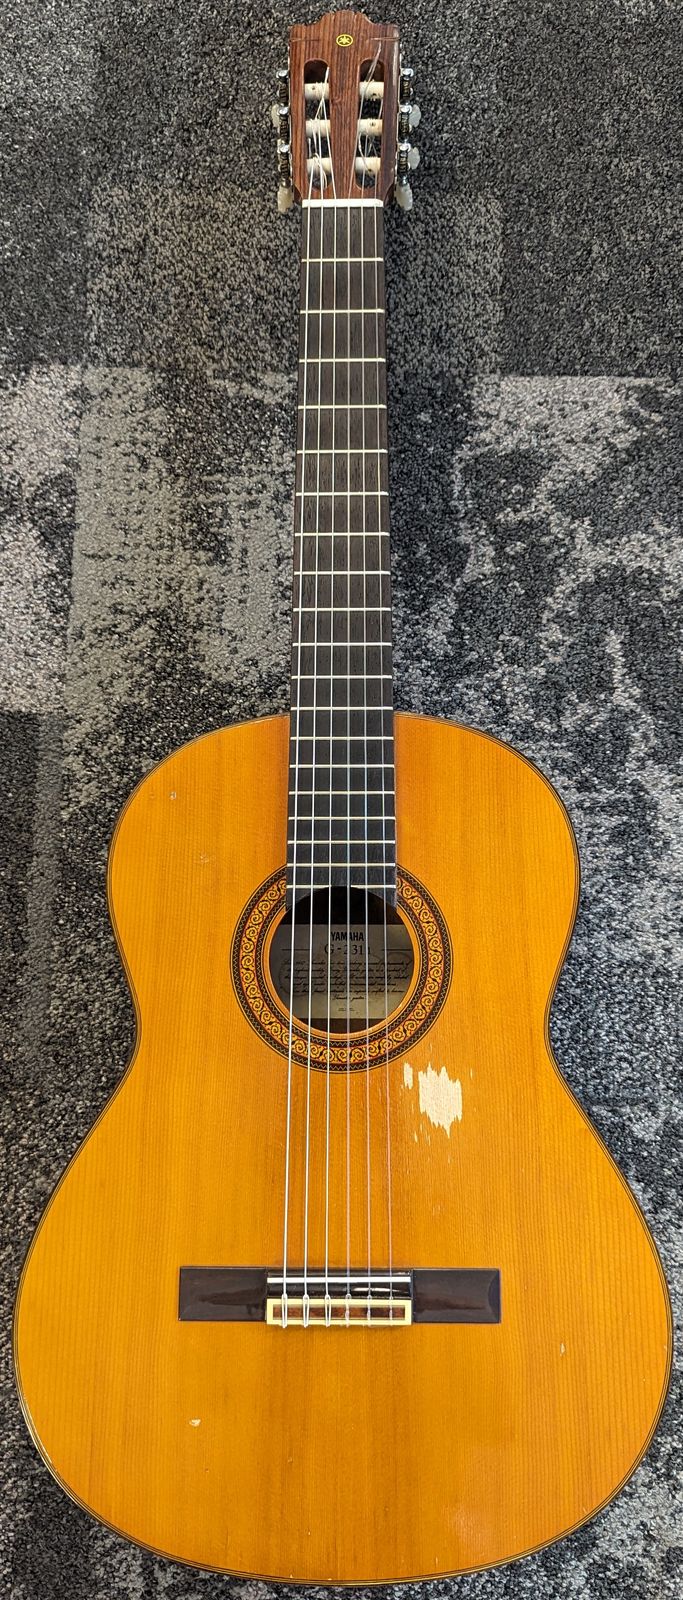
Yamaha G-231 II

This G-231 II Yamaha guitar is quite sentimental to me, my parents gave it to me when I was eleven - I was big enough to upgrade from my 3/4 guitar to a full size guitar. It was not the cheapest guitar for its time, maybe a model or two up from basic - it's got an ebony fretboard and the build quality is not bad - thanks dad.

It's the guitar that made me. The one that I honed my fingerstyle skills on. That by the time I was 15 I was thrashing with a plectrum (you can see the damage on soundboard) - luckily my mum bought me an electric guitar shortly thereafter. It sat around for 10 years mostly unused, occasionally brought out as a reference guitar when I needed to remind myself about nylon string classical guitars. It was lent out a few times - it was with my nephew for a few years while he was learning guitar. It lived at my old holiday house for 10 years, I would play it to the trees when I was there. It sat under my desk at work for years and I would play it in the lunch room for an hour on Fridays.

It actually sounds quite nice. But, it hasn't been great to play for a long time. Two main problems - the neck has slightly caved into the body under string tension, which happens to pretty much any classical guitar by the time it is ten. So it makes the action really high. There's no truss rod to tweak it back a little, but besides, it's the neck-to-body connection that goes out; the truss rod is about neck relief, so it's not reeeally the right approach.

The other issue is that higher up the neck the fret  heights are a bit out of alignment. Possibly an issue stemming from problem 1, it certainly doesn't help, but some fret positions up the neck are buzzy.

I have thought in the past about sawing through the neck from underneath (stopping at the fretboard) and then regluing - essentially creating a little triangle that pulls the neck angle back - to fix the high action. Seems savage, so I haven't done it.

But after my water soaking to get the double bass bridge back to square, I wondered if there was something I could do similar - clamp the guitar up forcing the neck backwards, splashing some water around tp ,ake things pliable...so I asked the internet...and discovered a bloke in Queensland had been doing "Steam Neck Resets". I watched his videos and read some stories of other people who had tried it with success and I was convinced.

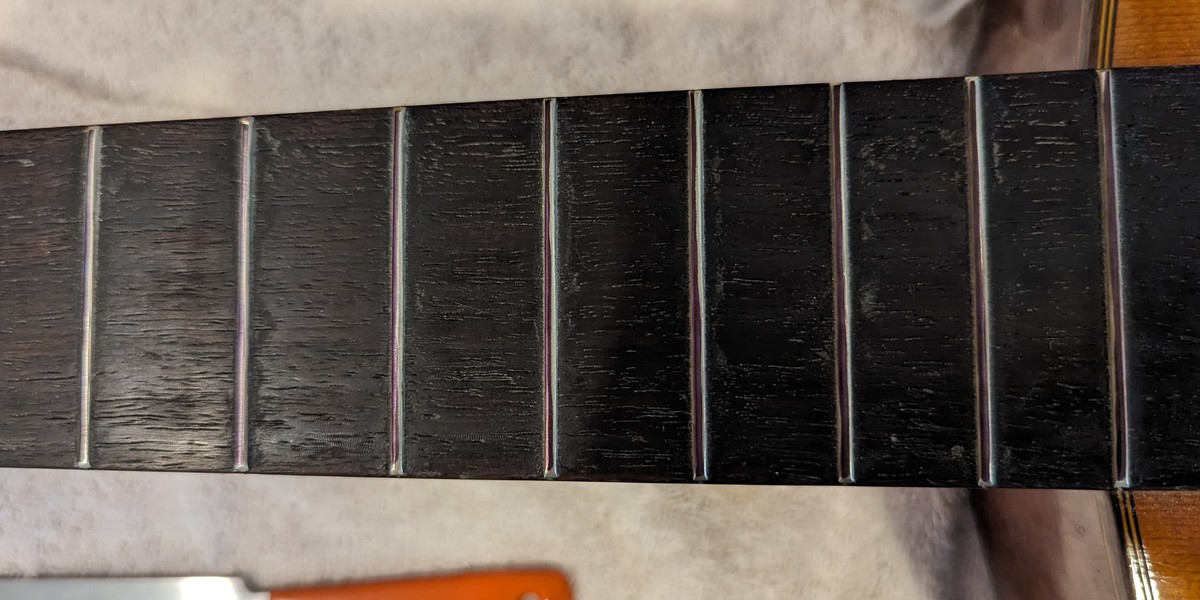
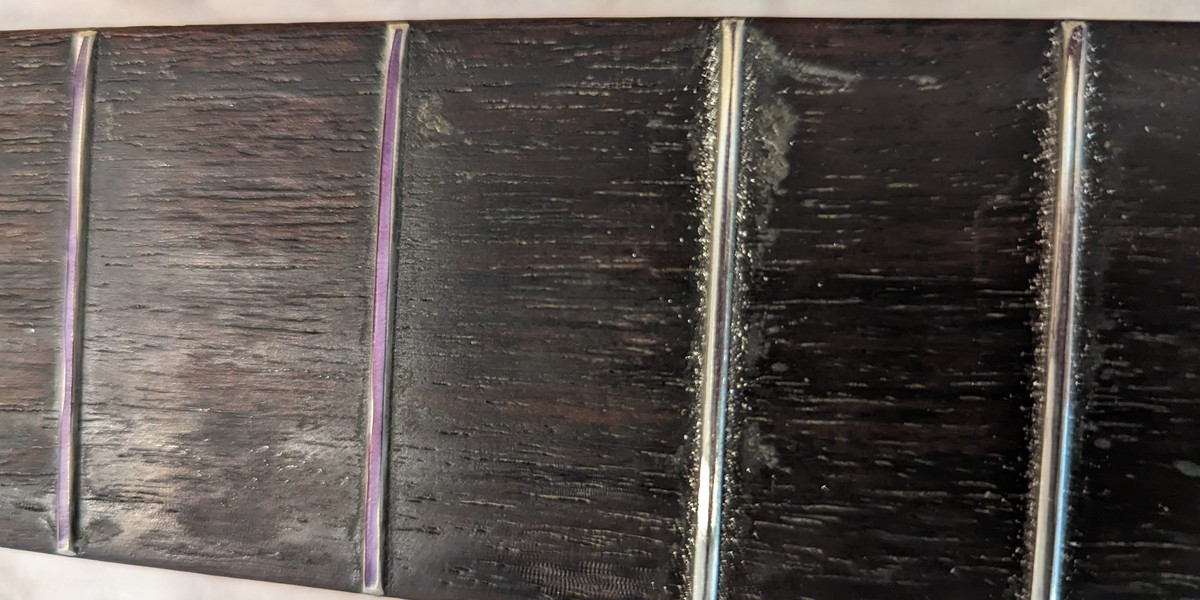
I decided to start with the fret grind and recrown. Classical guitar necks are flat, you so only need a flat block of wood and some sandpaper to do the initial grind back. I started with 240 grit, and I drew a black line across each fret with a permanent marker, sand for a bit, see whether all the black lines have been touched, draw the line back, repeat - basically I'm aiming to have a dead flat initial surface. I was suprised to find some grooves worn into the first few frets in the usual places. Nylon rubbing through steel!? That was unexpected. There was some very minor imperfections up where the fretting seemed buzzy, I wasn't convinced.

I spent a little time filing off any sharp fret ends as well, where the neck had shrunk a bit over time leaving some sharps. The file I used was a bit rough, I need to add a fret end file to my list for next time.

I then, still drawing black lines on each fret, ran my fret crowning file across. It worked okay, it's a cheap fret crowning tool, so I wasn't really happy. I will buy a good one for next time. Once I had each fret where there was approximately a thin black line across the top - meaning the original fret grind was still intact, but the rounded crown shape was still there - I moved to the next.

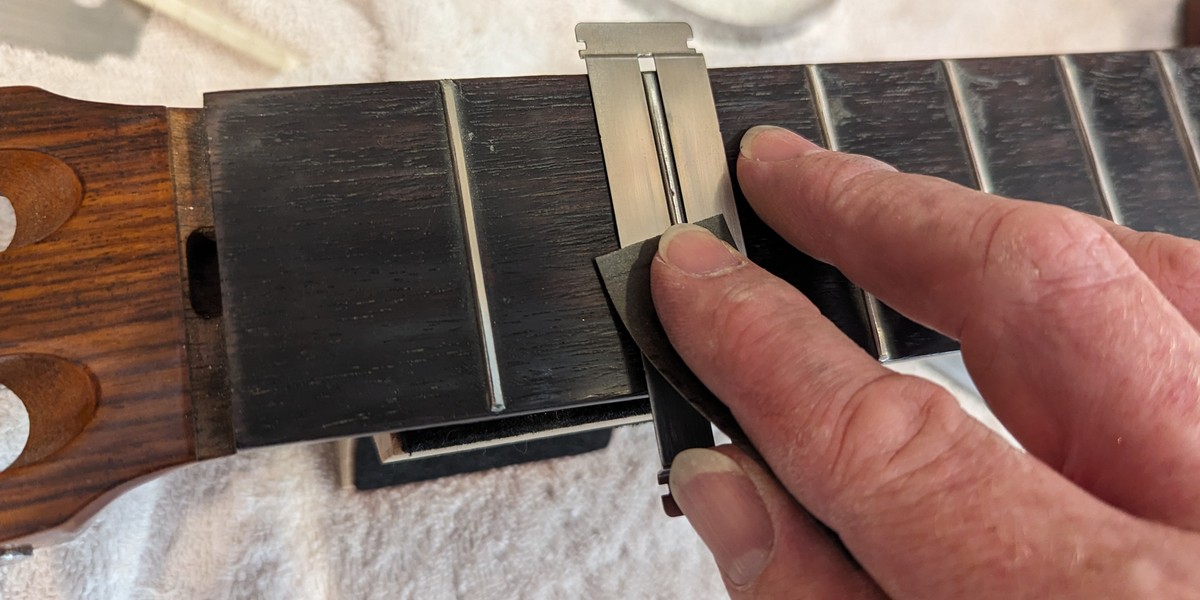
The final step was to hand polish each of the new crowns. I popped on my fretboard protector and worked my way down the frets, with decreasing grades of sandpaper, 400 to 600 to 800 to 1200 to steel wool. But the time I hit the steel wool it was nice'n'shiny. I could see in a few places where I had missed some scratches in earlier sanding, but over all, a nice job.

I had nicked the fretboard in a couple of places with the crowning file and the fret end file, nothing terrible, just a little amateur. I think it makes sense that the first fret grind I ever did was on the guitar that made me the guitarist I am today :-)

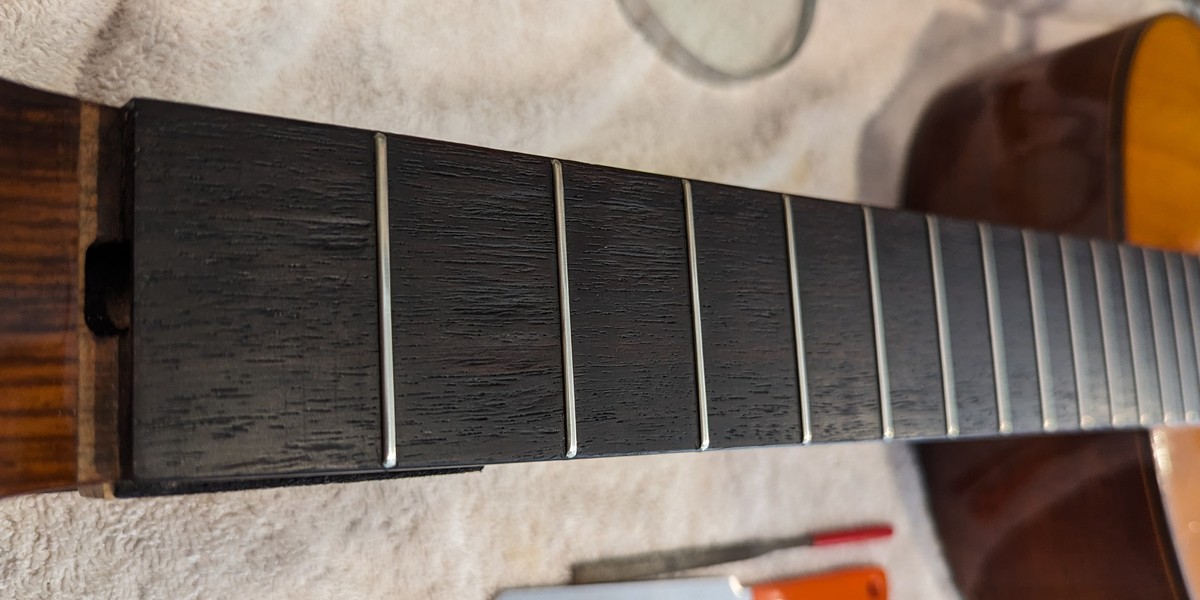
After an oiling it looked great. But no time to restring and test it - straight to the steam neck reset, I was very keen to try it out!

1. Make a mark across the frets 2. Block & sand until all marks touched
3. Fret crowning 4. Just a thin line still remains once filed
5. Sand through grits to polish 6. Sit back, admire

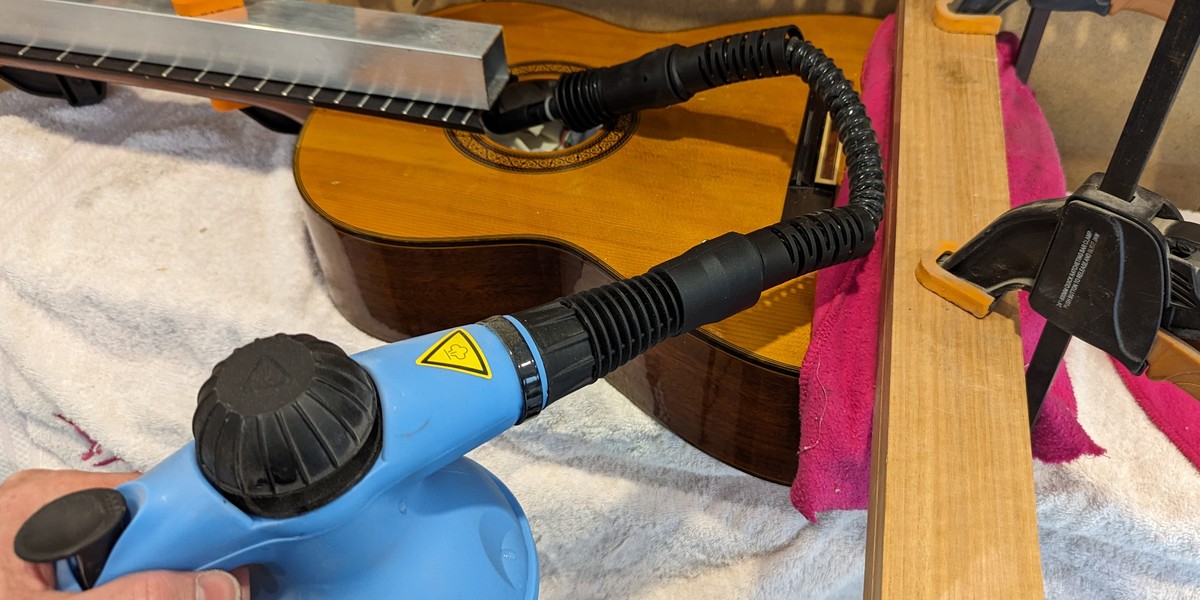
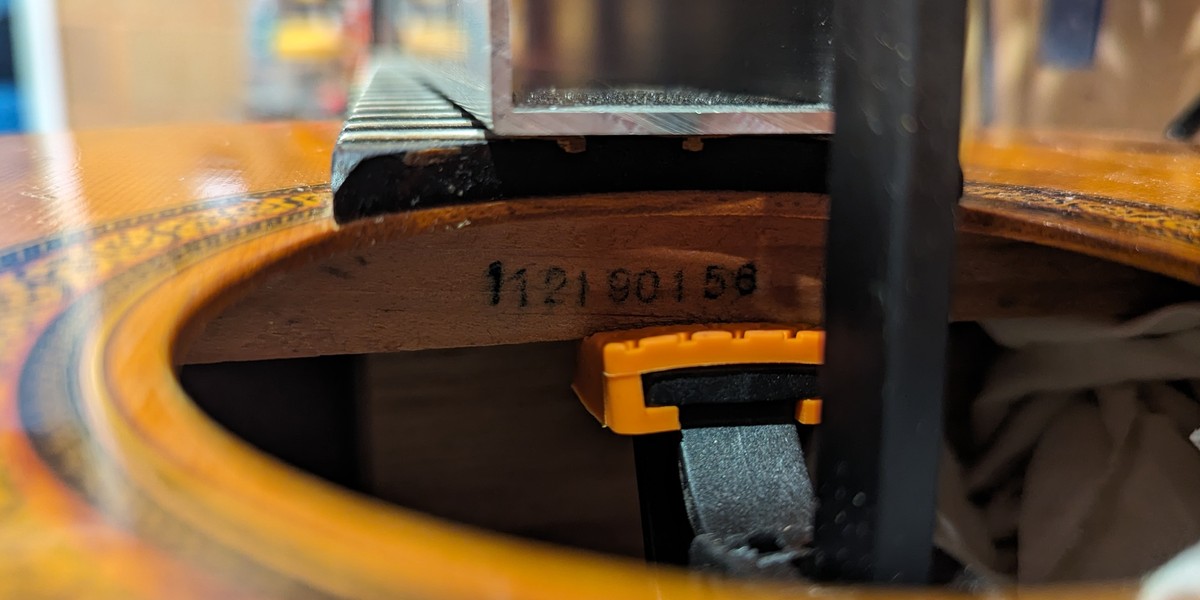
I bought a length of aluminium square tube and clamped it hard to the neck in a few places. I was using clamps that had rubber feet so they wouldn't mark the neck. The aluminium was sitting direct on the fretboard, but the frets are nickel-steel so they won't be marked by aluminium.

I then clamped the body to a length of board, with a few towels in between to keep surfaces safe. The goal is to have everything rigid so that when you apply the final clamp at the top it will pull the neck right back at the point when it joins the body. We aren't trying to bend the neck, we are trying to claw back the distortions where it all comes together. If you look carefully, kinda everything is involved - the soundboard, the heel, the sides, the internal ribbing.

I like concept though - put force in the direction you want to go, steam it so the wood and possibly glue becomes a bit pliable again, hold it there until it has dried out, and then when you release it and restring it, it will be back to where it once was. Maybe it won't last, maybe it will go back to where it once was? So what, do it again! - it can be a 5 year maintenance schedule.

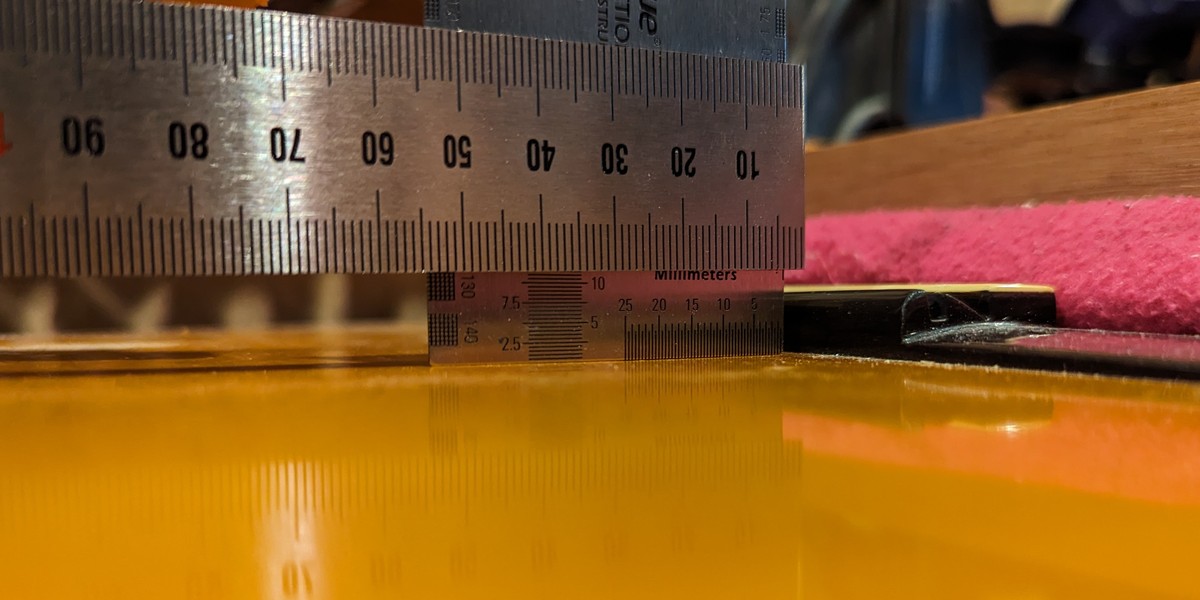
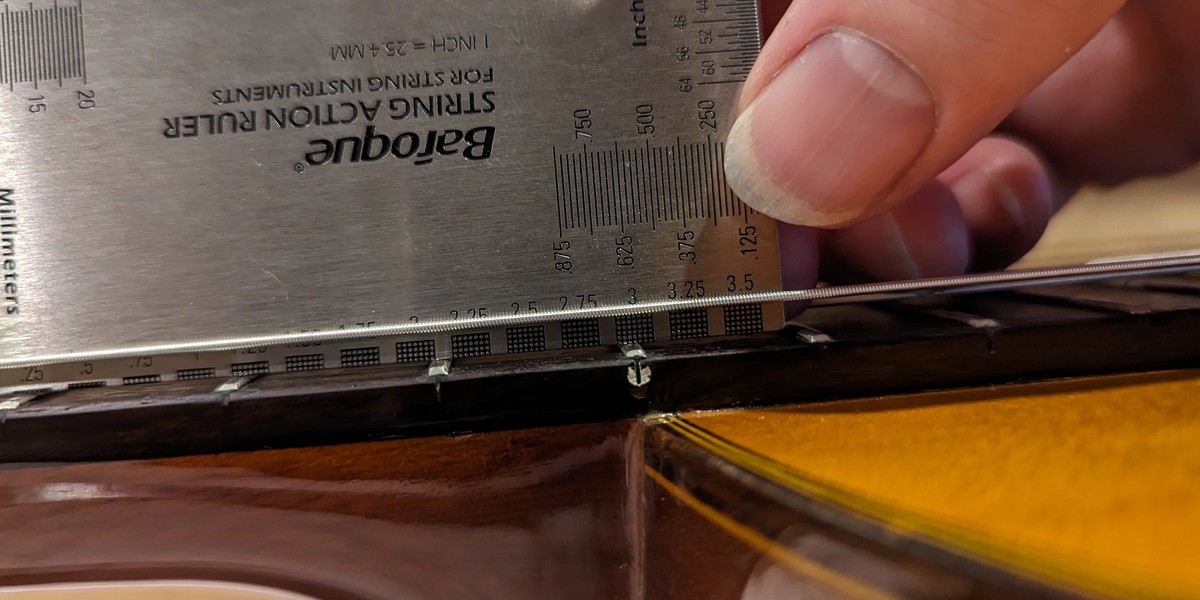
Result - I steamed it 3 times over the course of a week, and when I restrung it the action was about 0.25mm lower than before. So my verdict is yes it works, but you need to steam it more over a longer period of time, the consensus seems to be 3 weeks. And note that I really pulled a lot of force on - around 12mm deflection clamping force as measured at the saddle - and that only gave me 0.25mm resulting action decrease. So my lesson there is don't be frightened that you are going to accidentally go to zero action, you probably won't. Ahd then if you did, whip up a new higher saddle - they are easy enough to make.

Sometime I will have another crack at this, but I wanted to get this guitar back to work. After restringing there were improvements in playability, and the buzziness higher up the neck was reduced. Not gone, but more tolerable.

A worthwhile endeavour - for more info on this technique search for "John Miner Neck Steam Reset". Still not "great" to play , but better now.

Jig to hold everything in place Initial measure at bridge 8.0mm
Fill with rags and lots of steam This last clamp is particularly important
Cranked to 11.5mm - needed more Finished with 2.75mm action at 12th fret

In the meantime, I will keep my eye out for an unloved/broken vintage guitar that could do with my attention and I will go through these processes again, but without any pressure of needing to get it back to work.

Sunday, 13 November 2022

Bass Nut


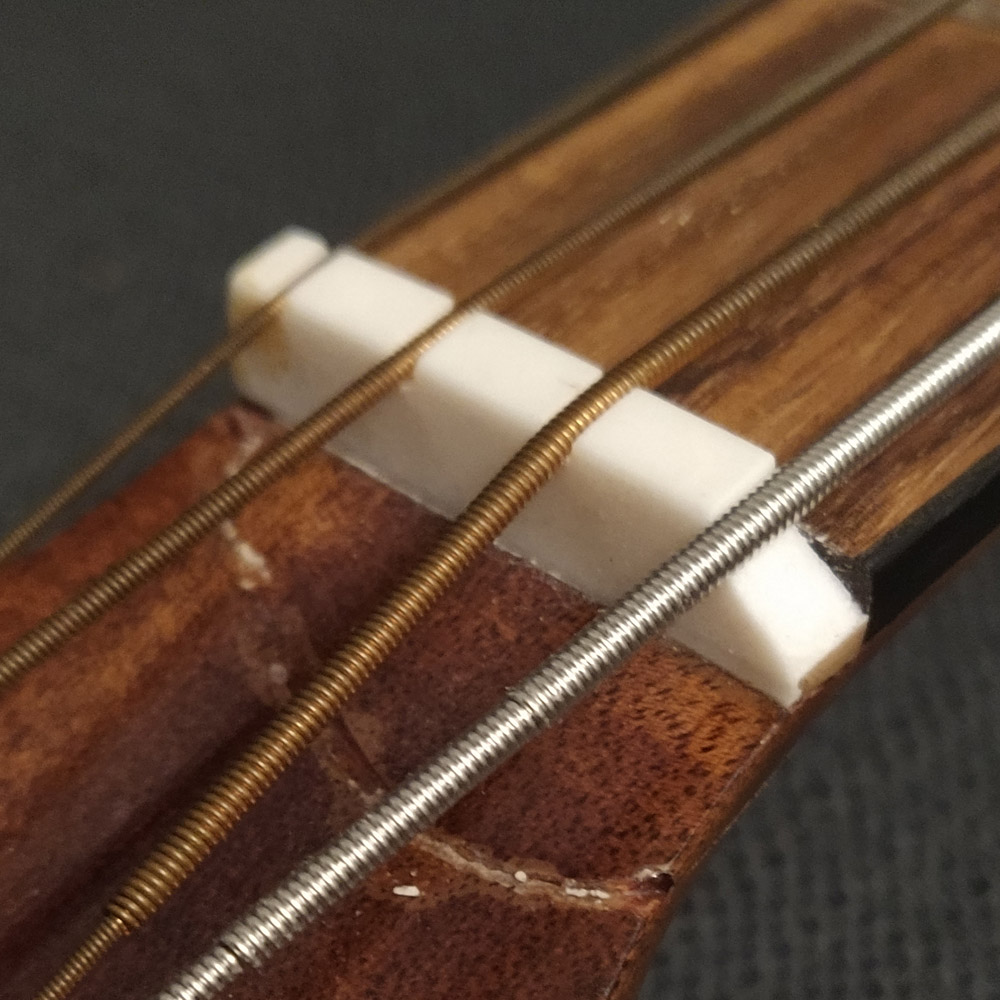
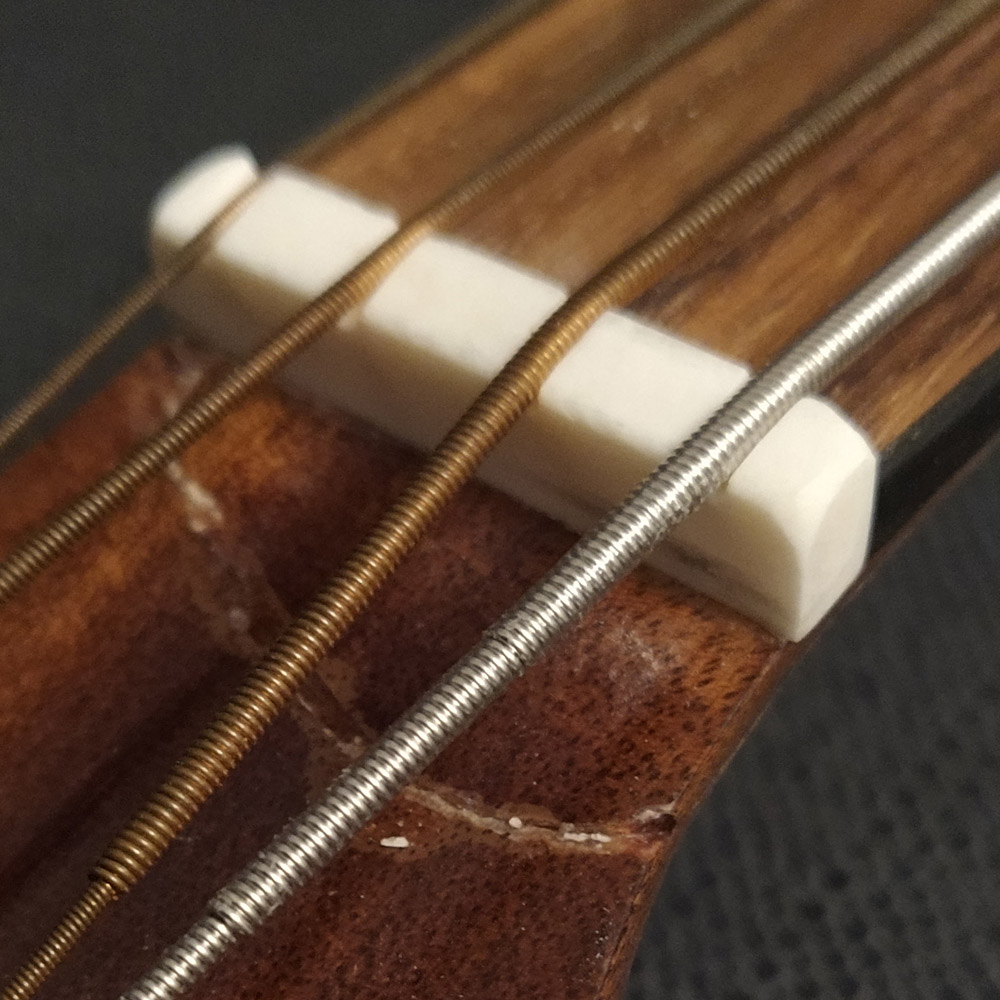
Broken nut

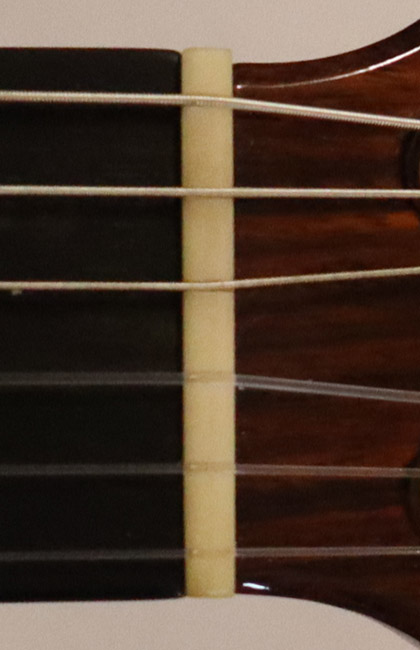
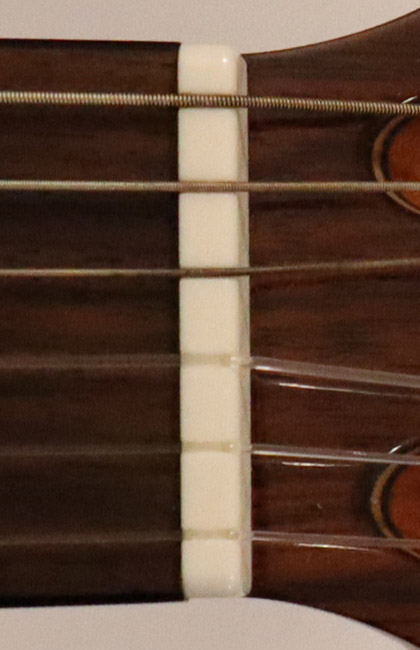
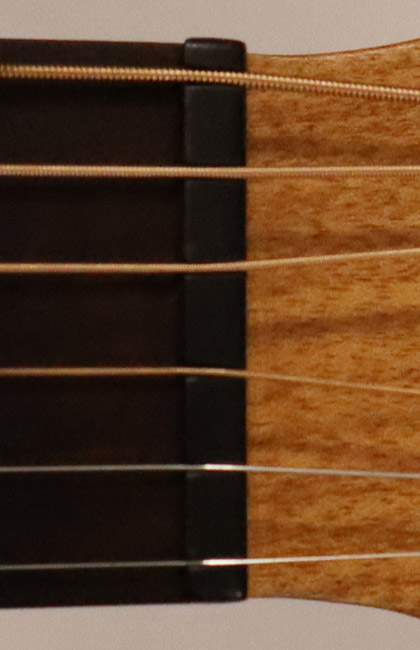
The school where I repair guitars has an acoustic bass, and somehow the nut was cracked. I don't know how you crack a nut, but the various guitar damage I have repaired over the years nothing surprises me anymore. In fact a few years ago the headstock on this acoustic bass was clean broken off. I wasn't game to fix that so it was professionally reattached, you can still see a bit of the scar in the photos. The repair on the back of the neck - where it counts - is smooth as, so good job whoever you are.

Since I had recently made a nut for my custom electric (I still need to remake that nut) I was in the nut making zone. I had already stocked up on bone blanks for nuts and saddles (they are cheap from Aliexpress), and I had one that was the right thickness it just needed to be cut down in width and the height made to match the fretboard curve. Once I had chiselled out the old nut, I cleaned the glue from the nut slot with a small file. I have an inexpensive set of jewellers files, it comes in handy.


New remade nut

I use a cheap hobby vice to hold the nut while I file it, and I have a small piece of super flat marble stone for putting sheets of sandpaper on to get those perfectly flat edges. A good trick I saw on the internet for when you have something thin and you are trying to get the thin edge to 90° and flat - put another object with a perfect 90° edge on and run your thin edge piece back and forth on the sandpaper along the side of it.

Because bass strings are so fat, even the thickest guitar nut slot file I have is too thin...the jewellers files came in hand for that again. I based my nut spacing on the old nut which was already pretty good. I set the depth with the tap test - if you fret the 3rd and then tap on the string at the first fret there should be the tiniest gap, just enough to get a 'plink' as you tap. This makes a lot of sense to me - the string height at the nut should basically be the same as if there was another fret behind. If the string height is too high then you are bending the string too much when you fret the first, and you will hear that in the intonation, the open string will be in tune but the first fret will be sharp. I find I get this anyway, I fret too hard, so I'm pushing the string too far into the fret which sharpens it. It's nice however when you have the string height at the nut as low as possible to begin with.

If you file the slot too low, then the string is going to buzz on the first fret. That's not good. This what naturally happened to my main classical, after years of tuning - pulling the strings through the slots - they are actually worn down too far, and the open string buzzes.

Even with the nut slots as low as I could take them, this bass guitar is still pretty awful to play, the action is so high! I filed down the saddle which improved it but not enough. I adjusted the truss rod -  to the point the top string was starting to buzz a little and then backed it off a turn or two. The truss rod is only really for adjusting the neck relief not action, even though it does affect action. What the real problem with that guitar is - the neck angle.

To be honest, almost every guitar I come across that is more than say 20 years old has a slightly wrong neck angle. This makes sense - wood is not a dead piece of spring steel - over time , under constant force, wood is going to give a little. The physics of the situation is that most of the force is in the plane of the neck - so not pulling up - but there is enough force there for something to give over time. The give seems to be on the soundboard, which also makes sense. You end up having a very slight caving in deflection of the sound board between the neck and the sound hole. Guitar makers don't make a soundboard so rigid it will resist deflecting in - that would spoil the tone.

So, I would say most 20+ year old guitars need a neck reset. Basically detach the neck, cut some meat/new angle out of the heel, reattach. I've seen formulas on the internet for calculating the amount to remove, usually ends up being a millimetre or two. Once you glue it back on - the soundboard caving in/etc is still there - but now the neck is compensated for it. And you are back to blissful action again!

Generally the lower the action - given that there are no buzzes anywhere - the more playable the guitar is. You don't have to take you fretting fingers off and on so far as you refret. It's just a nicer experience. It feels like the guitar is working with you instead of against you. Even my main classical's action is starting to get a teensy bit high. It is a 2002 model, so that fits my 20+ theory. For now I'm going to stick with lower tension strings for a while.

But my oldest classical from the late 70's is quite far gone. I'd like to adjust it. I've seen an interesting hack where you cut through the heel with a thin saw, and then reglue and clamp the cut. You won't get the same perfect mating surface when you bend the heel in, so it will need to be the right type of glue to hold and fill, but the neck angle will have been readjusted. Maybe I'll buy an old cheap classical and practise on that first :-)

Saturday, 15 October 2022

String spacing


Classical
Nut width: 52.5mm
High E: 3.8mm
Low E: 4.6mm

Hybrid Nylon
Nut width: 47.7mm
High E: 4.8mm
Low E: 5.1mm

Acoustic
Nut width: 44.4mm
High E: 3.0mm
Low E: 2.7mm

Strat Copy
Nut width: 48.0mm
High E: 3.0mm
Low E: 3.6mm

Tele Copy
Nut width: 43.0mm
High E: 3.1mm
Low E: 3.4mm

Electric
Nut width: 41.9mm
High E: 3.1mm
Low E: 3.3mm

So after cutting a nut for the custom neck on the Strat Copy, and then played a tune I realised I didn't like the nut I had cut. The string heights were bad on the bass notes, so it sounds out of tune - which can be fixed -  but what I didn't like was the string spacing. The top E was too close to the side of the neck. I had cut it to a fairly general specification - 3.0mm - but it wasn't working for me.

To find out why, I thought I would measure up the guitars I own, and how much I like or don't like their string spacing.

Quick note - the spacing is from the edge of the fretboard to the edge of the string, not to the centreline of the string.

I had hoped it was simply a "this is the distance that feels good" but it isn't.  It is a combination of several things, definitely the string gauge (nylon is much thicker than than steel for trebles!) probably string height off fretboard, probably neck radius, but other more subtle things like the radius of the front side edges of fretboard would make a difference.

It was a good exercise to measure though:

  • Classical is okay, the low E could be a tad closer to the edge and I'd be fine with that.
  • Hybrid Nylon is yuck! This exercise showed my why I stopped playing it years ago - the string spacing is gross!  You can even see it in the picture long before you take a measurement, both E's are too far away from the edge of the fretboard, which crams the strings up together.  I reckon if I cut another nut for this, it will completely change the way this guitar feels.
  • Acoustic is okay.  I reckon I could use a tiny bit more space from the side on the high E.  Surprisingly the very close low E string works out fine, especially when you are thumb fretting the bass. The advantage of a close distance to the edge of the fretboard means more distance available in string spacing, so you don't feel so cramped.
  • Strat Copy the high E is too close, low E is fine.
  • Tele Copy is fine, but the whole thing is too cramped with only a 43.0mm neck.
  • Electric is fine, but even more cramped than the Tele Copy.

So what do I think?  I'm estimating for a steel string (electric or acoustic) I would go with a 46mm neck, the high E at 3.5mm spacing, the low E at 3.0mm.  For a nylon, I'm estimating a 50mm neck with the high E at 3.5mm and the low E at 3.5mm.

This sure reinforces that the best way to know what you like is to play many guitars - I mean look at the differences in these string spacings I found! What suits me might not suit you - there is probably a cut for everyone - for instance somebody out there thought my hybrid nylon spacing was a good idea!

(Thinks wistfully about the $AUD4k Cole Clarke acoustic at Kosmic Music a few months back that just played so easily and beautifully - that must had the perfect string spacing for me.)

JAW

Saturday, 26 March 2022

Neck nut sizes

The size of the nut on the neck of your guitar pretty much sets the "width" of your neck.  Because I started out on classical guitars, typically 50-52mm (1 15/16" -2") that's what was burnt into my brain. When I was given an electric, at 42mm (1 5/8") I played that with a flatpick, but never really got into it.  In the 90's I bought a Maton acoustic, at 44.5mm (1 3/4") I adapted and played fingerstyle on it for a decade.  But as my fingerstyle grew more complex, I found the neck too narrow and restricting for fingerstyle.  I would play my classical and find it easier, but I struggled to go back to the floppy nylon strings.

I tried a crossover nylon in the 2000's with a nut width of 48mm (1 7/8") and I liked it for a year or two, but once I was re-accustomed to nylon strings I went back to a classical at 52mm (2") nut. Full circle, done.

Now I have a new electric, at 43mm (1 11/16"), yeah, that's really cramped for fingerstyle for me.

Playing solo - I would stick with the classical.  However, when I play in a band that has keyboard, multiple vocals, drums and bass, the classical is lost - it sits too close in sound with the keyboard and the vocals.  Acoustic strummed with a pick fits in nicely because it is super-bright, but I want to do more than strum cowboy chords!

Important distinction: Acoustic with pick (or fingernails) - very bright.  Classical with fingernails, mellow with only a hint of sparkly bright coming through the fingernails.

Another important distinction: Acoustic - tough hard fretting.  Classical - lighter touch fretting, on par with electric guitar fretting.

So to get the electric to fingerstyle playable in a band setting I think I will change the neck over to around 48mm (1 7/8") at the nut.  (Remembering that steel string trebles are nice'n'skinny not like classical, so I don't think you need the full 50-52mm.)

Alternatively, put the classical through a super brightening pedal effect.

I'll get back to experimenting :-)


GuitarNut Width    
Metric
Nut Width
Imperial
Telecaster copy43mm1 11/16"
Maton Acoustic44.5mm1 3/4"
Crossover Yamaha Nylon    48mm1 7/8"
Esteve Classical52mm2"

Thursday, 13 August 2015

Memories, and a ukulele is the same thing as a guitar

While talking with Dan, one of the guys that I work with, my guitar and Youtube and all things Jawmunji came up in discussion. While I was laughing at his amazement at how many views I had, I mentioned I took some screen captures of "special moments" on Youtube and he convinced me to dig them up. Sadly I didn't take anywhere near enough screen captures of special moments, but here are two ones that still get a giggle from me.

First up, on the most subscribed of all time in Australia, page 2, 26th September 2008, look, I'm ahead of Delta Goodrem. Take that Delta! This was page 2 so it put me #21 in Australia overall. (Fun fact: my peak most subscribed rank in Australia was #19)


Second up, on the 6th November 2008 when I uploaded "Jealous Guy" I was the Top Rated in Australia on that day. Not the most views overall, but #1 Top Rated. Kylie Minogue and Keith - beaten! Natalie Bassingwaighte - beaten! Ha ha! (Fun fact:Youtube used to be 1-5 stars rating system before it went to thumbs up/down).


* * *

During my discussion with Dan he revealed he had bought himself a really nice ukulele, but hadn't got very far learning it. I bought a fairly nice non-toy ukulele last year - for the kids - and I had learnt a few chords but hadn't really understood it. Talking with him about it inspired me to think about it, which I did, and I realised...

AS A GUITAR PLAYER, YOU CAN PLAY THE UKE, IT'S BASICALLY THE SAME THING!

See, the tuning for a standard uke is GCEA, but that bottom G is higher than the C and E. That threw me as a guitarist. But when I learnt the G chord on the uke, which is the same shape as a guitar D chord, I realised something was going on. And in thinking, those ukulele CEA strings...if you transpose the top 3 strings of a guitar, GBE, up four steps...you get CEA! No wonder a D shape is G on the uke!

But that high G on the bass, how does that work? Hang on, 4th string D on the guitar, go up 4 steps, it is a G! Oh I see, it is the same note, but an octave higher! So, a standard ukulele is a guitar with a capo on the 5th fret, the 4th string up an octave, and the bottom 2 strings removed! Suddenly it all makes sense.

To prove this, I set about attempting to play a fingerstyle song on it, one that I had already noodled with discovering the D->G chord.  And I recorded a quick vid to show you:


Enjoy!
JAW

Subscribe

Wednesday, 10 August 2011

Counterfeit Strings!

Probably like most of you have done with each of your guitars, I have been trying to work out what strings I like best on my Esteve. I started with my old favourite Augustine Red packet, but they started to get harder and harder to find. So I was taking whatever the music shops were suggesting, and each type had ever-so-slightly different characteristics, which was very frustrating because I couldn't easily tell what "was better". I didn't want to go to the effort of restringing multiple sets in one sitting and trying to work it out - they all sound very close - I detest restringing nylon, they take so long to settle in!

Anyway I finally settled on D'Addario Pro-Arte EJ45's, quite a good string. Good bright tone out of the packet (not as bright as some others) but the brightness lasts a long time (longer as some others) which is just what I need, did I mention not enjoying restring & bedding in nylon strings. Some other manufacturers I had also discovered I was breaking the D string - breaking the metal winding at low frets that is - after two or three months. The EJ45's never had that problem.

I had ordered a set online from a music store, no problems, where I'm working at the moment doesn't take me near a music store. Then I got cheeky - purchased a set on eBay, man they were cheap!

About a week ago I put them on. Tuned them in and whoa, the trebles were horrible! Very dull, sound levels between the three strings out of balance with each other. The bass strings were okay, not as bright as I was used to. I was disappointed.

So disappointed that I emailed D'Addario and asked them why it would be that after three sets of good strings I'd get a dodgy batch - a quality issue? Were they a copy/fake?

D'As got back to me real quick and wanted to explore the possibility of them being a counterfeit set. I vaguely thought they might be, but if they were, they were an *amazing* copy. The packet, the corrosion proof bag, the little sticky labels telling you which string was which - spot on. But, I had noticed three things that weren't quite right...the little "flexible" section on the wound basses (for the bridge tie-off) was a lot shorter than previous sets...the E string felt fatter (interestingly, I put my calliper on it and it was 0.1mm fatter. Amazing that my fingers would notice 0.1 of a millimetre!)...and the bad tone of course.

I sent through some detailed photos and yes, they were identified as counterfeit! D'As told me that they were having a lot of trouble with counterfeiting by my neighbours to the North, and had recently gone through a similar story with some electric strings from another guy in Oz.

D'Addario super-generously have sent through several packs to replace these ones - they'd like me to send them the counterfeits. I said it was my own fault for being such a cheapskate, but they seemed very grateful for me bringing it to their attention.

So, be warned! As with everything, if something is too good to be true, then it probably is. And yes, that last song I posted on youtube was played with them - the basses are not *horrible*, but I had to crank the EQ on the treble to get some brightness into the sound. Not terrible, but I had an opportunity for a posting. I've still got them on the guitar, but only until replacements arrive! (I hope they come soon, or I'll be off to buy a genuine set this weekend.)

Monday, 15 November 2010

What's happening November 2010

After at least three months of vague pain and discomfort in my left hand pinky when playing stretchy fingering passages, I finally did two things - saw a doctor and saw a physio.   Both did the same test - held their had with opposing force against my pinky, push up, down, left, right - is there any pain?  No, not really.  They also did a joint check - see if there is movement in the knuckles - I guess to check for signs of arthritis.  Doc said I'd overstretched a tendon, rub rubbing cream into it, especially before and after playing guitar, see how it comes up.  Physio said come back next week, she'll do some massage on it and a bit of acupuncture(?!)  But both said - "you need to stretch before and after playing".  You get ten points Roman, I knew you were right sometimes I'm in denial :)

Interestingly, the physio said that with the guitar there is a lot of emphasis on downwards pressure, but very little on upwards pressure so the muscle groups get out of balance.  I'll report more when I've seen her again!

* * *

"Take me Back" is pretty much sorted, just putting the time in to get it more smoothly playable.  Not bad, good fun, won't be popular on youtube but I've taken the responsibility of getting more Australian classic rock arranged for fingerstyle...so it just needs to be done!

* * *

Still doing saddle work on my guitar pickup.  Every time I change strings I file the saddle slightly to balance out the sound a bit more.  The string type make a difference so you can't go too silly, for example some strings might cause the G string to be really over powered, others won't.  At the moment I'm using hard tension but I think I'll go back to normal tension.  Hard tension just encourages me to play hard, whereas I should be playing with a good dynamic expression - soft in places, hard in others, in the middle for the rest.  Not hard everywhere!

But anyway, there was definite over power in the G string and bass E string.  The E bass string  was dominating the lower strings, which if you were only playing the E would be great, but when the D string is only coming through half as loud as the E when plucked the same way...well, needs adjusting.  I had filed the saddle on a slope across the top, high on the bass E and low on the treble E.  This way there is more pressure directed by the lower strings.  I simply took off some of the slope in the bass to drop down the height thus the pressure and thus the string volume.

G string is different - it's in the middle, don't want to drop that down from the top!  What I had been doing for that one is scalloping out underneath the saddle - basically so less of the string pressure is contacting on the pickup.  It was already scalloped a bit, I scalloped it a bit more.

End result - G is close, still a bit loud, E is better balanced, maybe a tad loud.  D string has dropped off a bit, maybe due to G string scalloping, maybe just the set of strings.  Plugged in sounded really nice mostly thanks to the new strings, I think next set I'll do normal tension and see how it goes without touching the saddle.  As the saying goes, if you fiddle with something long enough you are bound to stuff it up :)

* * *

One last what's happening - over the years I've seen quite a few people play, of all things, Super Mario Theme for fingerstyle.  My oldest daughter loves her Nintendo/Mario, so I thought I'll grab the tab and learn it, she'd love it.  Watched the first one on youtube with a tab - pretty good.  Have a go at the tab.  Hmmm.  Nah, that bit isn't a good resolve.  Euw, awful positioning I'd do it down here.  Right, let's look at the next tab.  Hey, that isn't even the right note!  That bit should be played up higher.  I would put the bassnote for that part here, not there.  I'm not liking this.  I know, Iggy plays a good version, no tab, I'll get some inspiration from him.

...what I'm trying to show here is that I can no longer use tabs.  I just can't play something the way someone else has tabbed it.  No surprises there, I don't even play my own tabs exactly the way I write them out!  It's good, and it's bad.  Good because I'm doing exactly what I tell everyone else to do - take a tab, modify it, make it your own.  Bad because I just wanted to be able to play a little tune for my daughter without going to the lengths of partially re-arranging it! :)
JAW

Friday, 18 June 2010

Saddles?&#!

I'm having problems with pickups, and it all hinges around saddles.  Go on, search around the internet for information about saddles.  They will tell you all about fancy materials to use, maybe a bit about shape, but nothing about what is really going on in a saddle.

So, with a little guidance from one of my luthiers books, and revising some of my first year university physics, I'm going to try to explain some stuff to the best of my understanding.

How does an acoustic guitar work?  You pluck the strings, sound is transferred to the soundboard and you hear the note.  Yeah okay fine, but we'll need a bit more detail if we are to work out what is happening at our saddles.
saddle_1
Okay, in this simplified picture you can see the string (under tension) goes across the saddle and down to the (or through the) bridge, with the bridge glued to the soundboard.  For simplicity I'll say the soundboard has rigid/fixed nodes on either end, even though in real life it is shaped in a figure-8 and there are non-rigid dynamics occuring at the soundboard to side interface...okay, that's too much detail.

When you pluck a string, what happens? It vibrates, creating a standing wave between the point it touches the saddle, and the nut or at a fret if you have fretted a note.  The fundamental frequency is of a wavelength the full distance, but there are also many harmonics added by many other things resulting in a complex timbre of the sound...but again too much detail.

Looking at a plucked string, you can see it vibrate, maybe up/down, maybe left/right, maybe in circles, if depends how you plucked it.  There's the clue - the _motion_ of the vibration isn't what is directly causing the sound, it is *pressure* (tension) that is transferred to the soundboard via the saddle and bridge.  Tension is of course directly related to the motion of the string, at the peak offset of the string vibration it is at maximum tension, passing through the lowest tension at zero offset, heading for the opposite peak.  Think about it, if you pull a string away from it's resting position, you create more tension, it is pulling harder against the saddle (and the nut, but the nut is a lot more fixed and solid than the bridge).

Ah, so the tension goes past the saddle, and pulls the soundboard up and down then?  No; no it doesn't.  That would be like trying to pick youself up by your shoe laces.
saddle_2
The saddle is fixed in place hard up against the bridge, so all that can happen is the bridge/saddle _twists_ the soundboard. That's right, _twists_.  The bridge/saddle ever-so-slightly pulls forwards with the tension of the string; and because it is connected to the soundboard it pulls that with it, creating a "bulge" behind the bridge, and a "dip" in front of the bridge.

The soundboard thus becomes an air pump - as the back bulges up it sucks some air in through the sound hole, and as it goes back to the resting position the air is expelled.

I hope I have explained that well enough that you understand, because now I can finally start talking about saddles.

The saddle sets the amount of torque that is transferred to the soundboard.  If you have a really tall saddle, it is "easier" for the string tension to twist the soundboard, giving a bigger acoustic sound...if the saddle is lower then less torque is transferred, and you get less acoustic sound.  (Let's totally ignore action, it isn't a function of creating sound in this context.)  The soundboard can saturate if the saddle is too high; if you start putting a massive load on it then you won't get a linear tension response in the soundboard and the sound will start distorting.  I'm back to too much detail.

As long as the saddle is firmly held in position, isn't made out of a material that absorbs vibration (for example a saddle made out of rubber) then the pressure is transferred reasonably efficiently and you have a faithful reproduction of the string's vibration to the soundboard.  Different materials will add different nauces to the timbre of the sound, for instance a highly efficient material would be a steel saddle, but we aren't after an exceptionally "true" transfer, what sounds best is a compromise, a material that transfers torque but also absorbs a bit, giving a sound that we like.  Again I'm heading out into details land, and my main point in continuously doing so and then stopping myself is that the creation of acoustic sound from a guitar is _incredibly_ complex, and all I really want to touch on is the absolute fundamental principle, firmly remembering there is more involved than just the basics.

Now, lets put an Under Saddle Transducer (UST) underneath the saddle.  You're going to have to think about this too.  The pressure being transmitted by the string goes over the saddle and then some heads down and back at an angle, so we get a ratio of the force is directed straight down through the saddle.  Note that this is balanced by the force pushing up from where the string attaches to the bridge - can't pull yourself up by your shoelaces, remember? But there is still a squeeze going on between the saddle and the bridge.

Therein lies the beauty - even though the soundboard is twisting to get your acoustic sound and it has nothing to do with the saddle downwards pressure - there exists this place between the saddle and bridge where an exact "sample" of the string tension is available.  By placing an electronic gizmo (UST) in there which turns pressure into a voltage, we have a pickup!
saddle_3
Now I said the join between saddle and the bridge has nothing to do with the acoustic sound - if the saddle was a bit loose, or the saddle slot a bit rough on the bottom it's going to make no difference to the acoustic sound (so long as the saddle isn't absorbing pressure, for example, minutely bouncing around). This however makes a lot of difference to trying to catch that sample pressure.  When an acoustic guitar is built, unless it is going to have a UST installed, they probably aren't going to care about the saddle slot quite as much.

I think you are with me.  Once I had fitted my pickup, I was getting poor response, and it came down to the saddle.  Here are some symptoms, and some resolutions:

* The saddle was a bit loose in the slot, so once it was under tension, it lent forward a little bit.  Doesn't affect acoustic sound, but suddenly all the downwards pressure was directed on the front edge of the saddle, and the UST wasn't getting the full pressure sample.  This is fixed by buying a blank over-size width saddle, and very carefully on a piece of glass or polished marble/granite surface with sandpaper, "thinning" down the saddle to be the exact same width as the slot.  Too loose and it will pull forward, too tight and pressure is lost into the walls of the slot as it is "jammed".

* Having a nice tight saddle will then next show you the saddle slot is not perfect.  My slot in fact flares out a bit at the top - not much I can do about that other than having a new wider slot routed in.  But all the laquer in the slot, from when the guitar was laquered, also caused it to be imperfect.  Armed with a trimmer blade, I carefully scraped off laquer on the floor and the sides of the slot to ensure they were as flat as I could get them.

* To fight a non-flat slot from two fronts, I bevelled the bottom edge of the saddle, just a tiny amount.  If the bottom of the slot still had some lacquer or generally non-90 degree bottom leading and trailing sides of the slot, that is, "radiused" sides, even only a tiny, tiny bit - and even if you don't see it - the saddle would be jamming in that last minute section, losing pressure.  If there was going to be any non-flatness in the slot, that's where it would be, so bevel the bottom of your saddle.

* Even still, I went one further step and put a spacer in the bottom of the slot, underneath the UST.  The spacer I made was two pieces of normal paper glued together cut to the same size as the bottom of the slot, acting as a kind of gasket, balancing out any imperfections.  Although this gasket arrangement will absorb some of the pressure; the pressure gained by it being there is far more than that lost.  Give this a try and see how you go - if the slot is good enough, you won't need to.

* Balancing.  As in, how much pressure is exerted by each different string - if you play all of the strings with the same touch, are any louder than each other?  Typically on a nylon string, the G string might be quite a lot louder than the rest...or maybe the D string.  Combat that by taking some meat off the bottom of the saddle directly underneath the string - basically you are removing some of the ability for the pressure to be transferred from the string to the UST.

If the higher strings are too loud compared to the bass strings, then file your saddle to have a top profile where the bass strings are higher.  This will result in a greater break angle from the string to the bridge tie off, which means more downwards pressure on the saddle.

Alternatively, if your saddle is already crazy high on the bass then add a sliver of paper on _half_ of the bottom of slot, which will take away a little bit of pressure from the trebles/direct it to the bass instead.


There is so much to talk about with saddles, bridges and the acoustic guitar's general ability to make a noise, and so much I don't know.  I've gone on here for long enough, I'm sure to go on about it again in the future!

Oh, and as a final note - no UST is good enough by itself to get exceptional sound. You must always mix it with an AST/SBT or built in condensor mic - the UST is too focussed on the fundamental frequencies, an AST/SBT/mic picks up all that other good sounds the guitar is making :)

JAW

Monday, 22 December 2008

What's happening December 2008

With some summer holidays up my sleeve I've grabbed some spare time to do some guitaring...first up I came across a kiwi named Oliver Batchelor who had some responses to my videos, while checking them out I saw "Mad World", and that he had tabbed it.  Man after my own heart!  It was Ulli's version, copied by Sungha, transcribed by Oliver and I though, ah, why not learn a song from a tab!

It's been straight forward, a little tricky to co-ordinate, it's funny how the stuff you work out for yourself is "easy" but the stuff you are playing from a tab is "hard".  Well it's not funny at all really, you arrange your own stuff in your own style, which is what comes naturally to you.

Anyway,  it's played capo at 8th fret, dropped D, which makes for something interesting for sure.  What it has done however is broken my spirit, or something - it has shown me that my guitar is badly intonated.  I've been running fairly high tension strings on it (still coming off steel string), next set will be normal tension.  That should help improve it, but if it doesn't, it will be time to take matters into my own hands.

Problem with intonation on a classical is there is no adjustment at all - playing intonation means filing up bridges and possibly nuts.  I did anticipate the needs for fiddling and grabbed a couple of bone bridge blanks when I bought the guitar.  I need to read up a bit more about it before I start hacking, but the physics of it is quite straight forward...

About a week ago a potential fingerstyle tune popped into the brain, usually these things happen to me in the shower.  Hot water heating the brain up?  Anyway, and old favourite of my missus, Alanis Morisette "Head Over Feet".  I remember the missus buying "Jagged Little Pill" and noticing that one was a glimmer of hope in an album of anger and pain, not to mention it was melodically quite nice.  Never got the headlines like the other songs on the album, until later.  Perhaps when the world had had enough of the anger and needed that hope ;)

Had a noodle last night and whaddaya know, perfectly suited to fingerstyle.  In about 2 hours I had a tab done.  Just gotta learn it now.

How did I get the tab done in 2 hours you say!?

First, I youtubed the song.  Found a nice acoustic version she did a few years back.  Listened to it a few times.  Searched internet for the chords.  Easy.  Couldn't quite pick the melody (have I mentioned my ability to pick a note is really poor?) so I downloaded a midi.  This is a good trick by the way - normally tabs won't ever have the melody.  Why bother, you sing the melody don't you?  But midi files usually have the melody.  Powertab can import midi files and display as tab (you have to choose the correct midi instrument that is playing the melody.  Not always one, not always easy).  Play the melody.  Pick out a bassline, work in some chord strums.  You are there :)

It's is quite hard to play, and I still need to add an outtro, possibly might try to get the harmonica solo in the middle in as well.

I'll probably do a video of it sometime early next year.  Mad world will be soon too, if I can get over the bad intonation that is...

JAW