Sunday, 15 September 2024

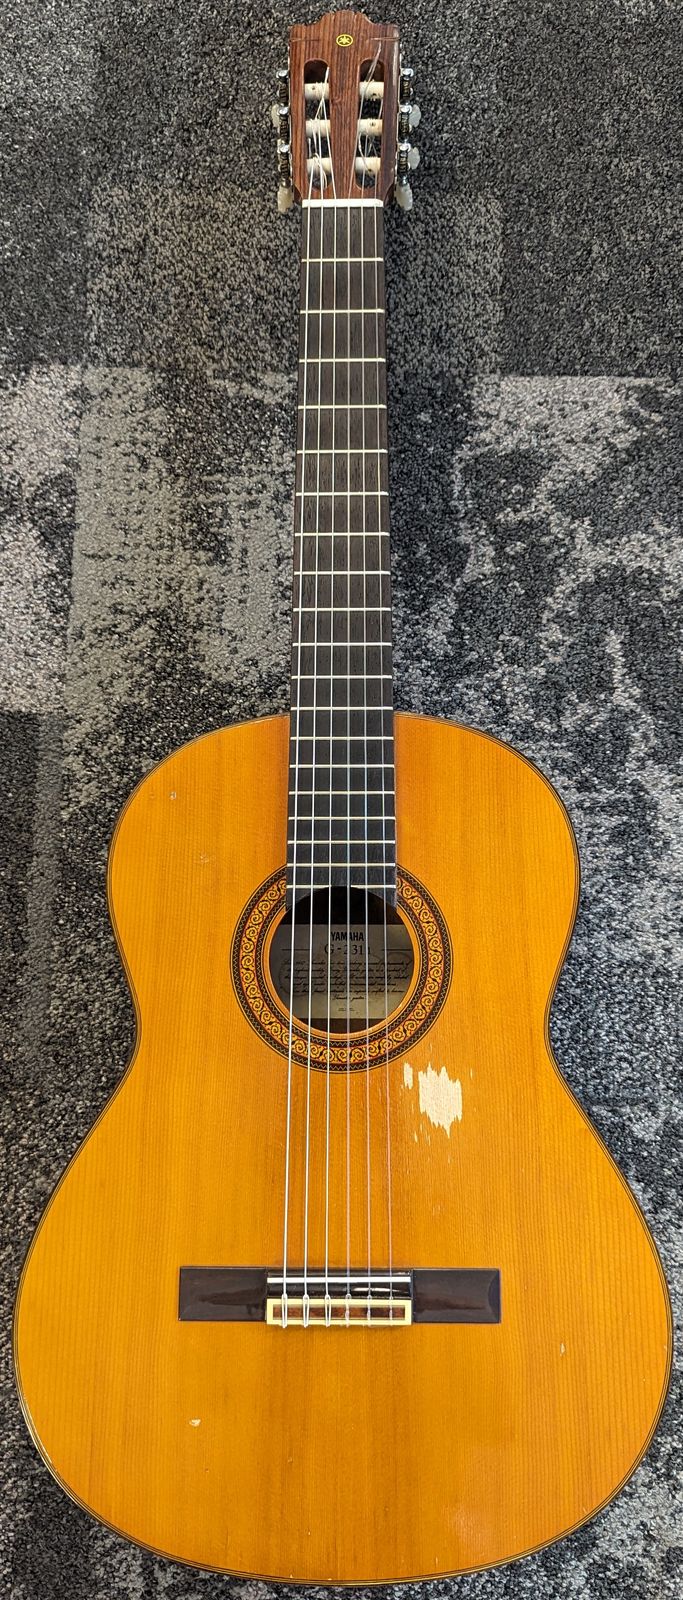
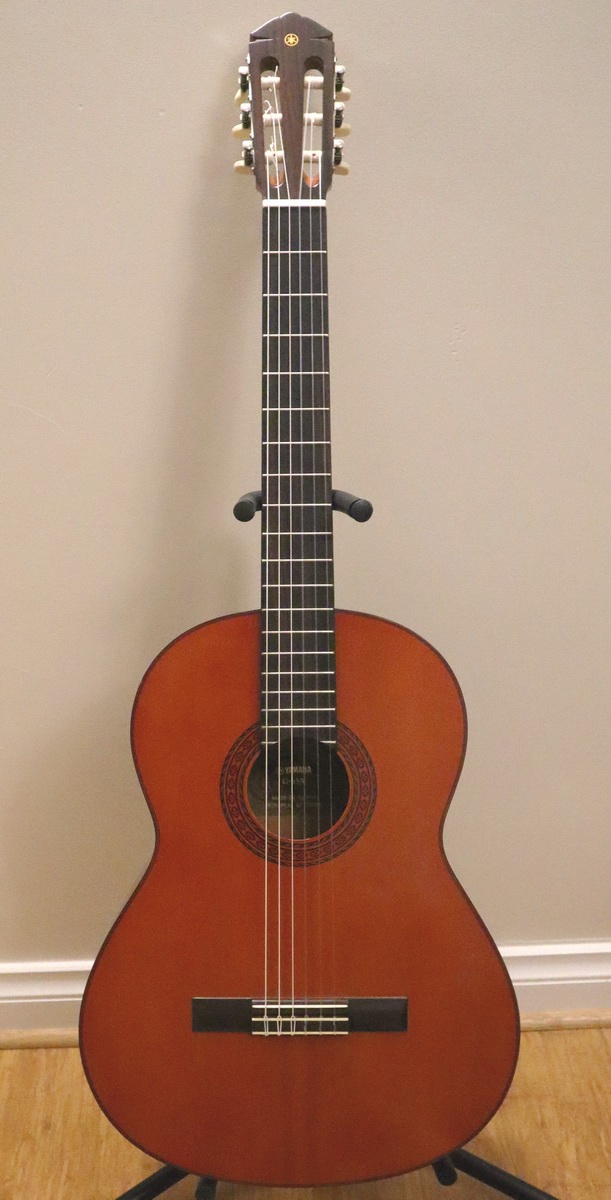
Yamaha G65-A

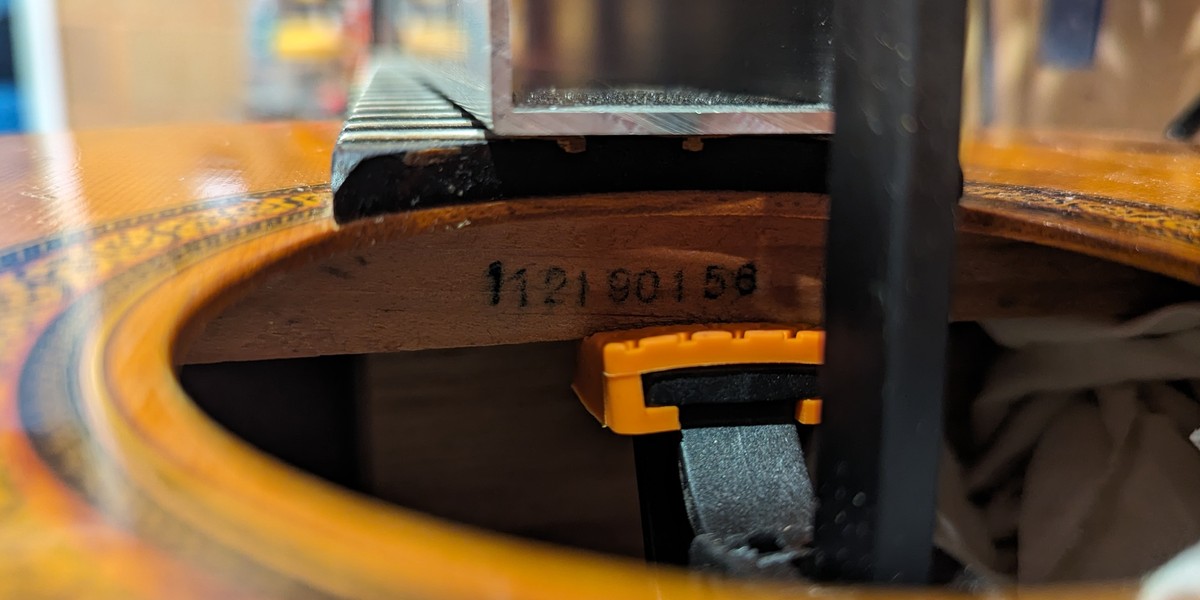
Another vintage Yamaha found its way to me, I was pleased that it was not a C40. Don't get me wrong, a Yamaha C40 is an adequate classical guitar, often not bad at all. But often not good. This G65-A (serial 31109517 - 0426423 so probably 1983) is in good condition, doesn't look like it has been played much. I whipped the few remaining strings off it and checked the fret level and neck angle, all was okay. Well, neck angles always seem out once a classical guitar is 20 years old, but we make do.

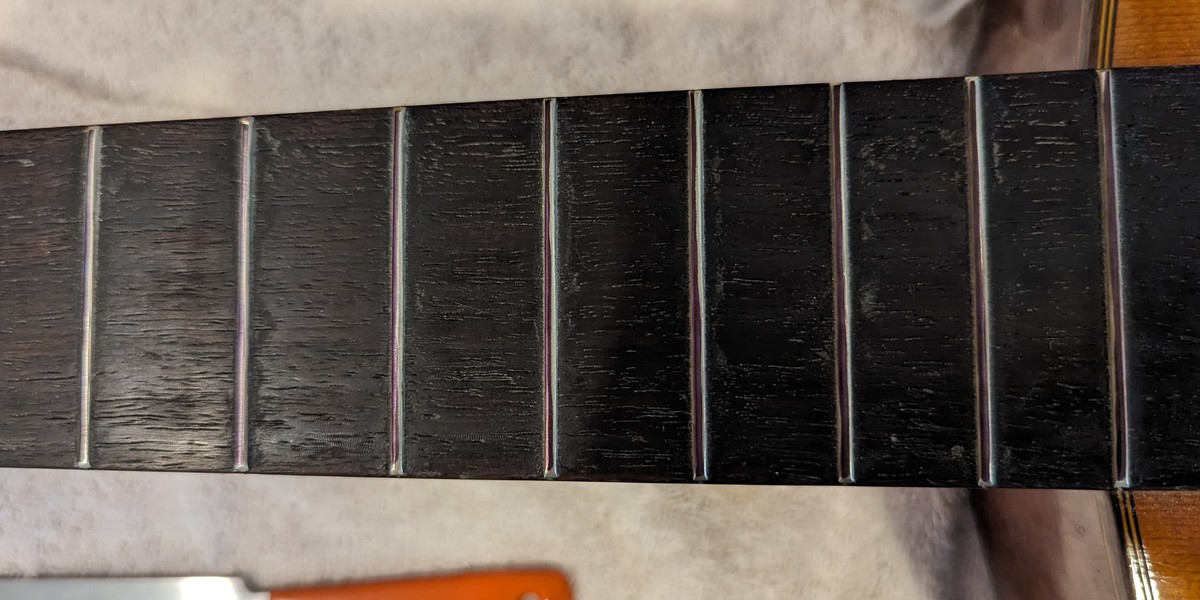
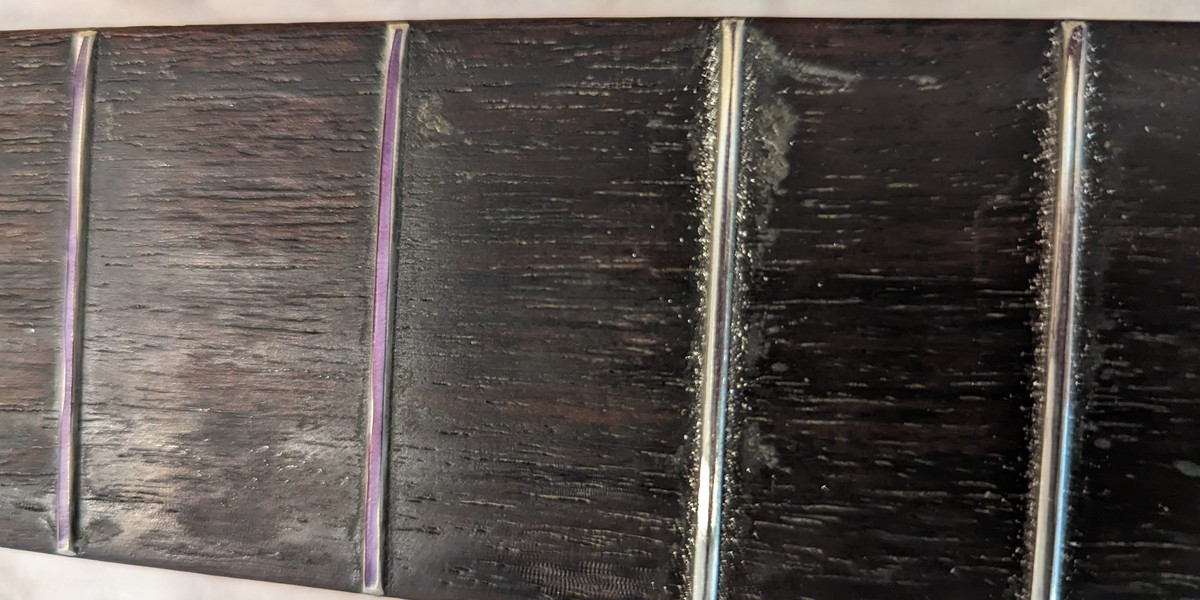
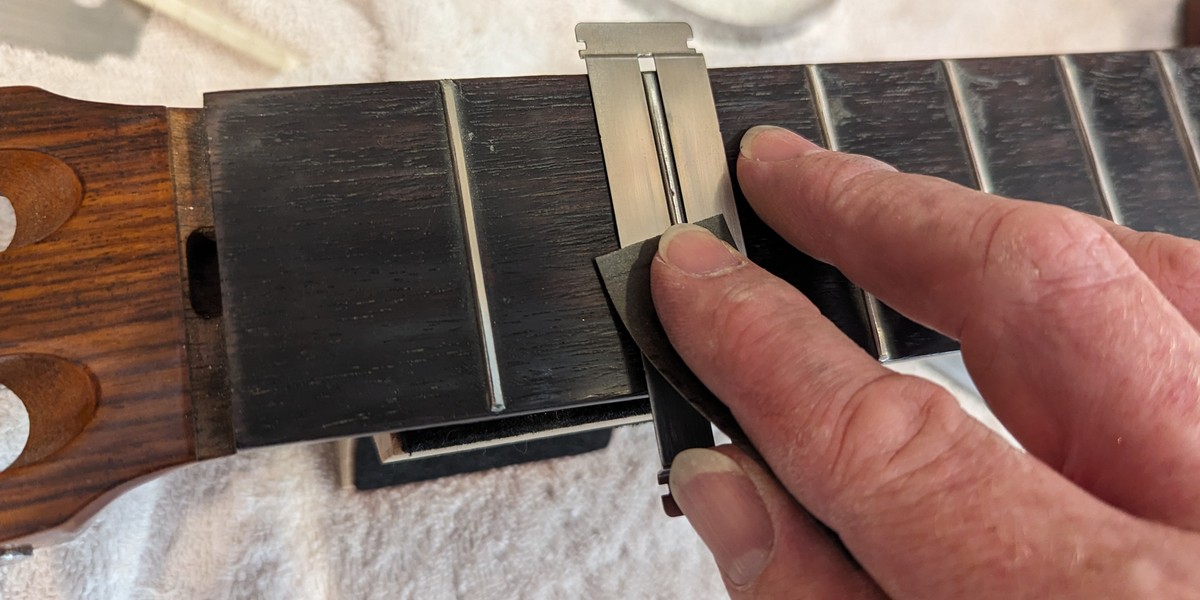
I ran a block with sandpaper across the frets and it did not take very long before it was touching everywhere.  I barely needed to put my fret file on it. Note: my latest fret file is nice, the one with the wooden handle, but the profile is too deep and was barely touching the frets. I am going to have to splurge on a decent fret file.

There were no sharp fret ends!  I think it is because the manufacturers tapped in frets already cut to size with pre-finished ends...and they are slightly too narrow!  It feel like that's not great because you lose a bit of fretboard at the edge. I want every bit of my fretboard to count. I reckon it is better to put the frets in and then sand them flush to the fretboard edge.

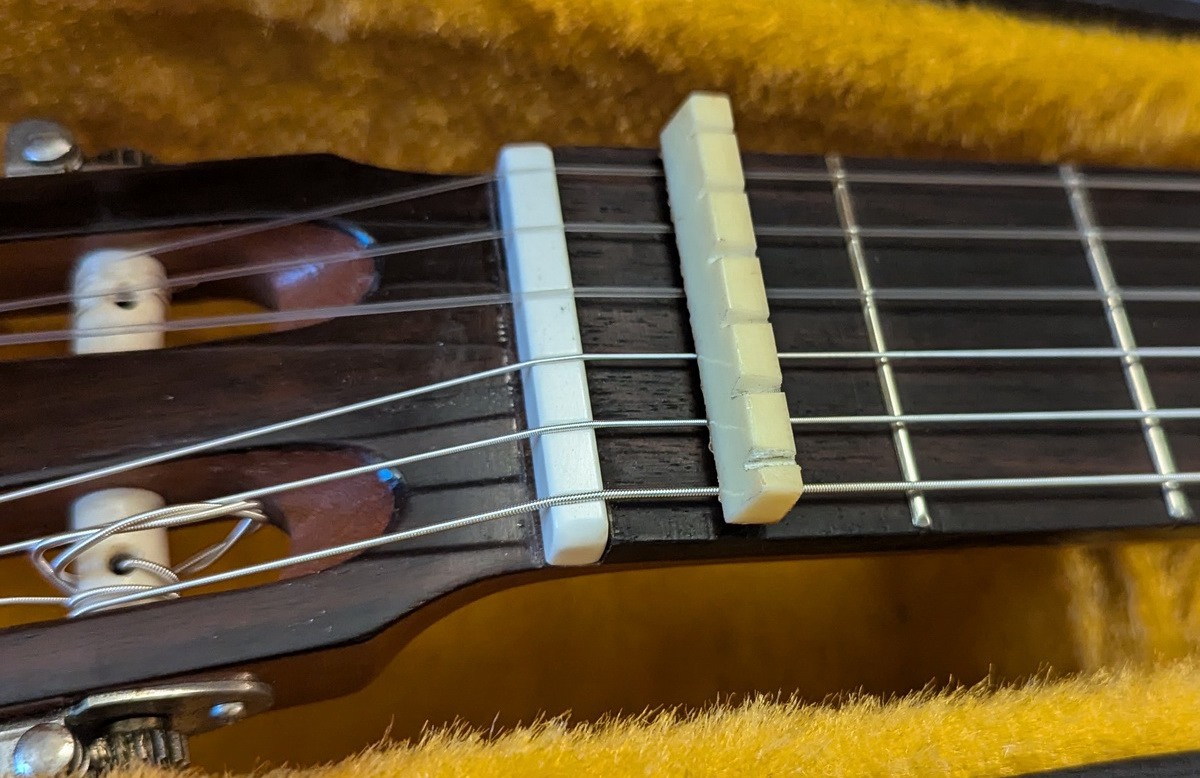
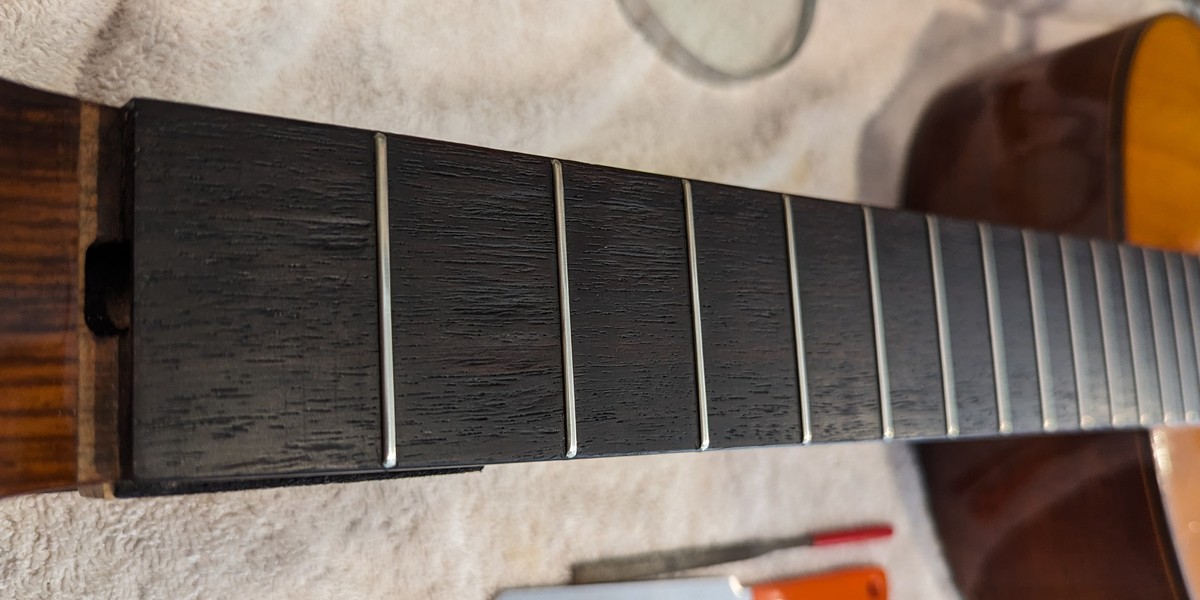
After polishing all the frets and giving the fretboard a heavy oiling, I decided to replace the nut. The existing one was pretty awful.  I had already bought a bag of standard classical bone nuts a while back, and they are a perfect fit.  Well, other than sanding the bottom down a few millimetres to get the nut height right.

The saddle was not the worst saddle I've ever seen, but, yikes, comes close! A cheap plastic one, and so thin! I've never seen a saddle so thin, I was tempted to open up the saddle slot a bit more to fit a bone saddle in, but, nah. A little too much effort for this calibre of guitar.

Restrung it up, it sounded okay.  Marginally better than your average C40. It has the usual G string resonance nastiness when you dig in, so many classical guitars have that.  I reckon that is your first test with a classical guitar. Pluck the G string hard, does it have a tedious resonance that grinds your ears - and does it sound a bit out of balance with the other strings? Otherwise this guitar has a good bass, the mids are bolder than I was expecting, and the trebles are adequate. It is not the worst vintage Yamaha I have played.

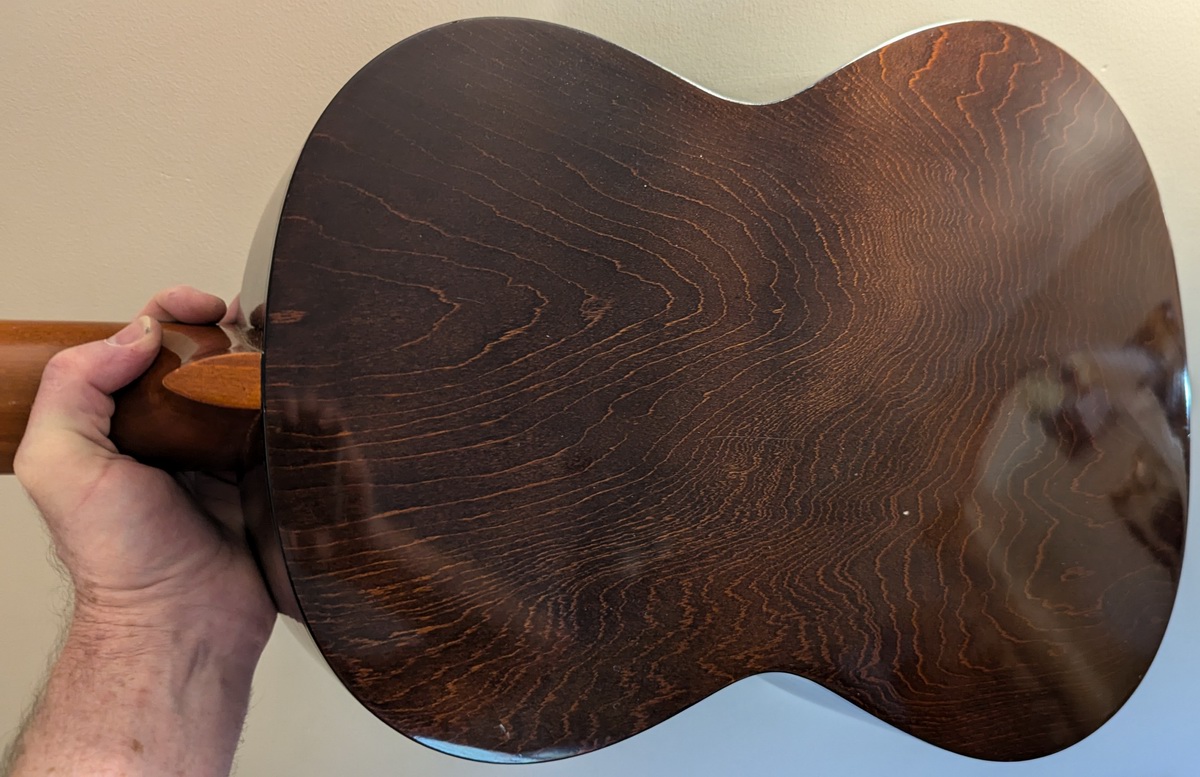
It is a cheap model, that's for sure, marginally up from my G-55A. For starters it does actually have a solid wood (rosewood?) fretboard, and a solid bookmatched soundboard (cedar?).  The rest of the body is all veneer, so quite cheap, and no attempts to bookmatch the back or sides. Although the back is interestingly pretty though, I mean veneer is still wood, just a really thin sheet of wood, I'm guessing this is an example of rotary peeled veneer. At least the veneer is not on a backing of MDF, it looks to be on some sort of (probably) laminated cheaper wood.

As found Fret tool not quite right sadly
New nut installed, compared with old Interesting veneer back

So overall it came up okay, sounds okay, and it is pretty, so ready to go back to its owner.

Here is my standard test song, raw from the microphone.

Yamaha G65-A:

Sunday, 25 August 2024

My Reaper Mixing Notes

This article is a work in progress and will be constantly updated, for me, as I learn new skills!

I use the Digital Audio Workstation (DAW) called "Reaper" for mixing and I quite often get a multi-track recording from a Behringer X32/Midas M32 deck (they are virtually the same thing). This post is a dumping ground for all the things I have learnt from the process so that I have a coherent centralised place to keep them for me - and maybe they will also be useful to you.

Remember some golden rules: use your ears, not your eyes; keep it simple; mix in context not in solo.

Important things to do to Reaper before you start:

  • Download and install SWS Extensions, it's, umm, to enable you to, ahh... just do it. sws-extension.org
  • Download and install ReaPack, for managing scripts. Reapack.com
  • Options->Preferences->Project Backups and tick the top level Auto-save. To prevent heartache later on when you forgot to press save when you should have, or presses save when you shouldn't have.
  • File->Project Settings:
    • Set you desired sample rate - 48kHz for an X32/M32 deck
    • If you are working to a click track, set the BPM here.
    • If you are not working to a click track, set "Timebase for items/envelopes/markers" to "Time" (won't automatically stretch items pasted from a different timebase)
  • In Reaper use the WASAPI driver instead of Windows direct sound, it is better. Options->Preferences->Device and select WASAPI. Go for Shared Mode so that other apps can use sound. Set the sample and bit rate to say 48kHz 24 bit. In Windows sound settings make sure you input and output devices the same setting. If you get the error "WASAPI shared mode device error: input device sample rate does not match output device samplerate!" then hard select the Input device and Output device to match your windows devices, you shouldn't need to fall back to exclusive mode.
  • You can save fx chains and reuse them, very handy.  They MUST be in the Reaper FXChains directory so be seen in the fx dialog, so any that you have (or save) will be (Windows) in C:\Users\<you>\AppData\Roaming\REAPER\FXChains
  • Windows users: In System->Sound your device->Properties MAKE SURE AUDIO ENHANCEMENTS ARE OFF! And Spatial sound. And anything that Windows uses to mess with the signal.

Raw files

Acquiring from X32/M32

While the X32/M32 has a USB port on the front it will only record a deck-mixed stereo signal. However if you have the SD card module added, you can record all 32 channels pre-mixer. Format any SD card to FAT32 and pop it in. While the manual talks about 32GB as the limit, I have been using 128GB cards no problem which can record a 5 hour session. Class 4 SD cards are fine for bandwidth.

It records everything into a WAV file, split into 4GB chunks, not useful yet. Here is my process:

  1. They are hexadecimally named which doesn't sort well, so I made this little script to rename them:Rename x32 hex to dec.cmd.
  2. Drag all these files directly into a Reaper track, "sequential time positions on a single track". You will now have a single track containing multiple items (the wav chunks), each containing the 32 channels.
  3. In Reaper, Extensions (previously installed from ReaPack) browse and install the package "Explode multichannel items to mono items in new tracks (without render)" by Rodilab. Run the script as an action. It will explode the WAV into separate tracks.
  4. In Reaper run my "prep" script which will get rid of the unused tracks, add colour, group, pan, based on rules. Download this script and edit it according to the rules you need. This will require some experimenting on your behalf! JAW X32 Track Rules Parser.lua

Consolidating

Now that you have multiple mono tracks with multiple items, all referencing rather large WAV files, it's a good time to consolodate into smaller MP3 files and throw away the unused tracks and quiet sections.

  1. Delete any tracks that weren't active, eg, there was no electric guitar playing that day, only 3 vocalists, etc)
  2. Set Reaper into "Ripple Editing All Tracks" - there is a button on the toolbar. Click to show a cursor, ctrl-A to select all tracks, S to split. Then use right mouse to drag click select, press delete and sections of the tracks will be removed. Turn off Ripple Editing
  3. File->Consolidate/Export Tracks, create a new directory, give it a name, set the resample mode to the highest quality MP3 or FLAC if disk space is not an issue, entire project all tracks, and tick all the boxes to update project with consolidated files and saving as a new project. This will create a much smaller set of files but still high quality files, with only one item per track. Much easier to deal with. Will take quite a while, all tracks will be rendered.
  4. Ctrl-A, Right click on any item, Item Processing, Normalise items. Normalise to Peak, "Normalise each item Separately". Depending on what the gains were like, this will get all tracks to the highest amplitude without any distortion. Again, to make it easier to deal with.
    NOTE: for dual mono channels that represent a stereo signal, do these "Normalise to loudest item" to ensure that they remain "paired" as part of the normalisation process. Otherwise you risk making one channel louder than the other.

Rough Mix

Faders(volume)

Set all faders to an appropriate level before applying any effects to get a rough mix. GIVE YOURSELF SOME HEADROOM! Don't try to max out the gain at this stage, leave yourself some room in the master track, don't worry, you can make it loud later.

You should only add effects to fix problems. With that said, if you already know a heap of problems that happen every time, and you have already solved them before, then add those effects in.

Pan

Not really an effect as such but definitely think about where you want each track to be situated from left to right. It's a good idea to get tracks off centre, even just by 10%, to create 3D space, unless you specifically want your track to be straight down the middle. With that said, to really create width pan tracks 100% left or right. Particularly good for multiple vocalists or a solo instrument that you can to hear "over there". Don't be frightened about going to extremes.

Phase

Maybe some of your mics have a different latency, and maybe the latency will cause phase cancellation or distortion. but if you want the tightest of the tight, then zoom right in on your master track and see how all the tracks are overlapping, specifically on punchy transients. Particularly useful on the drums, if you notice some tracks are offset to each other, you can move tracks in time slightly to line up the signals.

In Reaper 7.40 there is now an action to auto-align phase. Run the action "Item edit: Phase alignment" and let it do the work for you! Tip: For really long items, select a small section, tick "Use time selection" and the calculations will be much quicker. Always let it invert phase - it knows best. Cut a bit off the front of the tracks to allow the system to move tracks left, and hit apply.

Double Tracking

If you have recorded more than one track of the same song, to a click track, then add in a new track, synchronise them, hard pan one track left and one track right. This is fantastic for acoustic guitars. You might need to go through and re-align any errors that stand out - but use your ears, not your eyes. Perfectionism is a killer.

Routing Tips

When you create folders, containing children tracks, THE CHILDREN ALWAYS ROUTE TO THE PARENT. So if you wanted to route from one track to another, they can't be related. So for example say you had a complicated chopped up vocal track and you wanted a clean version with several vocal effects, but then another grungey version with abunch of unrelated effects, you would have three tracks all at the same level, you would then drag the routing icon from the first chopped up track to the clean track, then again to the grunge track. Then you can add you effects to those other two tracks.

Make sure you click on the routing for the sending track and untick Parent Send channels so that track isn't going to the master. Note that that track will act like a parent folder - if you solo it you will here all the tracks it is sending to coming back through it.

Vocal Isolation

Meta (Facebook) have been working on AI in the music scene for a while now, and to show how good they are they release their models for free! If you have a crowd mic and you want to incorporate it (it really adds ambience to a mix!) but it is full of reflections of the PA you can get quite an impressive vocal isolation, albeit not perfect. It will have artifacts which if glued nicely at a reasonable level in the mix won't be noticed. You can do this locally on your own PC, don't waste time with online isolators:

Initial Setup:

  • install python, make sure it is in your environment path. If you don't know how to do this, chat to the LLMs.
  • download the program "ffmpeg", unzip into a directory, add ffmeg/bin to environment path. If this doesn't make sense, chat to the LLMs.
  • in a command box execute:
    • pip install demucs
    • pip install soundfile
  • Do some research with your favourite Chatbot about GPUs.  Install the latest driver, look up how to use Torch with your GPU to really speed the process up.  Something like:
    • pip install torch torchvision torchaudio --index-url https://download.pytorch.org/whl/cu124

Ongoing Use:

  • turn your crowd mic into an mp3 - if you have a stage left and stage right then hard pan them and save as a stereo mp3.
  • in a command box run: demucs -n htdemucs_ft "your audio file.mp3" --two-stems=vocals --device=cuda
    Note: htdemucs_ft is slower but better.  For faster response just use hrdemucs
    Note: drop the --device=cuda if you don't have a GPU set up
    Note: you might need to set the GPU if you have more than one:
       python: device = torch.device("cuda:0" if torch.cuda.is_available() else "cpu")
       bash: set CUDA_VISIBLE_DEVICES=0

Effects

Delay

My favourite use of delay is a stereo delay - having different times in the left/right channels. This can make a mono signal sound like a wide stereo signal and is great to re-situate a track into a different 3D space to the rest of the tracks. Use "ReaDelay", set length to say time=80ms (musical=0), pan full left, then add a new tap, set to time=120ms pan full right. Adjust the wet for a good feel. Adjust the times to get the spacing you like the sound of.

Compression

Tame a signal where the dynamics are bigger than you want them to be, squeezes the levels together. Use on almost anything. Set the ratio higher to have less effect, but 4:1 is a good starting point. Move the threshold up - if you aren't exceeding the threshold anywhere, you aren't going into compression, there is no point having it. Set the attack fast if you need to the compressor to respond quickly, set the release slow if you want the compressor to not come off so quickly, sounds more natural. ReaComp is a good go to, don't forget to tick "Auto make-up" to keep the volume consistent. Choosing one of the stock presets for your application is a great starting point.

The JS 1175 is an emulated Urei 1176 fast compressor worth looking at, ReaXComp get even more fancy by having multiple frequency bands of compression.

Limiter

When compression isn't enough...use a limiter to prevent clipping on aggressive transients while bringing up all the subtleties underneath. Great on drums and in mastering to Make It Loud.

Set attack and release times so it doesn't sound unnatural.

For a The Ultimate Limiter use "Event Horizon Limiter/Clipper" which has zero delay response, this will clean up anything that escapes out of the normal limiter.

EQ

Boost and reduce frequency ranges, surely everyone knows what EQ does. A good way to work out what frequencies you want more or less of is to make a fairly narrow band boost, drag it extremely high, then sweep across the frequency ranges listening for what you like and don't like, and set it accordingly. Some good rules of thumb:

  • 20-70 : Rumble/Subbass : for dums and bass need this.
  • 70-300 : Boomy/Warmth/Muddiness/Fullness : Sometimes there are resonances here, notch them out.
  • 300-1.2k : Boxy/Nasal : often worth reducing on some tracks to create space for other tracks.
  • 1.2k-5k : Honky/Harsh : can add clarity. Look to remove vocal esses (sibilance) in here.
  • 5k-11k : Sparkle/Presence
  • 11k+ : Air

Use ReaEQ for creating normal boost/cut EQ. Use ReaFIR set to Dynamic EQ mode which can be great to tame harshness in vocals or solo instruments: Set mode to Compressor, set the Compression Ratio fairly low, say 1.5:1 and then set up a band profile where the compressor is starting to do stuff on the peaks across the frequency spectrum. This will smooth out peaks in frequencies depending on how hard you set the compression ratio.

Reverberation

Ubiquitous and overused but quite essential. Because we aren't always recording in a warm room or a cathedral, but those sounds are nice, so apply artificial versions of them. Don't overdo it! Argh! Reverb does not make up for a bad recording! A little bit of reverb underneath a vocal or a solo instrument can be quite nice, a good one as recommended by Kenny Gioia is ReaVerb: set to file, use the "Fat Plate" impulse file from the Lexicon 480L last seen at http://www.housecallfm.com/download.php?f=BGLex480.zip somewhere around -30dB.

Another great free reverb is Magic7.

A simpler Reaper built in reverb that can be quite effective is ReaVerbate: set the room size to massive - even say 95, and use very sparingly to make a vocal ring. Use side chained or automate the wet mix or manually add it in a separate track.

Gate

If something sits on background noise most of the time and then bursts into life, then gate it - ie, it will be silent unless the gate is exceeded. It will sound unnatural solo'd, but in a mix it will be fine. Drums are good to gate, sometimes even the vocals. Use ReaGate and set the attack/hold/release to something that suites your track, and most importantly set the threshold.

Tuning

It's okay to tune up a few vocals here or there, especially when there are multiple singers doing harmonies, but you can't fix a bad recording. Add in ReaTune in Auto mode, if you choose the key for the song it will make sure no notes leave the key - or just set it for chromatic so any normal note is allowed - so any off notes will snap to the closest note. 

If you need to fix just a few bad vocal notes is to do it manually: on the Correction tab change the attack time to around 100ms, then on the Manual Correction tab tick "Manual Correction" and then draw blue lines to fix missed pitches. Put your blue line slightly after the point at which the pitch is hit, to make it sound smoother, and finish the line a bit early. Put ReaTune first in your effects chains. Note - if you have to manually tune notes, it's probably already a lost cause...

Sometimes when there is sibilance ('S'es/etc) the tuner will go warbly and yuck, you will notice it. A straightforward way to deal with it is to simply turn off the tuner during those sections. Go to ReaTune, click Param and select "Show Track Envelope" (use "Wet").  Now you have an envelope under the track, simply block out the sections where you are hearing tuning nonsense. Using "Wet" to turn it off is a better idea than "Bypass" as you can often get pops and clicks and the VST energises - when you are using wet it continues to run in the background, you just don't use it for a bit.

Saturation

This is a quirky little effect, basically distorts the signal based on the way old analogue equipment like tape machines or tube amplifiers would distort when driven hard. Adds harmonics which are "richer, warmer" ie pleasing. I found the free plugin "GSat+" does a good job, load it up and at the top menu press the right arrow to say "Medium" or "Warm", wind the input up until it is going onto saturation for at least part of the range.

Another good saturator is Korneff "Chocolate Milk" which is a tape based saturator rather than the GSatplus tube based saturator. Because saturators are simulations of the real word effect of overdriving analogue signals through something like a vacuum tube or magnetic tape.

Quantisation

With your drum MIDI that you have captured and had played to a click track, and you want to fix up mis-timed hits, first start with quantisation:

  • Double click your MIDI to get the MIDI editor window
  • In the bottom left, first choose your grid - if the fastest notes you played for example were 1/16 then set it to that. Change to straight/swing, or triplets if you were playing them.
  • Press Q to bring up the quantise window.
  • A simple quantise would be: Use Grid, Uncheck Bypass, All notes, Position, Strength around 80% so it still sounds like a human played it and Fix overlaps, Hit commit and OK.
  • You might like to get your snare snappy and accurate - select all the snare notes and hit quantize again, set them to 100%
  • Now listen, and anything that was too out of time will be pretty obvious, click and drag into the right position.

Tip: when playing with midi, make a text file where each line is <midi note> <description> and import in with File - Note/CC names - Load note from file. Set the view to be note names rather than piano.

Dealing with Takes

If you are layering/overdubbing, Reaper will automatically make takes into a second lane in that track. You can be a total pro about it and comp it and finalise a take, or you can explode it into individual tracks and do it olde school. This is probably essential if you "accidentally" recorded more than just one thing into a single track. Right mouse drag to select all items in track, right click on one of them, Take - Explode all takes into tracks. For bonus points you can re-select all split items and right click - Heal items in split, as doing takes will naturally split at the point your take started and ended.

Instruments

Drums

The setup I spend a lot of time with has 7 mics. I will always make a track that is a folder (bus) for all the drum tracks and I add a limiter to that to "clean up" those times when the drummer has hit 3 drums full tilt at the same time.

  • Gate all drums except the overheads. Set the gate so that only the "fundamental" drum sound comes through, so usually the fastest attack possible and only a hold/release for as long as required, hopefully not before the next hit.
  • Put on a limiter rather than a compressor. Drums have a massive impulse on the initial hit which doesn't suit any compressor I've played with. Whereas the limiter, with a brickwall ceiling, can bring up the tail without losing too much initial impulse. Push the threshold until the limiter is only just coming in.
  • Add some saturation where you need a drum to really punch
  • EQ to the drum in question. Use an online cheatsheet. Note that the full mix will contain everything - let the overheads glue it together. Set each individual mic have an EQ that captures the essence of that drum:
    • Kick drum - low frequencies important here, but some highs to get drum character.
    • Tom drum2 - keep low frequencies and some mid.
    • Snare drum - keep mid frequencies and some highs.
    • Overheads - remove the low frequencies and most of the mids, keep only highs. The overhead mics glue the drum kit together through the middle - the low end is dealt with in their own tracks.
  • On the snare drum add the free VST "snare buzz". It is fantastic to bring out that snare sound.

Electric Piano

Since it is electric it's already perfect, leave it alone. The only thing you might want to do is compress it if you want to squish the dynamics, or adjust the EQ to create some space for another instrument.

Acoustic Guitar

Generally this is already coming in from a pedal, so like the piano you might not need to touch it. However I rarely find an acoustic guitar that has a frequency response I like, so I usually add EQ to remove boominess and boxiness. It's also a good idea to remove everything from around 80Hz and below, acoustic guitars can't hit those frequencies.

Vocals

Ah, the most challenging instrument of all. Compress - if there are really peaky parts, use two compressors, one to scrub the peaks, the other to smooth it out without crushing it.

I love a saturator on a vocal. Korneff Chocolate Milk (tape saturator) is great, GSatPlus (tube saturator) is free and also quite good.

Add in a further compressor to do sibilance de-essing. In ReaComp, in the detector, adjust the Lowpass and and Highpass so the detector is only working on a frequency range where the esses are, say around 7k-11k for a female. The attack should be fast and the release fast-ish, say 1ms and 30ms.

EQ - varies from person to person, but 120Hz for fullness, 240 for boxiness, 5k for presence, 8k for sibilance, 10k for air. Sweep the mid to find frequencies you like/dislike

Sax

I found that the sax is dynamically unbalanced even between notes. I compress it a lot. Either go for a little bit of reverb, or add some back slap delay if you don't want to muddy it with reverb. EQ this for sure.

Fine tuning and Mastering

Envelopes

Right click on a track header, click Envelopes and then choose say Volume or Pan. Now you can drag the fader/pan around as the song progresses. I normally do the 4 click trapezoid to bring a section up or down. You are almost re-producing the song with this - you can say drop a solo instrument right down so it isn't competing with the vocals, and then crank it up during insturmental sections.

Edit

Don't be afraid to split tracks up! You can realign missed tempo notes, or copy sections from another take or verse to punch out bad sections. Overlap all cuts so they seamlessly transition. Normally you can drag around the cross-fades, but if the fade isn't showing, right click the track, select Item Properties, and then type in new values for the fade in and fade out.

Mastering

The JS 1175 Compressor is nice to glue it all together if it feels a bit unstuck. Use the ReaXcomp multiband compressor to make it pop. Some very minor EQ to tweak up anything that presents itself in the final mix (because you were too keen EQ'ing individual insturment). Top it all off with the JS Event Horizon Limiter/Clipper, set the ceiling to 0, and wind down the threshold a little bit to make it louder but don't go too far or it will start to distort.

Handy Functionality

SWS/S&M

Action - SWS/S&M Copy FX chain from selected track (bind to key I)
Action - SWS/S&M Paste FX chain to selected tracks (bind to key O)

MIDI double hits

I found my older cheaper Yamaha DTXplorer was giving double/triple hits, probably picking up hit bouncing (they are pretty firm rubber pads) but I probably have the sensitivity and threshold too low in the drum head unit.

But all is not lost! I created a script that will remove hits that are clearly too short. The rule is if it finds a hit that happens too quickly after the same note hit then it removes it and stretches the first hit to be the same length as the two hits together.

In the MIDI editor, select all the notes. Under Actions, change the section to Main, and run a lua script. point it to my script and run it. Yah!

Channels

Generally, each track will only have 2 channels shown in the mixer. Even for mono, because FX will often create stereo. If however you have ended up with say 32 (and the track is really wide) you can fix it by clicking on the Route icon, set channels 2.

Timeline

If you want to make an arbitrary point your new zero, right click on the ruler -> change start time/measure - > Set to zero. You can later undo this with a Reset Project Start Time.

VST Drums

Steven Slate VST drums (SSDSampler5) is popular and a great solution if you don't have access to a real drum kit. If you don't have a midi input and just want to draw on the grid:

  • Add a track and add the fx SSDSampler5
  • In Create double click on a kit to select it
  • Click somewhere in the track Insert->New Midi item
  • Double click on the midi item to bring up the MIDI editor
  • Set the toolbar to note names
  • File->Note names->load note names and point to an SSD drums note name file

If you do have a drum kit and use midi triggering through an interface, don't forget to set Reaper enabled on MIDI inputs.

Sound Interface

If you are using an interface to record directly into Reaper, and you want to be listening as you go, then minimum latency is critical. I can hear a latency of 10ms and it is too distracting - you can't pluck guitar strings and have more than 10ms delay and remain sane and calm. You have two choices - have a setup with low latency, or don't listen to the signal, just record.

To get low latency (I'm in Microsoft Windows land) you can try using WASAPI, you might be fine, it's pretty good. You will need to tweak with buffers (keep them small, ie using less time, but requires a faster computer). What you really need is equipment that supports ASIO. Note that ASIO4all is not actually ASIO, it is a fudge, like WASAPI it might be okay. You need to specifically buy equipment with its own ASIO driver, such as the stuff from Focusrite, Presonus, various Behringer gear. Unfortunately at the moment it is not cheap.

Note: if you experience noise while connecting your laptop to your interface over USB, you might have a ground loop issue. If you unplug your charger and the noise goes away, then definitely a ground loop issue. Try a different charger, run on battery only, or put a galvanic isolator on your USB between your laptop and your interface to eliminate the gound loop.

JAW's Quick Notes To Himself for M32 mixes

  • Copy WAV to local drive, name the folder yyyymmdd <leader> - song 1 - song 2 - song 3 - song 4
  • Run ..\Rename x32 hex to dec.cmd
  • Drag WAV to new Reaper session, sequence time positions on a single track
  • Run JAW's Explode & Track Rules Parse.lua
  • Delete inactive tracks and rename tracks according to the prep standard
  • Using Ripple Edit mode, cut out bits not required
  • Save as yyyymmdd-1.rpp
  • Consolidate tracks into FLAC: Set output directory correctly, project name as yyyymmdd-2, set consolidated filename as $project-$track
  • Isolate vocals: after doing the consolidate there will be 4 flac tracks for the congregation in the root directory.  To pack and isolate them run
    ..\ProcessCongregationIsolation.cmd
  • Run JAW's Pre Mix Prep.lua
  • Optional: Phase alignment on drums (pull all tracks right a tad to allow space). Use a short section that features plenty of snare (bleeds into other mics), MAKE SURE it is "Adjust each item separately" and Adjust "Position". Use snare as the master.
  • Drag isolated vocals in and add the fx chain.
  • Double track acoustic guitar/etc if required.
  • Rough fader re-adjustment: GIVE YOURSELF HEADROOM!
  • Solo and tweak individual drums if necessary - levels, amount of gating, limits.
  • Going forward - don't be afraid to split tracks and do coarse volume adjustments on those (pre-fx) items.
  • Add in Bass and tweak.
  • Add in Piano, Guitar and any solo instruments and tweak.
  • Solo the vocalists, add in fx if not already there and tweak.
  • Make the START of the song really hit.
  • Run through the VSX checks.

  • Note: these are some of the decent isolators:
    Demucs:
    demucs -n htdemucs_ft "cong.wav" --two-stems=vocals

    Melband Roformer is possibly slightly better but takes ages:
    audio-separator "cong.wav" --model_filename "melband_roformer_instvox_duality_v2.ckpt" --mdxc_segment_size 256 --mdxc_overlap 4 --use_autocast --output_format=WAV
Sunday, 28 July 2024

What's happening July 2024

I continued to progress "Don't Dream it's Over" and very nearly recorded a Jawmunji Talks video. I still might, it's worth a discussion.

However this month my local church had an open night, and the kids and I wrote two tunes for it. So a bit of time spent working on that. We had actually written the tunes some time ago, which came down to me putting together chord progressions and writing lyrics...yes, I do them both at the same time...as in, I don't write lyrics and then set it to music - I don't write music and then create lyrics - they are informing each other as I go. I have a vague idea of melody, but once I have a chord progression and words, I give it to my youngest daughter and she immediately comes up with a melody far better than I could do. It must be a singer thing. And she'll normally tweak the words to fit better with her word flow. Finally, once we have that together, we play it a few time for my son, give him the chord structure, and he will improvise something over it on the sax.

I decided to play the double bass for this one, plucked, bluegrass style. I love the sound of the double bass - particularly when bowed, but I'm bad at bowing it so plucked it needed to be. My youngest played keys and sung on the first song, sung and played electric guitar on the second song.

We needed to have done a bit more practise, but the gig went off without a hitch. All three of us had more anxiety than we were expecting, which was weird, we have all played to audiences many times. I think it was because we normally play covers, there must be something about originals that heightens the anxiety. An increase vulnerability perhaps.

Anyway, good fun. My youngest daughter is a born performer, having her front our little trio with a low slung telecaster belting out some lyrics is in her element. My son can wail out soulful expressions on the sax, we were using a new sax pedal which introduced some nice tones. I love the big fat sound I can get from the double bass, we had it mic'd up so it was kickin'. It is still hard to play, and I am still sporting two blisters on my right first two fingers. I did carefully knife them open, splashed with a methylated spirits to keep the bugs away. A long time ago I decided that pricking open blood/fluid blisters is much faster recovery than letting them do their own thing.

All done, back to working on my fingerstyle arrangements!

Saturday, 22 June 2024

What's happening June 2024

I finished my arrangement of "It feels like we only go Backwards", I have played it through many times, several people have heard it, vaguely recognised it but couldn't tell me what it was. I count that as a win! It is a good arrangement in that it has a few challenging parts. The bass has a prominent "one and ... three and", so funk style, and I'm not used to playing a bassline like that. It took me a while to get that under my fingers - although I didn't take it too far - in the places where the melody is complex I drop the "ands".

However it is good to push out of your comfort zone with your arrangements - it helps you develop skills that you can then use elsewhere. It's pretty easy for me to play everything in my default style, which is the drum equivalent of kick-hat-snare-hat, which translates to bass note-mid note-mid chord fragment flick-mid note...adding in any melody notes on top as required. If you can get all the variations of bass rhythms locked into your brain to naturally occur then you have a pathway to great sounding arrangements. I have said it before but I'll say it again - Travis picking a song sounds great...for the first song...but not for every song! (I recognise my  hypocrisy here - I play too many songs with a chord flick on beats 2 and 4...Kel Valleau did it for years and then suddenly stopped...maybe I take a leaf out of his book?)

I've also said before that I wish I had played more bass as a kid. With apologies to my classical brothers and sisters, but the bass rhythms you find in classical music don't have the groove of the bass rhythms in rock and pop. It's only been in the last decade or so that I have come to discover the wonders of bass groove and how it glues a song together.

It's all about musical growth.

Speaking of which I turned my attention to a song I have had on my back list for arrangement for a long time, "Don't Dream it's Over" by Crowded House, which is claimed by both Australia and New Zealand as their own. It too has musically challenging parts that don't fit with my default. There are prominent chords and melody accents on "1-ah", as in "1-ee-and-ah", being the 4th sixteenth note in a bar.  This really clashes with my desire to hit the snare on beat 2, one sixteenth beat later. I've found a compromise where I can hit the prominent chord and still feel the off beat 2 and 4 groove.

There's also some great melodic choices - after digging into it I found all sorts of interesting treasures - for instance the chorus "hey now hey now" the chorus are G-A, but the melody is E-B-F#-B, so you end up with unusual chord fingering of the quite haunting chords of G6-A6sus2.

It's all about musical growth.

(I highly recommend oolimo for analysing the chords you are thinking about.)

Saturday, 25 May 2024

What's happening May 2024

Earlier this month I recorded a Jawmunji Talks video. I enjoy doing them, I have a lot to talk about. Unfortunately I don't have a good setup for recording them, and I'm not great at them either. Interestingly about the same time I recorded it Rick Beato put out a video talking about his obsession with the perfect look for his talking videos. I could relate to evertything he was saying. My computer is under a staircase, it's pretty tight but I make it work. It doesn't however give me much room to create an ambience. It would be nice to have a big room with the background filled with all my musical stuff, with warm lighting, and a set of cameras and microphones set up permanently so I can just go in and record whenever I felt like talking about something. One day one of my kids might move out and I will repurpose their bedroom into a music studio...

I need to work on my talking videos, I need to articulate more, and possibly plan what I'm going to say if not script it. I like the idea of being able to just talk without scripting, but when I watched that video back I realised that I missed saying some things I wanted to say, and said some things that were unnecessary. This media we are on right now - text - so easy, I can just go back and edit anything! And I do! And sometimes, when I'm a consumer, I prefer text, but sometimes I prefer video, so it's nice to have both.

It was good to dust off OBS Studio, I hadn't used it in a while. It's such a great program for staging AV productions. I had plugged in two logitech C920s, a Zoom H1N as audio input, a knock-off Behringer USB interface, and two display captures. It handled them all live, the USB interface was slightly more laggy than the Zoom H1N, so I had to mute the Zoom when I was playing the guitar (I was using the electric). I be honest I should just play the nylon string guitar through the mic...in fact a dynamic mic for voice and a condensor for the guitar. Mmm, maybe dynamic for the guitar, but I do love a condensor for the guitar, it captures everything, if not a little too much everything. I should look into being able to capture all audio feeds and all video feeds at the same time to do post production on - so all video angles and all audio streams, but I doubt my little laptop could handle that.

Anyway, something to chip away at in the background.


Meanwhile, I've had an obsessive dive into a Tame Impala song I first mentioned I should cover back in 2013. "It Feels Like We Only Go Backwards" has been in my to-do list for a while, it's a nice psychedelic rock song, and Tame Impala is from my home town of Perth Western Australia, I need to have more Perth band songs in my setlist. It won Single of the Year for our local music awards in 2013, it has a nice high melody with a very groovy bassline.

I'm at a stage when the basslines in my arrangements are starting to get a bit more complex, which I am really enjoying. My thumb is starting to know where to go, both in rhythm and note selection, rather than just sitting on the root note for the whole bar.

It does make for playing it quite complicated though. But that is a good thing, it's how you progress!

The song is in F, but I'm just tired of needing a top string A over a bottom string F in arrangements, which it would have a few. So inititally I dropped it back to E, which ends up with the main chord progression of E-B-F#m. The latter two aren't trivial chords for arrangements.

I bashed out the melody and the bassline into Musescore with very little playing the guitar. I wanted "the actual" melody and bassline to be there at the start, after that I can grab the guitar and work out what I'm prepared to tackle and what I won't. There were some great sounds but some unusual fretting, and I've worked out that if I don't keep it simple then the songs won't stay with me, so I dumbed it down ever so slightly.

I came back to it the next day and considered instead of dropping from F to E, going from F to G. This created a much easier chord progression of G-D-C, but I needed to drop the melody down an octave to fit, otherwise it's a high B over a low G, which is slightly easier than a high A over a low F, but then I may as well stick to E.

The lower melody over the higher bass is also easier to put together on your left hand, but you've now compressed the song together in the middle frquency range. It gaves a warmer feel (it's how the Artic Monkeys play their cover of it) but to me it turns it into a lullaby. So I'm wrestling with "do I make it easier to play but more frequency compressed, or harder to play and a wider range? Not to mention that G-D-C is such an overused cowboy chord sound.

I know what Naudo would do :-)

Sunday, 28 April 2024

Yamaha G-231 II

This G-231 II Yamaha guitar is quite sentimental to me, my parents gave it to me when I was eleven - I was big enough to upgrade from my 3/4 guitar to a full size guitar. It was not the cheapest guitar for its time, maybe a model or two up from basic - it's got an ebony fretboard and the build quality is not bad - thanks dad.

It's the guitar that made me. The one that I honed my fingerstyle skills on. That by the time I was 15 I was thrashing with a plectrum (you can see the damage on soundboard) - luckily my mum bought me an electric guitar shortly thereafter. It sat around for 10 years mostly unused, occasionally brought out as a reference guitar when I needed to remind myself about nylon string classical guitars. It was lent out a few times - it was with my nephew for a few years while he was learning guitar. It lived at my old holiday house for 10 years, I would play it to the trees when I was there. It sat under my desk at work for years and I would play it in the lunch room for an hour on Fridays.

It actually sounds quite nice. But, it hasn't been great to play for a long time. Two main problems - the neck has slightly caved into the body under string tension, which happens to pretty much any classical guitar by the time it is ten. So it makes the action really high. There's no truss rod to tweak it back a little, but besides, it's the neck-to-body connection that goes out; the truss rod is about neck relief, so it's not reeeally the right approach.

The other issue is that higher up the neck the fret  heights are a bit out of alignment. Possibly an issue stemming from problem 1, it certainly doesn't help, but some fret positions up the neck are buzzy.

I have thought in the past about sawing through the neck from underneath (stopping at the fretboard) and then regluing - essentially creating a little triangle that pulls the neck angle back - to fix the high action. Seems savage, so I haven't done it.

But after my water soaking to get the double bass bridge back to square, I wondered if there was something I could do similar - clamp the guitar up forcing the neck backwards, splashing some water around tp ,ake things pliable...so I asked the internet...and discovered a bloke in Queensland had been doing "Steam Neck Resets". I watched his videos and read some stories of other people who had tried it with success and I was convinced.

I decided to start with the fret grind and recrown. Classical guitar necks are flat, you so only need a flat block of wood and some sandpaper to do the initial grind back. I started with 240 grit, and I drew a black line across each fret with a permanent marker, sand for a bit, see whether all the black lines have been touched, draw the line back, repeat - basically I'm aiming to have a dead flat initial surface. I was suprised to find some grooves worn into the first few frets in the usual places. Nylon rubbing through steel!? That was unexpected. There was some very minor imperfections up where the fretting seemed buzzy, I wasn't convinced.

I spent a little time filing off any sharp fret ends as well, where the neck had shrunk a bit over time leaving some sharps. The file I used was a bit rough, I need to add a fret end file to my list for next time.

I then, still drawing black lines on each fret, ran my fret crowning file across. It worked okay, it's a cheap fret crowning tool, so I wasn't really happy. I will buy a good one for next time. Once I had each fret where there was approximately a thin black line across the top - meaning the original fret grind was still intact, but the rounded crown shape was still there - I moved to the next.

The final step was to hand polish each of the new crowns. I popped on my fretboard protector and worked my way down the frets, with decreasing grades of sandpaper, 400 to 600 to 800 to 1200 to steel wool. But the time I hit the steel wool it was nice'n'shiny. I could see in a few places where I had missed some scratches in earlier sanding, but over all, a nice job.

I had nicked the fretboard in a couple of places with the crowning file and the fret end file, nothing terrible, just a little amateur. I think it makes sense that the first fret grind I ever did was on the guitar that made me the guitarist I am today :-)

After an oiling it looked great. But no time to restring and test it - straight to the steam neck reset, I was very keen to try it out!

1. Make a mark across the frets 2. Block & sand until all marks touched
3. Fret crowning 4. Just a thin line still remains once filed
5. Sand through grits to polish 6. Sit back, admire

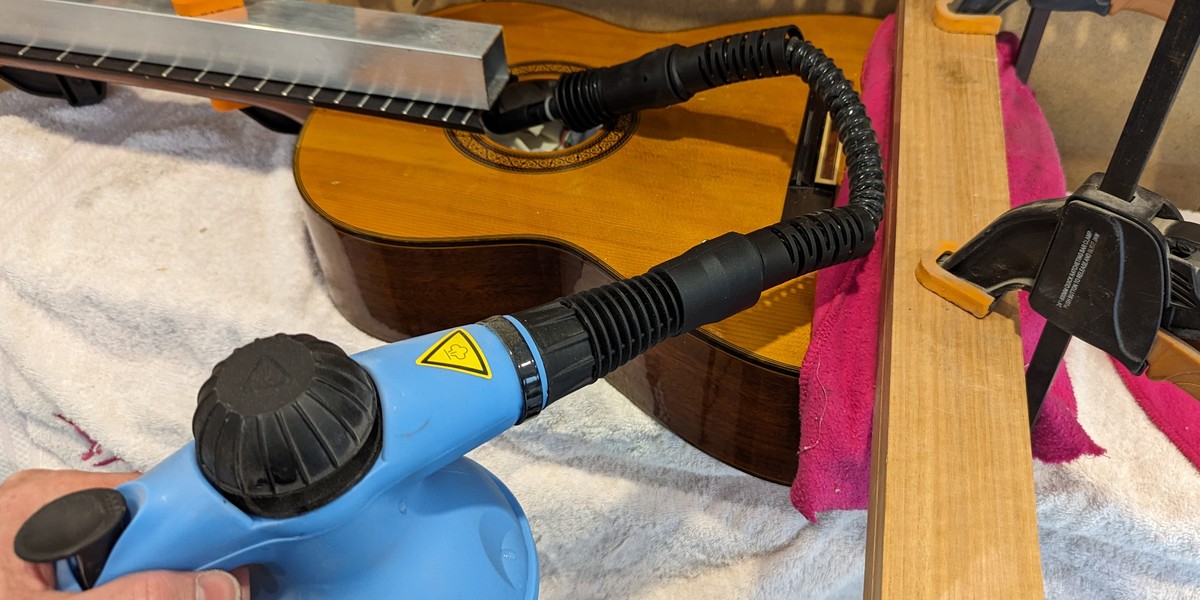
I bought a length of aluminium square tube and clamped it hard to the neck in a few places. I was using clamps that had rubber feet so they wouldn't mark the neck. The aluminium was sitting direct on the fretboard, but the frets are nickel-steel so they won't be marked by aluminium.

I then clamped the body to a length of board, with a few towels in between to keep surfaces safe. The goal is to have everything rigid so that when you apply the final clamp at the top it will pull the neck right back at the point when it joins the body. We aren't trying to bend the neck, we are trying to claw back the distortions where it all comes together. If you look carefully, kinda everything is involved - the soundboard, the heel, the sides, the internal ribbing.

I like concept though - put force in the direction you want to go, steam it so the wood and possibly glue becomes a bit pliable again, hold it there until it has dried out, and then when you release it and restring it, it will be back to where it once was. Maybe it won't last, maybe it will go back to where it once was? So what, do it again! - it can be a 5 year maintenance schedule.

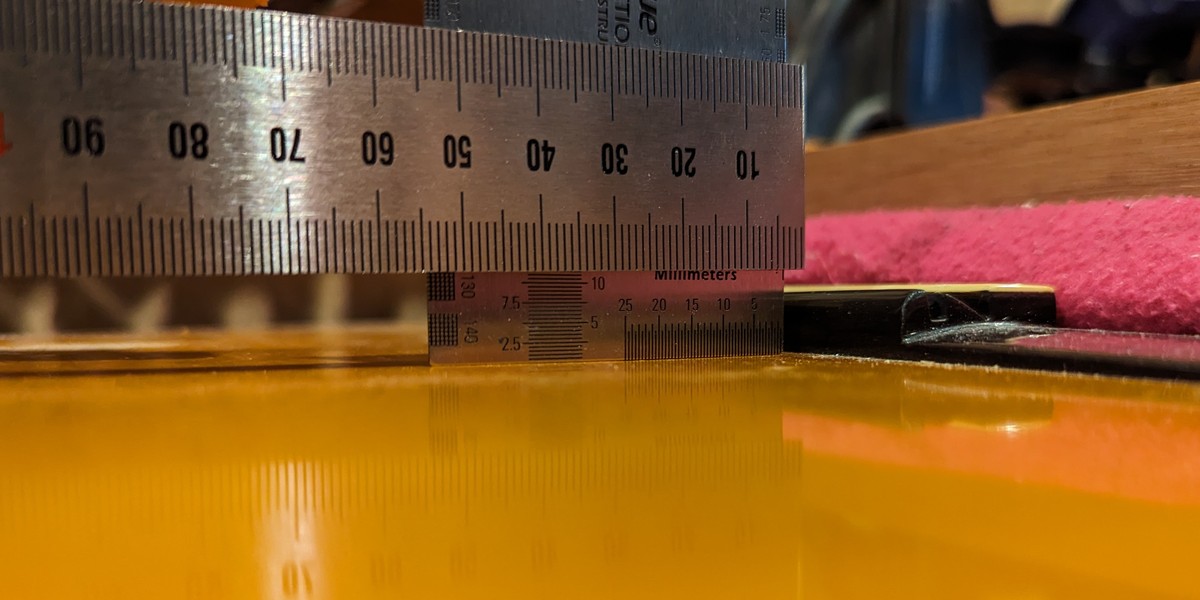
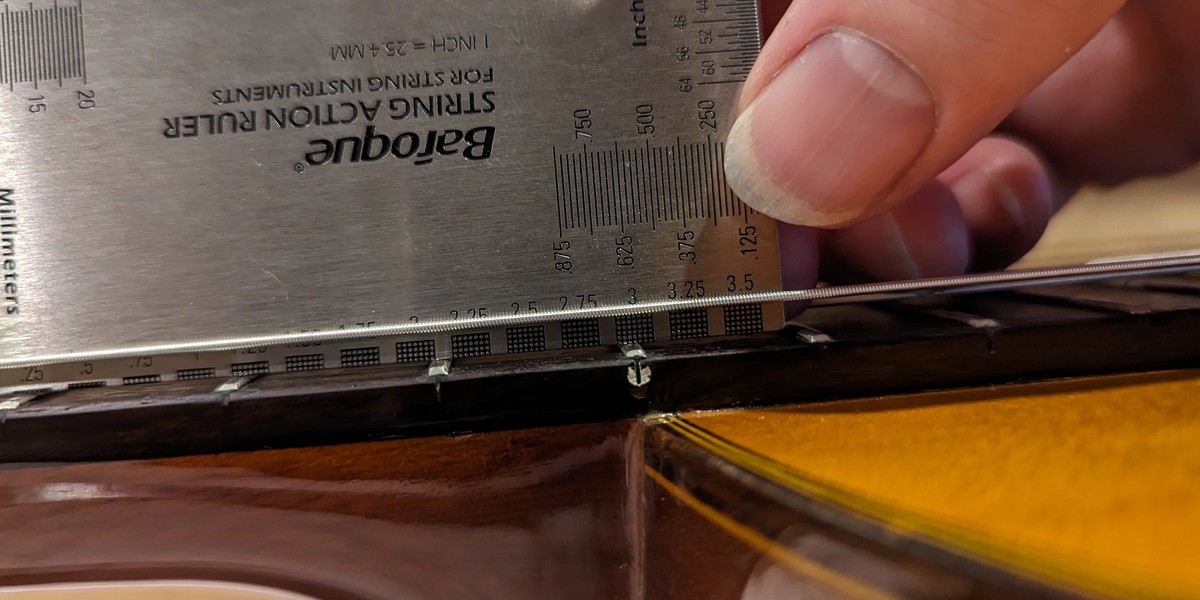
Result - I steamed it 3 times over the course of a week, and when I restrung it the action was about 0.25mm lower than before. So my verdict is yes it works, but you need to steam it more over a longer period of time, the consensus seems to be 3 weeks. And note that I really pulled a lot of force on - around 12mm deflection clamping force as measured at the saddle - and that only gave me 0.25mm resulting action decrease. So my lesson there is don't be frightened that you are going to accidentally go to zero action, you probably won't. Ahd then if you did, whip up a new higher saddle - they are easy enough to make.

Sometime I will have another crack at this, but I wanted to get this guitar back to work. After restringing there were improvements in playability, and the buzziness higher up the neck was reduced. Not gone, but more tolerable.

A worthwhile endeavour - for more info on this technique search for "John Miner Neck Steam Reset". Still not "great" to play , but better now.

Jig to hold everything in place Initial measure at bridge 8.0mm
Fill with rags and lots of steam This last clamp is particularly important
Cranked to 11.5mm - needed more Finished with 2.75mm action at 12th fret

In the meantime, I will keep my eye out for an unloved/broken vintage guitar that could do with my attention and I will go through these processes again, but without any pressure of needing to get it back to work.

Friday, 19 April 2024

What's happening April 2024

A while ago I decided I needed an electric guitar. I bought an interesting one that had a UST pickup in it. I remembered pretty quickly afterplaying it for a while that electric guitar necks are too narrow - generally a nut width of about 43mm. I next had a company in China build me a custom neck - 48mm wide - but I accidentally specified Stat style heel rather than the Tele style heel that guitar actually needed so it wouldn't fit on the guitar. Not dismayed, I picked up a cheap Stat copy from my local pawn shop and fitted the neck. It was okay, but I hadn't made a good nut for it, so the intonation was bad.

Nonetheless I started using it as my practice/arrangement guitar, mostly because it is quiet and yet the neck feels like a classical neck, and the string tension is not that far off a nylon string. I've been playing it more than my actual classical... a lot more.

I thought to myself "why don't I fix up the nut so it intonates better, and do some of my normal recordings with it?" Because to set up a recording with microphones with the classical requires a bit of effort and the house to be quiet. My house is rarely quiet.

Getting the nut better is becoming an easier process for me, I have made a few saddles and nuts now. I have a feel for what you need to do, and am getting a bit quicker at it. This one was easy, the strings all just needed to be closer to the fretboard.

I remembered why I stopped adjusting it last time - you have to be able to file a very narrow groove - the width of a string - into bone. I had tried the welder nozzle cleaner files and they are okay, but not with the really fine files, it's not really possible.

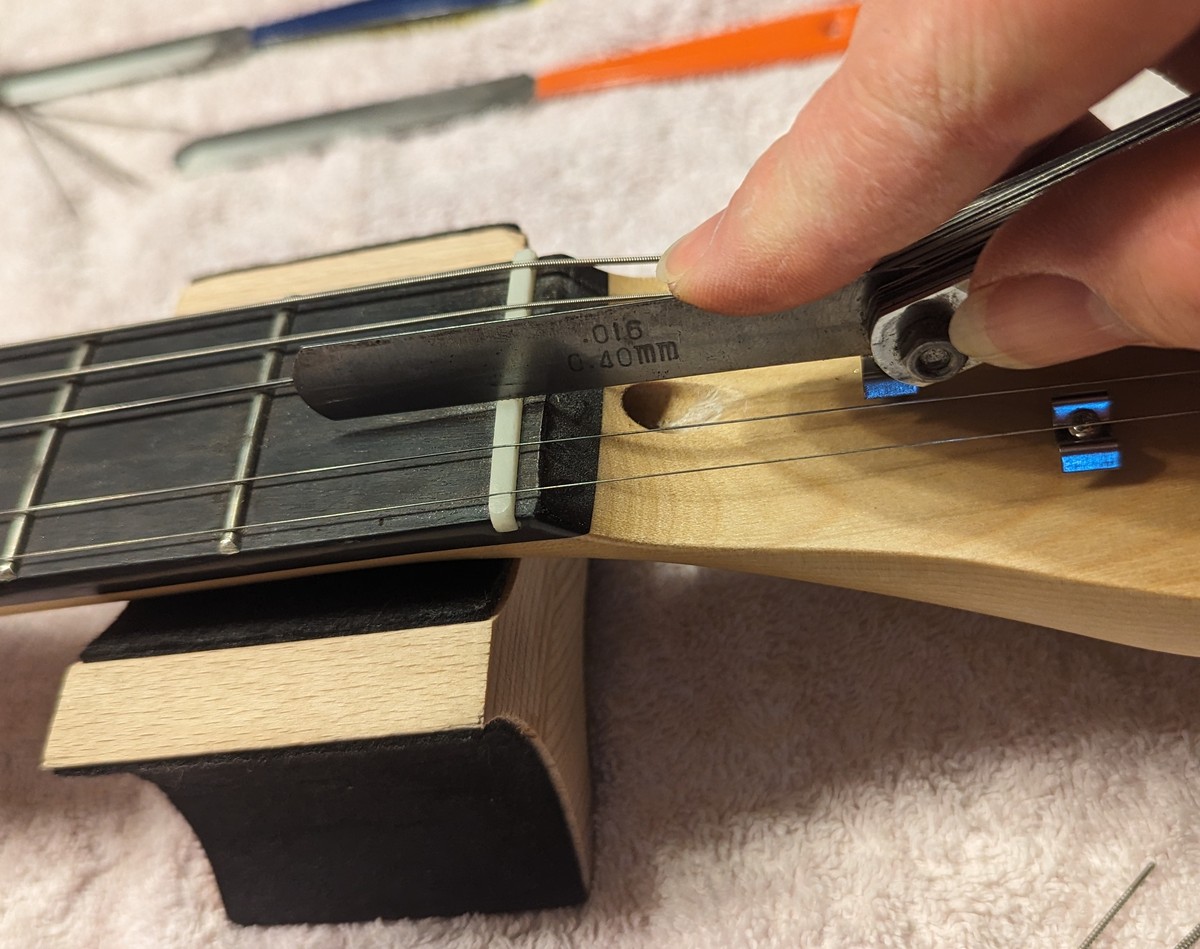
I remembered a trick I had seen on the internet - modify a set of feeler gauges. The idea being that feeler gauges come in all the exact widths you'd need, and they are kinda tall so they don't flop around like a 0.4mm round file. So I grabbed my feeler gauge, measured up each string with a caliper, got the corresponding feeler gauge out, and roughed up a section with a heavy duty file. I didn't need to make it super rough, or even a very long section. I did clean up the burs on the sides by running the edges flat over some sandpaper, and rounded it ever so slightly so it wouldn't cut a completely square slot.

The end result is great. You don't need to file much, it is only slightly abrasive which is fine for a thin bone slot and you aren't going deep anyway.

I quickly had the nut slots the perfect width per string deep enough that you only had to press the string down a tiny bit before it was touching the fret. How far? Well, I figure if you fret at the first fret, and then look at how close the string is to the second fret, you want about that same distance. Leave a bit extra - nuts wear down during tuning, so have a bit of meat there so it lasts longer than the first string change.

Once I re-tuned and then fretted at the first fret the intonation was not perfect but a lot better. I still fret like an acoustic player - mashing those strings down so of course I am going to go a bit sharp anyhow - I need to develop a lighter touch for electric guitars. But I was happy enough.

The next stumbling block recording on an electric, is how to play with headphones on through whatever effects pedal you want to hear, possibly listening to a click at the same time, all while recording just the guitar.

This should not be a stumbling block of course, people have been recording through interfaces for years. I had bought a nice little Behringer mixing desk with USB output for a cheaper price than an interface, and that has come in super handy as both a mixer and for recording. Because whatever you mix can be sent straight to a computer as a 44.1kHz 16 bit USB stereo signal.

The problem now is latency. If you are sending your mix to a giant amp that you are listening to, and recording in the background, then latency is not a problem, it can be seconds, who cares! But if you pluck a string and are listening in headphones from the computer then there should be no delay (no latency). I reckon I can hear latency starting at around 10-15ms.

Out of the box the average computer hardware running Microsoft Windows will not achieve 10-15ms. The standard Microsoft audio driver is "DirectSound", and it is not made for real-time audio. You will be quite sad if you try to use it for real-time audio.

However if you switch to ASIO as your audio driver, you should be able to get your 10-15ms. Unless you have a specific ASIO driver for your USB interface, download and install "ASIO4ALL". From Reaper/Audacity/etc go to your audio setup, choose ASIO, and click on the ASIO Configuration. Things to try: test out Hardware Buffer, I found setting this with anything around 12ms-20ms worked great. Try setting the block size to 64. Keep the sample frequency at 44.1kHz/16 bit.

If you hear latency, then decrease the values. If you hear noise - like the occasional pop and click, then increase the values. I was able to find a noise free setting that had a latency that I could tolerate.

With that all done, I found with ASIO I couldn't play a click track or anything else at the same time! That is because ASIO will only run exclusively, it won't share with other audio. I found if I went back to DirectSound and recorded a click track, and then back into ASIO mode I could play the click track and overdub, so it's okay.

Otherwise, try out WASAPI. This is the Microsoft equivalent to ASIO. It's pretty good, it will run in shared mode so it is almost the same as using the default DirectSound in that respect. It has similar settings to ASIO, play around with the buffer size, and set the thread priority to Time Critical.

I found I couldn't quite get as good latency out of WASAPI as I could from ASIO. This is all on an 8 year old Dell laptop running Windows 10, so hopefully you have more joy!

So once I was ready with a guitar that would play in tune, with a recorder that could record noise and delay free while I was listening, I hit the next road block.

Well, two road blocks.

I couldn't get the tone I wanted, and my fingerpicking doesn't translate well to coil pickups. Huh?

Tone - I am using my Zoom G Four multi-effects pedal, so I can dial in any patches I want. I found an acoustic simulator with a tiny bit of reverb, running through the neck pickup only at about 50% tone was barely okay - I could live with that - but it just isn't the sound of a classical guitar.

Fingerpicking with a consistent dynamic and tone is hard on electric! I only had to pick ever so slightly different between notes, almost imperceivable, and that different dynamic leaps out. Only have to flick the strings percussively a tiny bit different to the previous and it is the difference between a kick drum and a closed high hat!

I dialed in some compression and this squeezed those inconsistent dynamics together and made them less obvious... but you know what? It squeezed the dynamics together! I _want_ the actual dynamics that I want when I'm playing!

So my years of nylon string has meant I don't have the ultra-fine control of my dynamics I need for an electric guitar.

I haven't given up, but for now, I think I will stick to practice on the electric but recording on the nylon. (Oh, and all this practice on the electric is making me rusty on nylon...)